Hi friends, here we are again! Day 2 of The Greetery’s Love Letters release! If you thought yesterday’s products and projects were wonderful, just check out what we have for you today!
Today’s reveal includes the Written in Ribbons stamp set (so cool!), Sketchbook Roses (a versatile layering stamp set that works well as an outline only image too), a new Sentiment Suite (obviously Love-themed), a “Beautiful” word die set AND a gorgeous new BotaniCuts Rose die set! I didn’t think anything could be more beautiful than the BotaniCuts Pine Cone from the Winter Song Collection, until I saw the newest Rose set!

Lets start with the BotaniCuts Rose Die set! There are dies for two differently sized roses, a variety of leaves and a little bud. They are not complicated to assemble and look stunning when finished.

My first card uses the larger of the two rose dies set, with the complete set of leaves. I stamped the “just for you” sentiment with the Written in Ribbons stamp set and die cut it with the coordinating dies.

I used only one ink pad to stamp the Written in Ribbons sentiment, stamping once full strength for the 2nd layer and stamping off once and using the 2nd generation of ink impression for the 1st (complete) layer. The “with love” is one of the Love-theme Sentiment Suite choices and I used a coordinating die from the Sentiment Suite Basics Die set to cut it out.

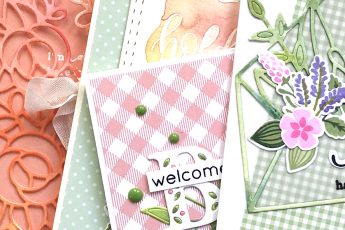
Everything is assembled and adhered to a green stamped background panel stamped with the Windowpane Plaid stamp you first saw yesterday.

The second card uses a card base that is stamped in red with yesterday’s Windowpane Plaid background stamp.

Each of the roses for these two cards are die cut from a panel of watercolor paper, painted in red ombre from top to bottom to give a shade variation that remains true from lightest to darkest. The leaves were painted and die cut in the same manner.

I added some interest/decoration to the card by tearing a corner section from two contrasting patterned papers in my stash and layering them underneath the rose die cut. The sentiment for this card is again, stamped from the Sentiment Suite and die cut from the coordinating die set.
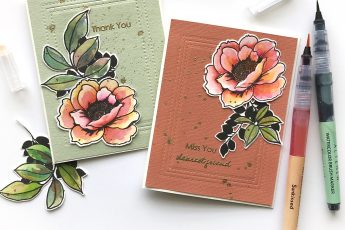
The next three cards are similar in one way – they are stamped with the outline stamp from the Sketchbook Roses stamp in the same position on each card, but from there the techniques all diverge.

The first card is stamped with water-resistant black ink and then watercolor painted in non-typical shades of blues, lavender and green. I added a background made up of a mix of those colors.

I painted in a blotchy, no-thought-for-realism way and I love how the colors play with each other when dry.

The sentiment for this card comes from one of yesterday’s stamp sets – Signed and Sealed With a Kiss. I added a couple of narrow, coordinating patterned paper strips for embellishment.

Card #2 is stamped with Versamark embossing ink and heat embossed with gold embossing powder. I painted this one in more traditional colors but used a blotchy, artsy style of painting for this one as well.

I die cut the word “beautiful” from a dull gold cardstock in my stash, with the main die in the Let’s Have a Word die set. I paired it with stamped sentiment words from the Sketchbook Roses stamp set, heat embossed with gold embossing powder.

I love the elegance that the gold glimmer provides! I also noticed in editing these photos that I missed painting in the center of that middle rose. It seems so obvious now, I can’t think how I missed it! (It has since been remedied).

Finally, my last card has no water coloring at all. The blooms and leaves are filled in with the layering stamps in the Sketchbook Roses stamp set (two layers for each section) and augmented with some colored pencil shading. I used PrismaColor Pencils for the coloring.

I also colored a mix of shades behind the stamped image and used Gamsole and a paper stub to blend the colors.

The “thanks” is stamped with a coordinating green ink, once again using only one ink pad and using the generation stamping technique to get two shades from one color. I used the coordinating dies to die cut the sentiment and adhered it atop the colored cardstock and patterned paper trim at the bottom.

Lastly, I added some speckles with a black water-based brush pen. I chose that method because you can never be certain how some cardstock will react to pigment-water droplets being spritzed. (Also, I like a little more control in my speckle pattern).
That’s it for me today! Don’t forget to visit each of the blogs listed below and leave a comment for a chance to win a $50 The Greetery gift card! Thanks for stopping by and enjoy the rest of the tour!
Complete list of participating blogs:
Norine Borys – You are here.