
Hi, hello! I’m so excited to be joining Pinkfresh Studio today for their August Release Blog Hop! I love their designs and products so much, that it’s an easy YES when invited to be a guest designer! You should have arrived here from Leane West’s blog but if you’ve happened here by chance, you should click back to the beginning at the Pinkfresh Studio blog so you don’t miss anything awesome!
I have 4 different cards to share with you today using the new products in this fantastic release! Lets jump right in!

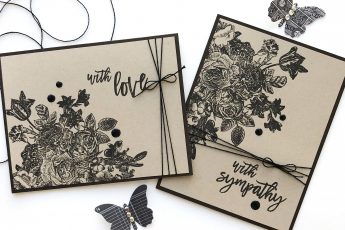
The first one is a lacy, sort of gate-fold card using the Modern Blooms stand alone die. It consists of two panels die cut from 110lb cardstock and wrapped around a regularly opening card.

I stamped a sentiment from the Delicate Wreath stamp set, onto coral colored cardstock with Versamark ink and heat embossed with white embossing powder before adhering it to a cream colored card base.

Then I die cut the two floral lace panels and blended pink, yellow and orange inks on them. I aligned them angle-wise on the front of the card panel and marked where they should fold, then I used a score board to gently score along the fold line.

Using some GinaK Connects glue I adhered the two card panels to the back of the card base then folded the “cover” part of the die cuts around to the front where I looped some cream colored crinkled silk ribbon binding tape through two holes in the die cuts and tied it in a bow.

I think this would make a beautiful wedding or anniversary card as well!

The next card uses the gorgeously hand-lettered sentiment stamp set called No One Compares to You.

I carefully stamped the sentiment onto some watercolor paper using a stamp positioner so I could re-ink if needed, and it often does when you stamp on paper as textured as watercolor paper. Then I heat embossed with white embossing powder.

I blotty-painted (not a word, but you know what I mean) over the embossed sentiment with watercolor paints and let it dry organically. Then I die cut the sentiment with a stitched square die.

I die cut and stamped a variety of leaves and flowers from the Lovely Blossoms stamp and die set and used them to embellish the corners of the sentiment panel which is popped up on some dotted patterned paper from the It’s A Boy 6″x6″ Carta Bella paper pad using foam tape for more dimension.

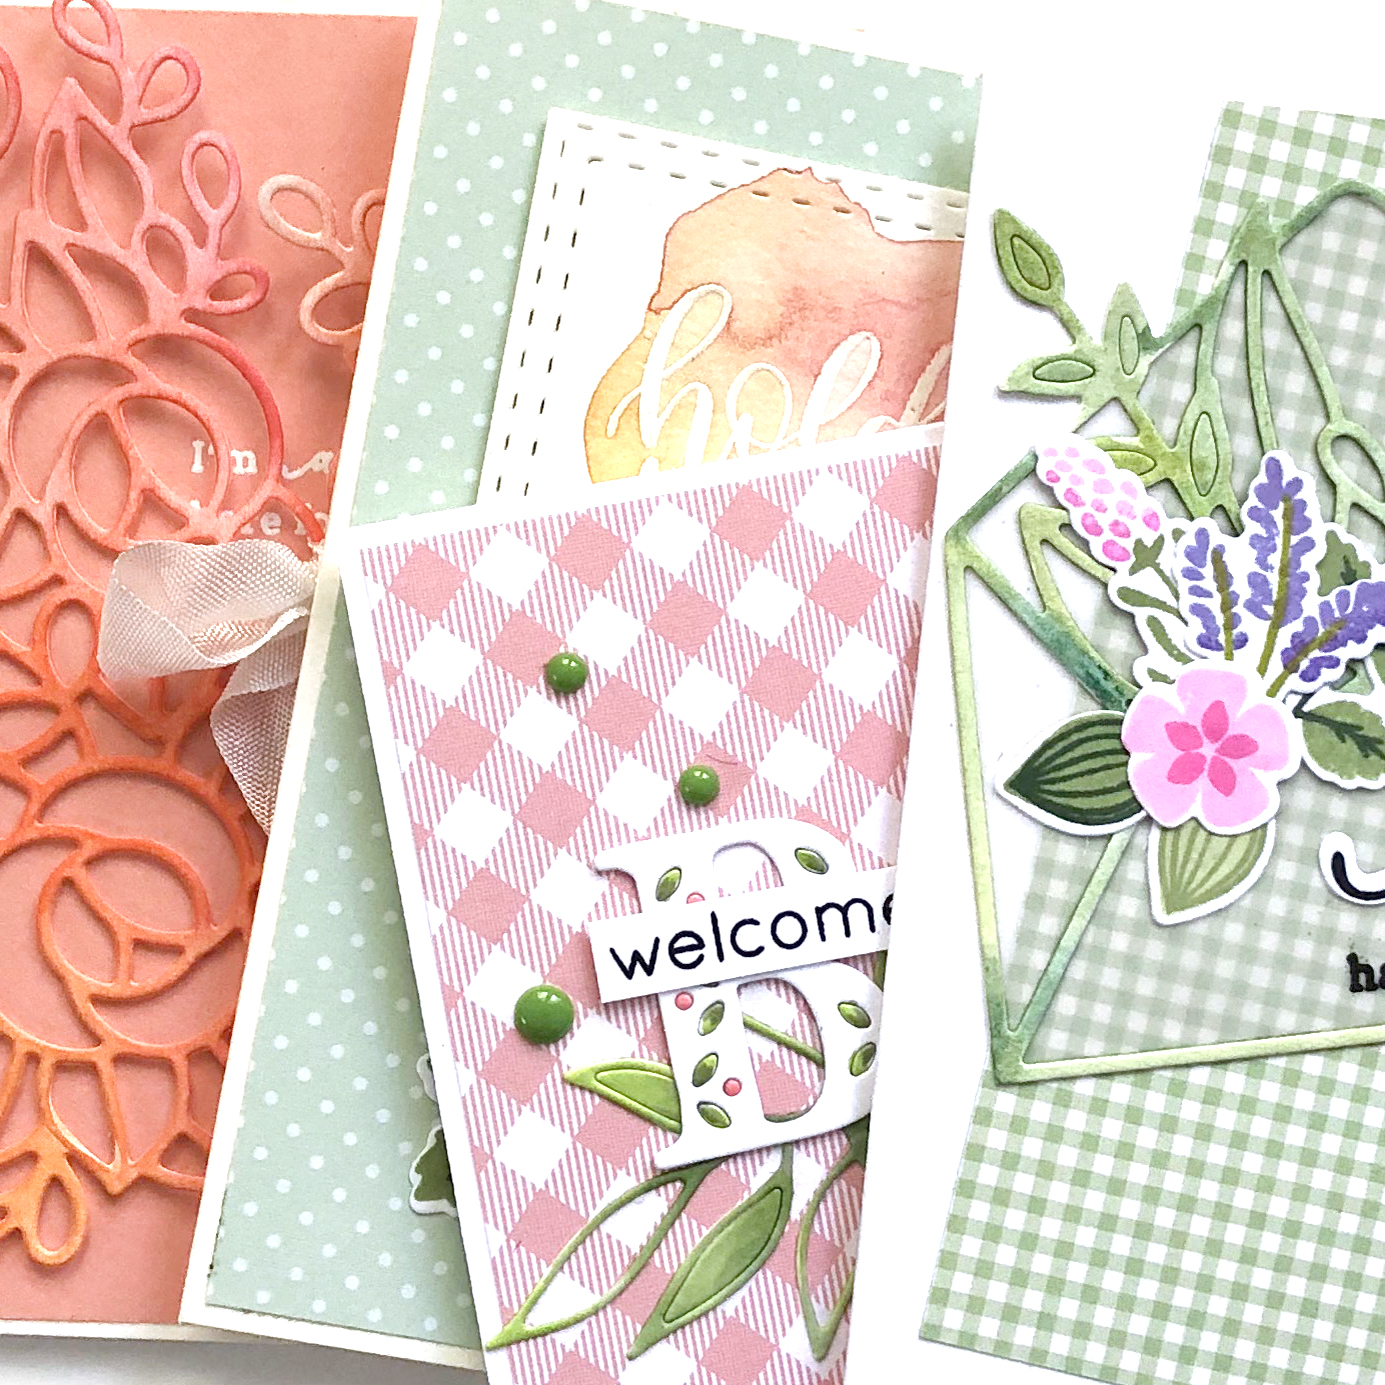
Card #3 is one that uses the Leafy Envelope Die and more of the flowers and leaves from the Lovely Blossoms stamp and die set.

I die cut the envelope from watercolor paper and painted it with three different shades of green from cool blue green to warm yellow green keeping some of the interior bits of the die cut from falling out.

I used more GinaK Connects glue to adhere the dried die cut to a piece of vellum paper and then cut out around the outside shape. I stamped the sentiment from the Floral Vase stamp and die set, stamping “sending” onto cardstock and die cutting it with the coordinating dies, and stamping the “happy thoughts” onto the vellum with Versamark ink and black heat embossing.

I covered the card base with a wonky-cut piece of patterned paper from the Carta Bella 6×6 paper pad called “It’s A Boy”, then adhered the vellum backed envelope die cut and additional blooms and leaves to the front of the card.

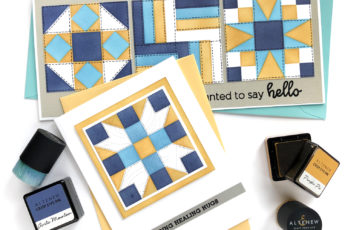
For my last card, I used the Kelly Alpha – Upper Case die set to cut the letters spelling “baby”, from 110lb cardstock.

I colored the bitty inserts with Copic markers, at first poking them out to color them so I would mess up the letter itself, then discovering that carefully applying just the tip of the marker to the bitty pieces still inside the alphabet letter worked just as well!

Next, I die cut a piece from card stock using the Leafy Branch die set. Leaving some pieces of the leaves intact, I colored the die cut with Copic markers.

I stamped a sentiment strip with the word “welcome” from a stamp set in my stash, and covered a card base with a piece of coordinating patterned paper from Lawn Fawn’s “Gotta Have Gingham” 6×6 paper pad. Finally, I adhered all the layers to the card base and added some matching enamel dots to complete the card.
Whew, that was a lot, huh? Thanks for sticking with me to the end!
Your next stop on the hop is Rebecca Luminarias’ blog. Should you encounter a broken link along the way you can find the complete blog hop list HERE.

As well, Pinkfresh Studio is offering prizes, prizes, PRIZES! Leave a comment on their blog and/or Instagram page for a chance to win the entire release!! Pinkfresh Studio will also be giving away a $25 gift certificate to one lucky commenter on each blog on the hop. Winners names will be drawn on Sept 2, and posted on the Pinkfresh Studio Giveaway Page and you must check and redeem within two weeks. Also, Pinkfresh now has free shipping within the USA for orders over $100. And finally, Pinkfresh Studio is giving away the free die cut pictured below, with any purchase, while supplies last.

Thank you for visiting today and enjoy the rest of the hop!