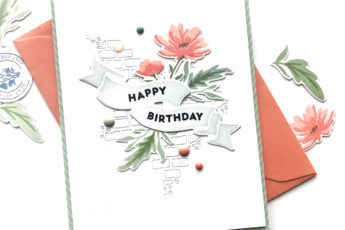
Hi, hello! I was a guest designer for Spellbinders last week and wanted to share with you here, what I made for those posts. I got to work with the Shapeabilities Exquisite Splendor Dies Collection by Marisa Job and today’s cards showcase the Flower Box Card Etched Dies Set in particular.

Something these cards demonstrates, is that inspiration is everywhere! In November I attended the Houston International Quilt Festival. I don’t know if someone told me this, or if I’m making it up, but I believe it’s the largest quilt show in the world. Definitely in the USA. So you know I was soaking up inspiration for 2 days straight! I’m not, and will never be a real quilter, but I love quilts and fabric and art. And PAPER. So it should come as no surprise that some of the inspiration spilled out in card form!

I wanted very basic but strong designs, so I die cut lots of little flower shapes from the Flower Box Card Etched Dies set, from a variety of colored card stocks that combined nicely, as well as white. Mostly greens and blues with a touch of orange. Modern, yet classic.

I also cut many small squares of white, green, blue and orange, using a small square die from the Tulip Flower Box Etched Dies set. Then I cut them all in half and reassembled them in a color-blocking design. For this first card, I wanted to leave no doubt that this is a quilt-inspired design, so I used a Copic Multi-Liner pen to draw on stitch lines. I mounted the assembled pieces onto a yellow card stock mat, to match the flower centers, and adhered that to a patterned paper card panel. The patterned paper card panel had already been run through the die cutting machine to die cut the sentiment, and I inlaid the white card stock letters into the openings in the patterned paper.

I made another, more CAS version of the first card, with a slightly different patchwork pattern. This card eschews mats and stitch lines and repeats the quilt pattern colors with the sentiment letters.


A single strand of butcher’s twine completes this card.

Up next is a card that repeats some of the elements of the first, minus the stitching. (I had extra blue and green die cuts and I loved this color combo, thus…).

The Flower Box Card Etched Dies set includes the word dies for LOVE, THANK and YOU, which, when you combine them can also spell HELLO. I combined that with a “friend” stamp from Technique Tuesday and Ali Edwards, stamped in Altenew Starlight blue ink.


The last card was a dandy way to listen to a couple of podcast episodes from start to finish! Which is to say, it took more time that the first three combined! But WAY less time than if I were creating this with a sewing machine and fabric, so there’s that!

I cut many strips of assorted patterned papers from my stash drawer (all eyeballed, no measuring) and adhered them to an A2 sized card panel on a diagonal line. I didn’t worry about glueing them down at a perfect 90 degrees because I knew I could lay the die down in a way that ensured it.

I die cut 12 squares of paper, (re-adhereing the corner bits that needed additional glue) and arranged them in a pleasing pattern. Then I trimmed the edge squares to fit on a card panel with a 1/16″ gap between each block and glued them down.

Next, I die cut more flowers and flower edge layers, including yellow circles for the centers and added them to the quilt block intersections. I stamped a sentiment from Endless Creations with embossing ink onto black card stock and heated with white embossing powder. At that point I deemed it finished! It’s busy enough with the mix of patterned papers that any more embellishments would be lost.
I have another Spellbinders Guest Design post coming in a couple of days so I hope you’ll check back to see that one too. Better yet, subscribe to this blog so you don’t miss a single post!
Have a wonderful day and thank you for stopping by!