
Hey, hello friends! A few days ago I shared some cards made for a Spellbinders Guest Designer post, using the Exquisite Splendor Collection by Marisa Job. Remember these quilt show inspired cards? Today I have more to share, using other dies in the collection.

There are several things I did similarly for each card; the first is using watercolor paper for each of the featured designs, second is the same color scheme used to paint each of the elements, and finally the technique used was either straight up die cutting or else die impressing. Because of using similar elements and color schemes for each card I now have a “set” that I can bundle and give as a gift of handmade greeting cards!

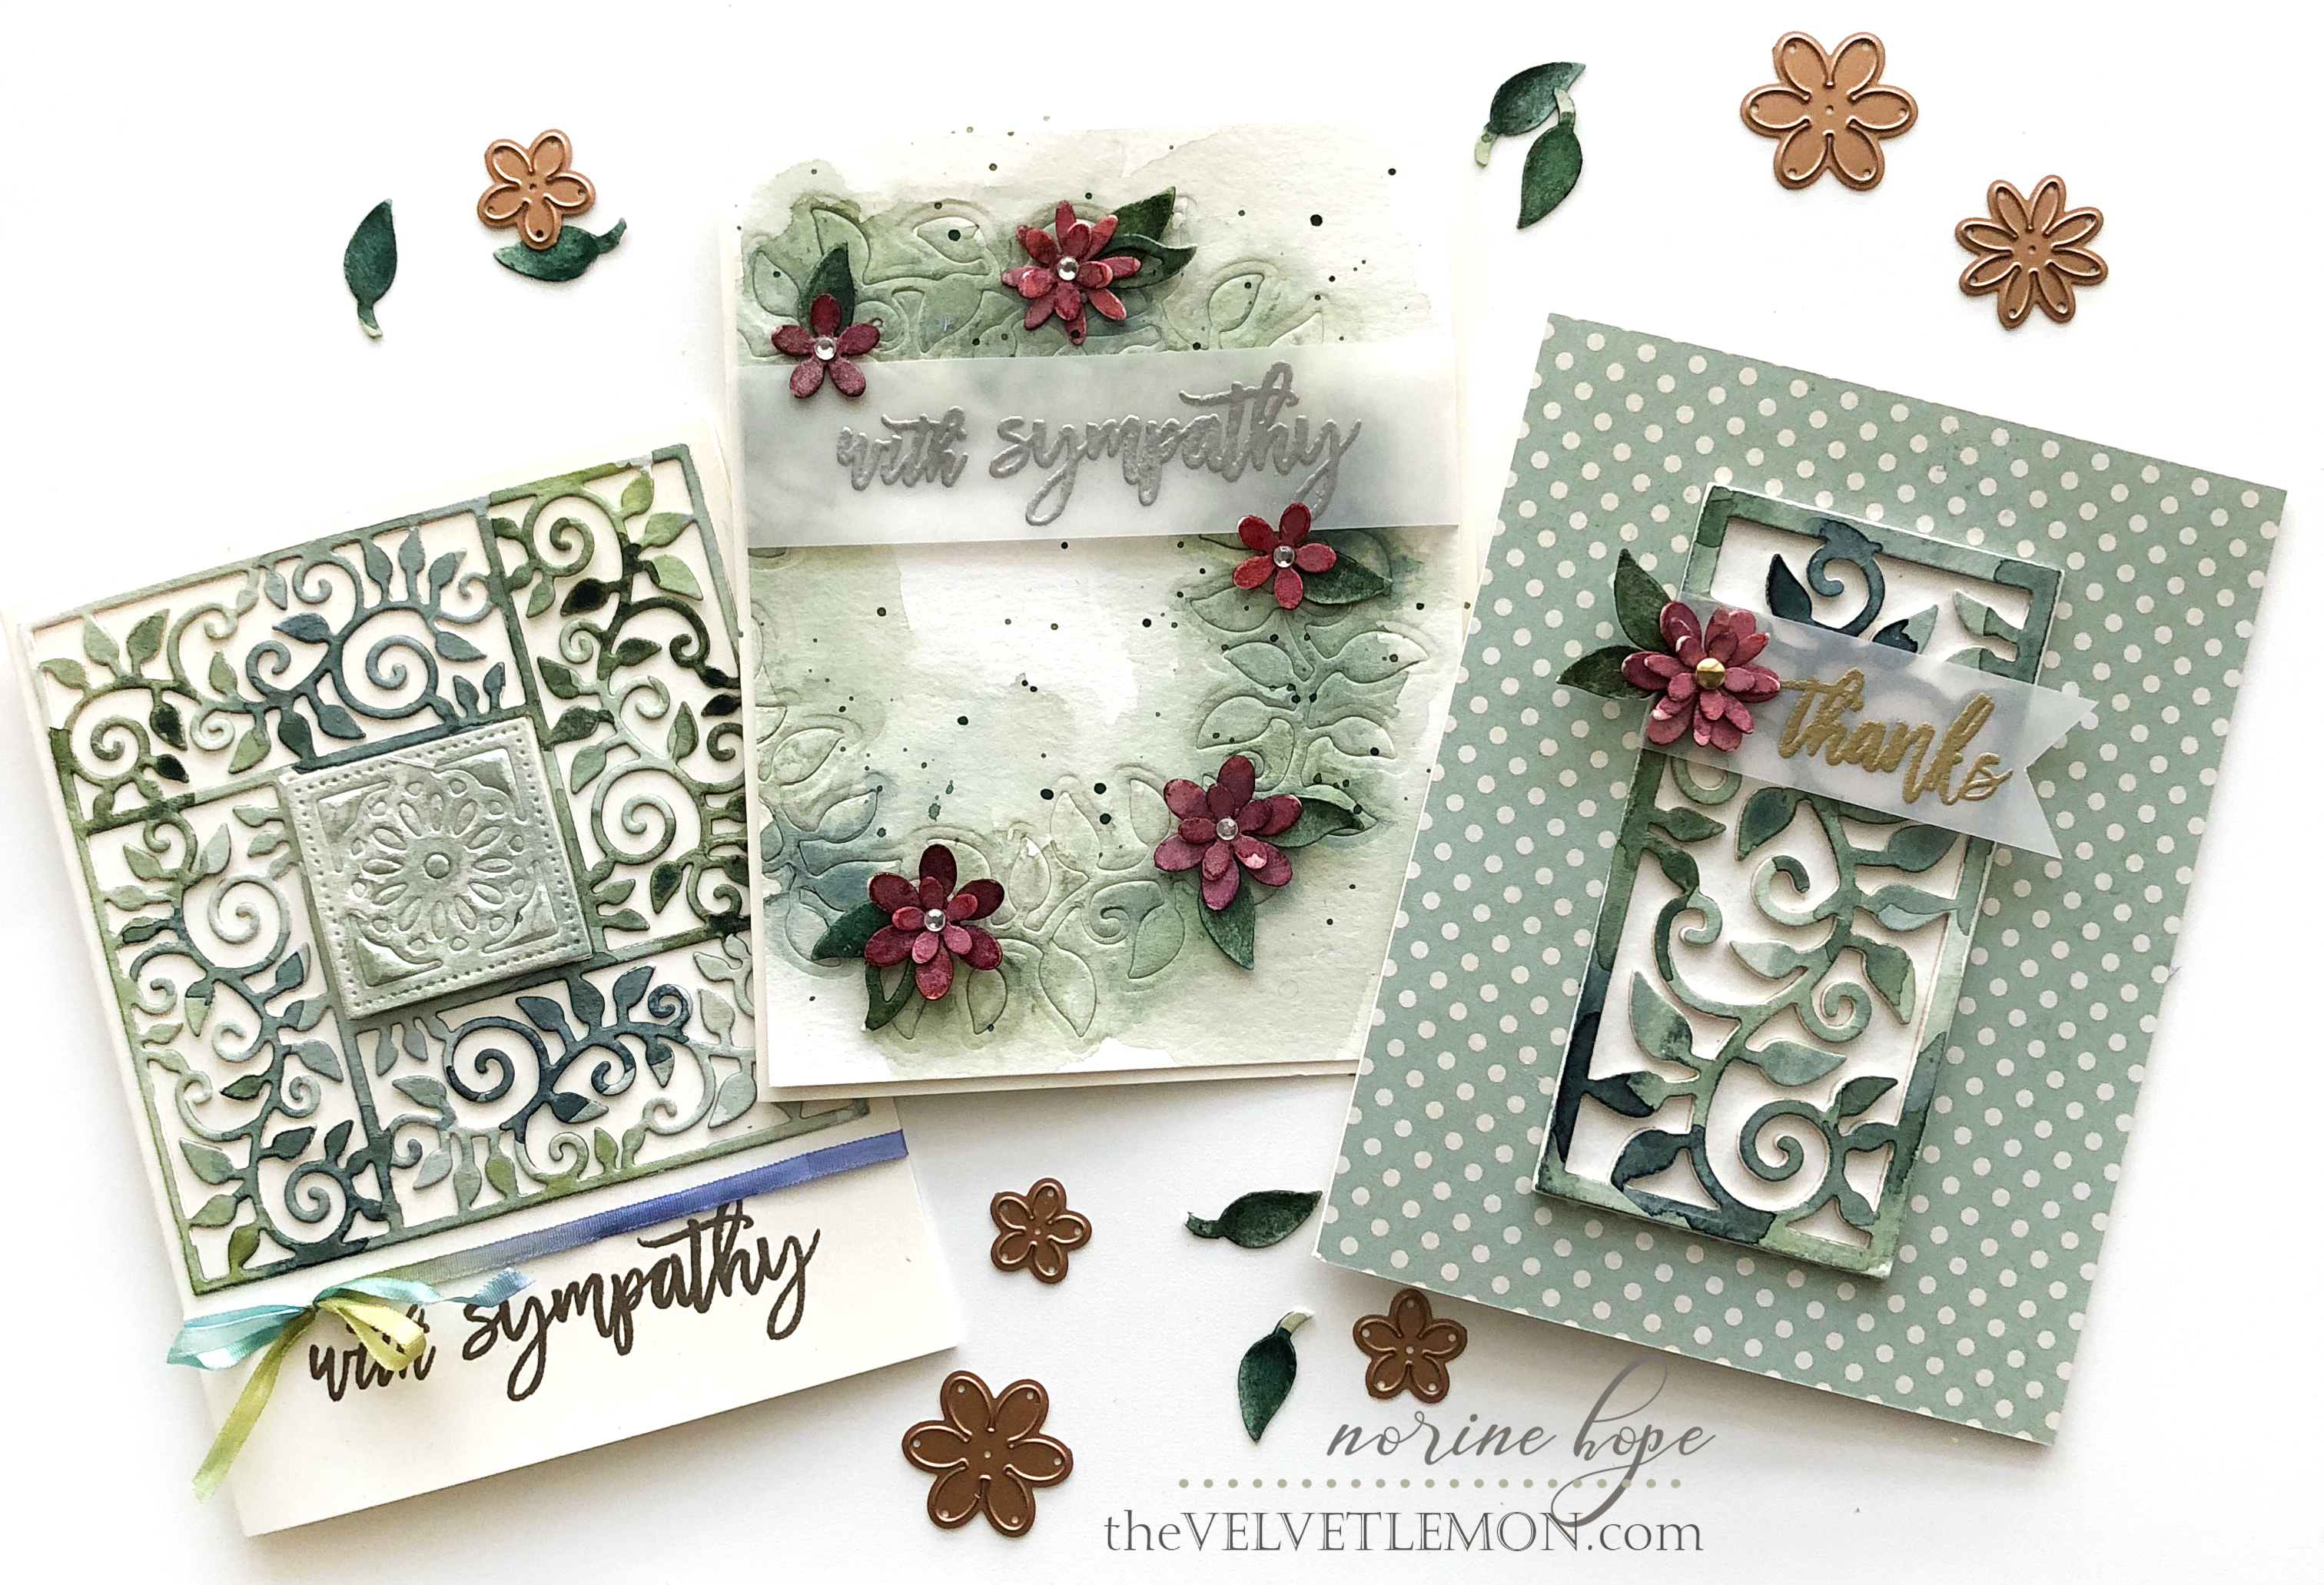
For this first card, I die cut several of the same pieces from the Die D-Lites Leaf Border Die, and watercolor painted one of the die cuts which I made the top layer as I glued them into a stack 4 die-cuts high. I used the outline rectangle die in the set to cut the background piece and glued that to the stack. I also painted some of the the flower die cuts from the Shapeablilities Blooming Floral Wreath Dies set, stacked them up with some leaves from the Shapeabilities Tulip Flower Box Etched Dies. The “thanks” sentiment is from the Floral Love Clear Stamps set, and is stamped on vellum with gold embossing powder, cut into a fish tail and adhered behind the stacked, adhered flower bloom.

The next card was created by die impressing, as mentioned above. I achieved this look by laying the wreath die from the Shapeabilities Blooming Floral Wreath Die set partially onto a piece of A2 sized watercolor paper and using the rubber mat when rolling it through the die cutting machine so that it didn’t cut, but left a deep impression in the watercolor paper. Then I randomly daubed water color paint in shades of blue and green all over the wreath. I used plenty of water in my brush to achieve that pale, faded look when dry. I went back a 2nd time and added more intense daubs of paint in a few areas for extra definition and variety of color. I also painted more of the flowers and leaves die cut from the Shapeabilities Tulip Flower Box dies.

I added paint speckles in the same colors of paint I used on the wreath and splattered them all over. Finally, I glued all the layered flowers and leaves in place, and stamped the sentiment from the Floral Love Clear stamps set, on vellum again, heat embossing with silver embossing powder.

The last card was made much like the first, in that the die cut was cut from watercolor paper using the Shapeabilities Leaf Border Frame and painted all over with random daubs of blues and green paints before being adhered to a card front. The square medallion center piece is the center of one of the tiles from the Shapeabilities Square Medallion Tiles die set. It was painted with the same colors of watercolor paint, and once dry, was covered completely with a coat of Wink of Stella Glimmer. On the card above the tile has a layer of fun foam behind it to pop it up and provide some extra interest. The sentiment on this card is also from the Floral Love Clear Stamp set and is heat embossed with platinum embossing powder. I tied a piece of coordinating, hand-dyed silk ribbon around the front to complete the card.

You can see the original post of these cards on the Spellbinders blog here, with more details of how these cards were created. If you have any questions please leave them in the comments and I’ll be sure to respond. Have a wonderful day and thanks for stopping by!