Hi there friends! I want to wish you all a very Happy Holiday season and thank you for your support this year while I’ve started my new blog/site and grown my paper crafting efforts. You are a huge part of the enjoyment I derive from discovering what can be done with stamps, ink, paper and glue! Thank you!
I have another set of cards to share with you today. They are posted on the Altenew Card Blog today too, along with more detailed photos and instructions, not to mention, the all-important product links.

We all know how much fun it is to spend hours creating a work of art that is a card, but sometimes circumstances decree that we need to simplify our efforts and make several cards in one go. Perhaps for a single purpose, or maybe for gifting as a set of handmade greeting cards. Today’s technique is an easy way to accomplish that!

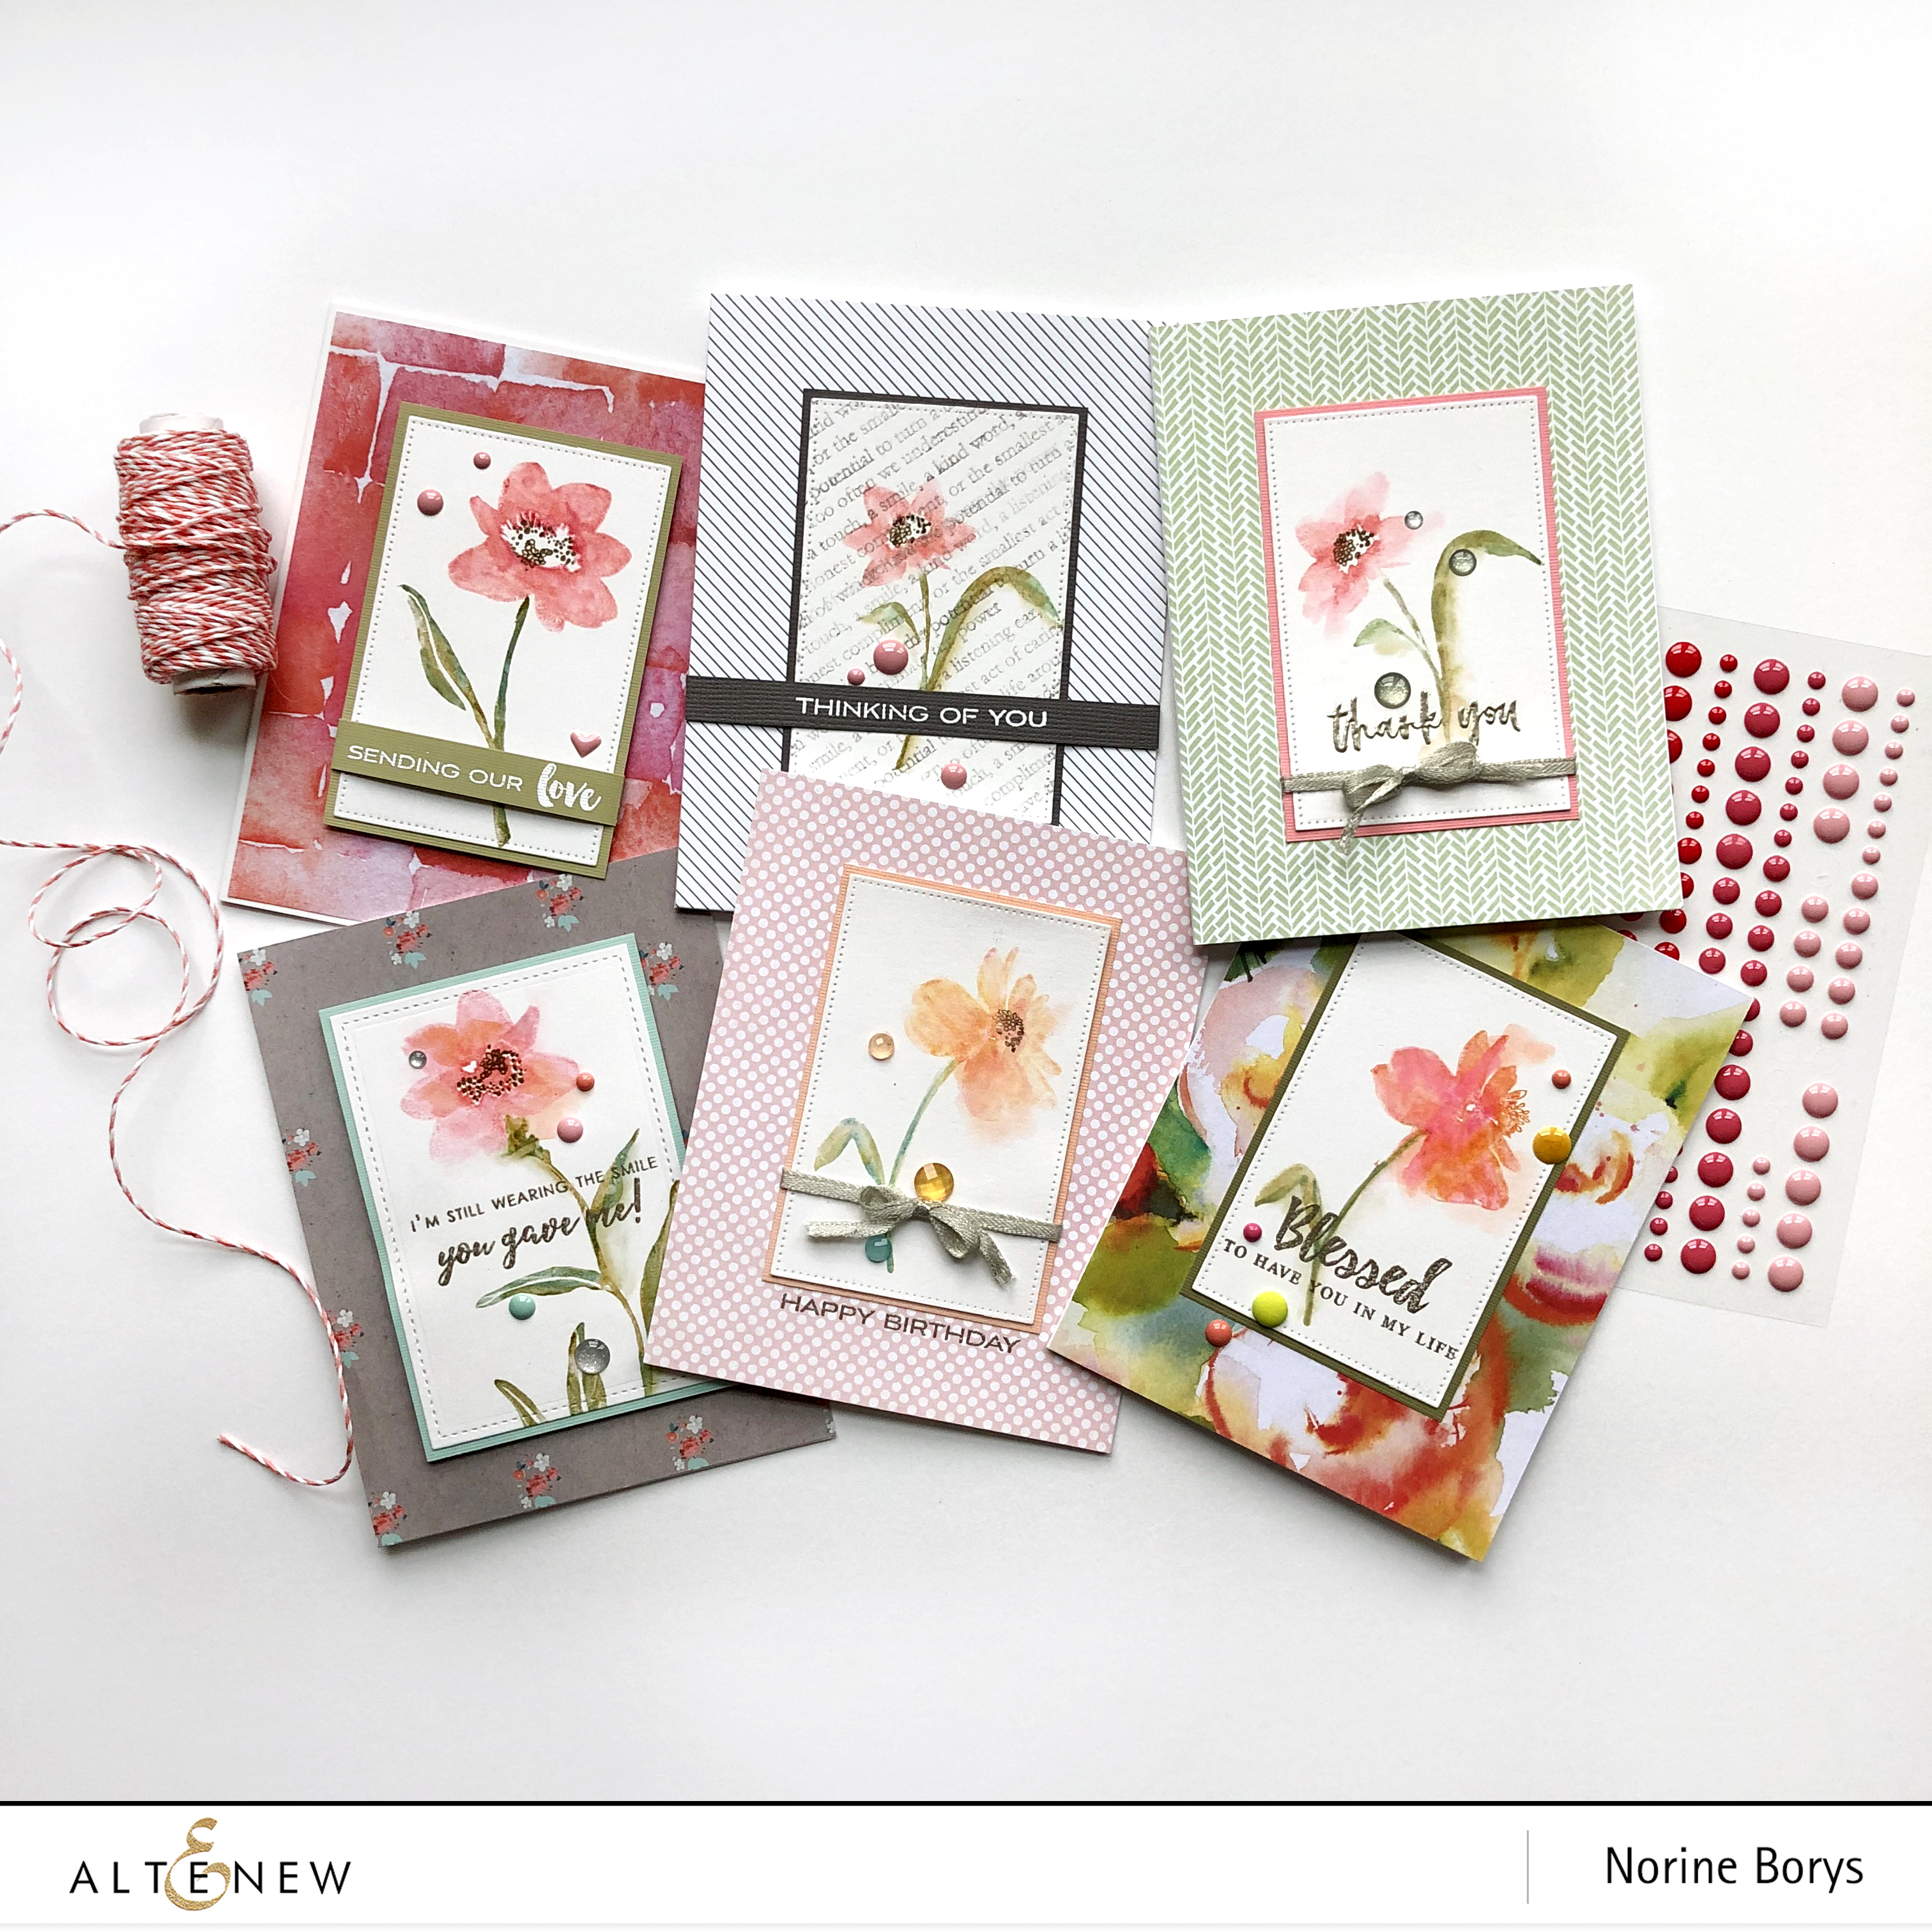
The technique I used today is basically, coloring on your stamps. With water based markers. I used Tombow markers. Its one of the first things I learned to do with stamps back in the 90’s when I first explored card making. The Floral Garden stamp set from the New Day Card Kit is perfect for stamping this way because each of the stamps is a single layer, silhouette shape. I kept it simple by using only two colors for each area, dark and light shades of red, pink or orange for the blooms, and a warm dark green with a cool blue green for the leaves and stems. You can blend ink colors on a stamp with ink pads, but it’s awkward to try and get a smooth blend or to shade in specific areas, and although I was very casual in my color blending, when using water based markers, you can be very specific in your stamp coloring.

I colored each part of the stamp, working fairly quickly, and not worrying too much about where each color should go. For example, I colored the bloom with a dark, bright shade of red or pink water based marker around the flower center, then used a lighter, analogous color shade to mix with the darker color a little and color right to the edges of the stamp. Then for the leaves and stems, I just slapped on the green and blue ink, and right before stamping, I “huffed” on the stamp a few times to re-moisten the ink and pressed firmly onto some Strathmore Bristol Smooth card stock. Because of that paper choice, I had a little extra time to use the Altenew water brush to blend the colors in the areas where the marker blending was a little harsh, and even to draw that color “out of the lines” into the background. Quick and simple. Color. Stamp. Done.

I die cut each of the stamped images with the Die-Namics Pierced Rectangles dies, added a variety of heat embossed sentiments, matted each card panel with coordinating card stock and adhered them to patterned paper (including the 6″x6″ Reflection paper pad in the New Day card kit) covered card bases. A few enamel dots to complete each one, and I had a half dozen cards completed in the time it usually takes to make ONE. I know. How much do I rock!
As I said, there is more to see on the Altenew blog so click on over to get more info. Thanks again for stopping by and have a wonderful Christmas day!