Hey, hi friends! I’m up on the Altenew Card Blog today with these three cards for a stamp focus post featuring the Enchanted Roses stamp set!
This post contains affiliate links that are listed below. Your clicking through to purchase products I’ve linked helps to support this blog at no additional cost to you and allows me to continue to provide you with creative inspiration and instructive help.
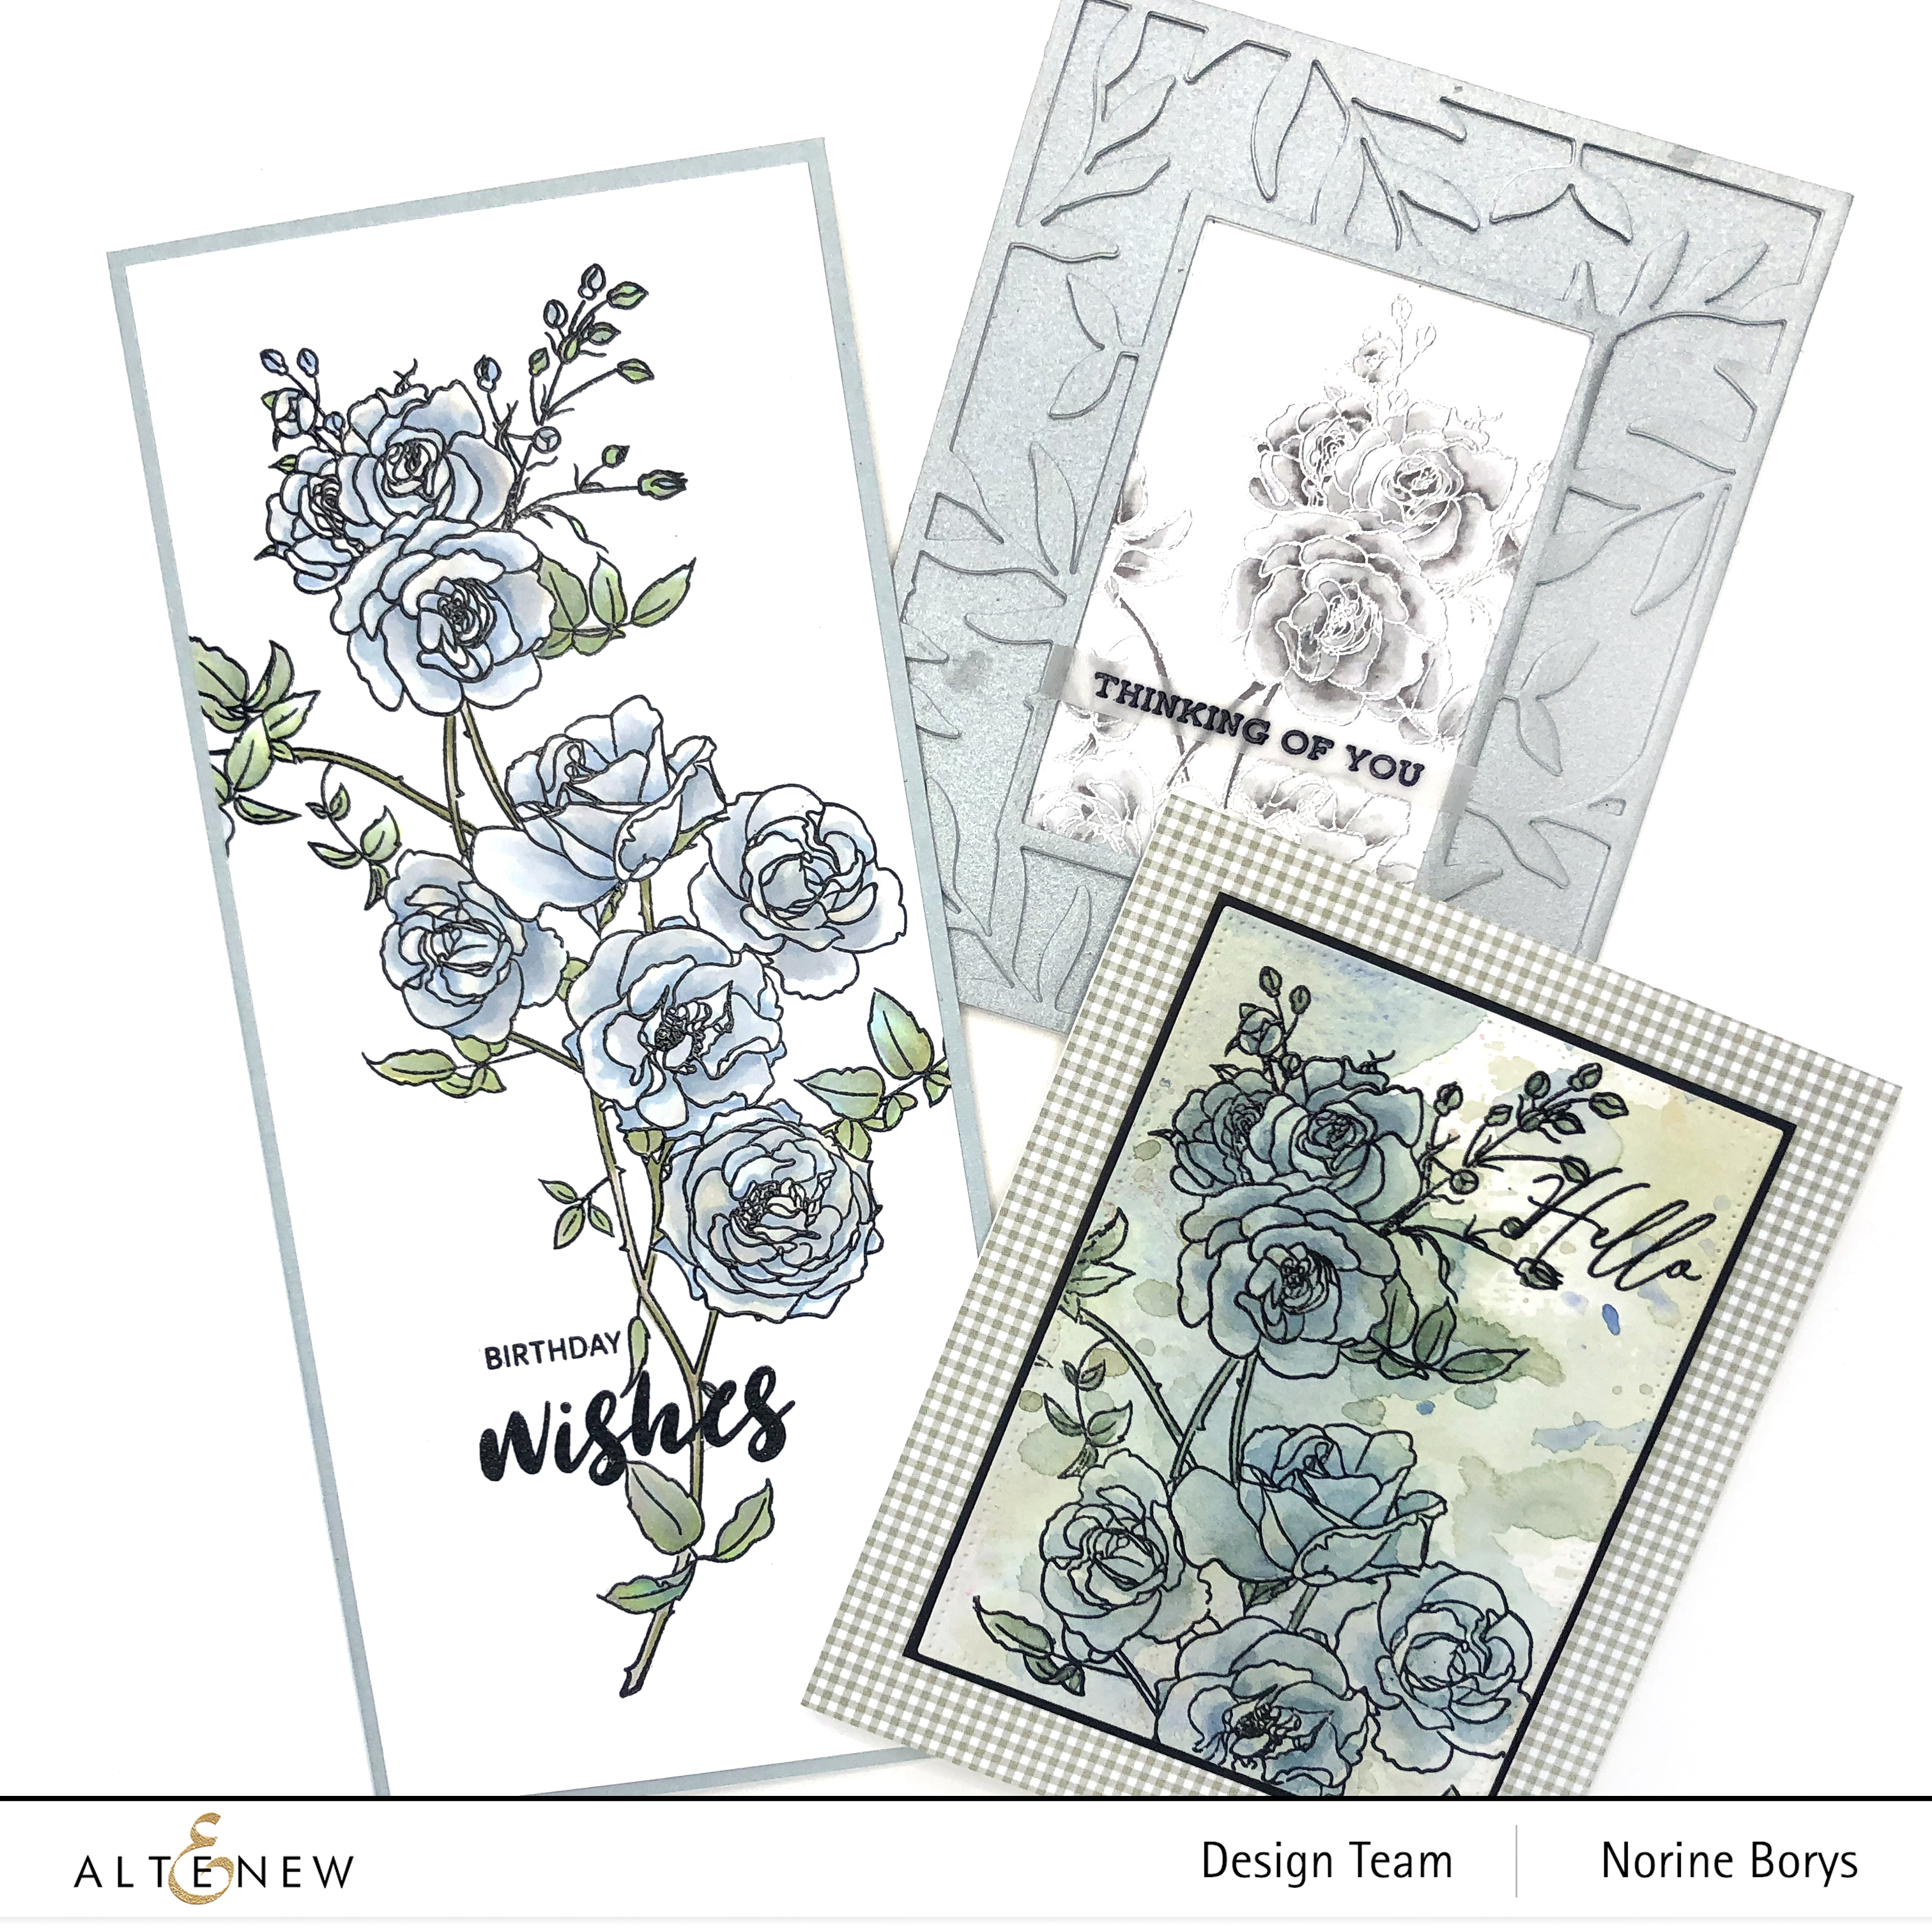
I love this new stamp set, first because it’s just so lovely. And second because of it’s size, you could stamp a multitude of cards, no two alike, simply by stamping a different part of it at different angles.
I’m going to skip through the details of today’s cards, but if you would like more photos and how-tos, you can find that at the Altenew Card Blog.

The first card today has an interesting beginning. I had a scrap of watercolor paint smooshed paper, dry and die cut, from a very old project in the past, and as I saw the stamp packaging liner laying over it with it’s fine black outlined image, I knew that’s the look I wanted!
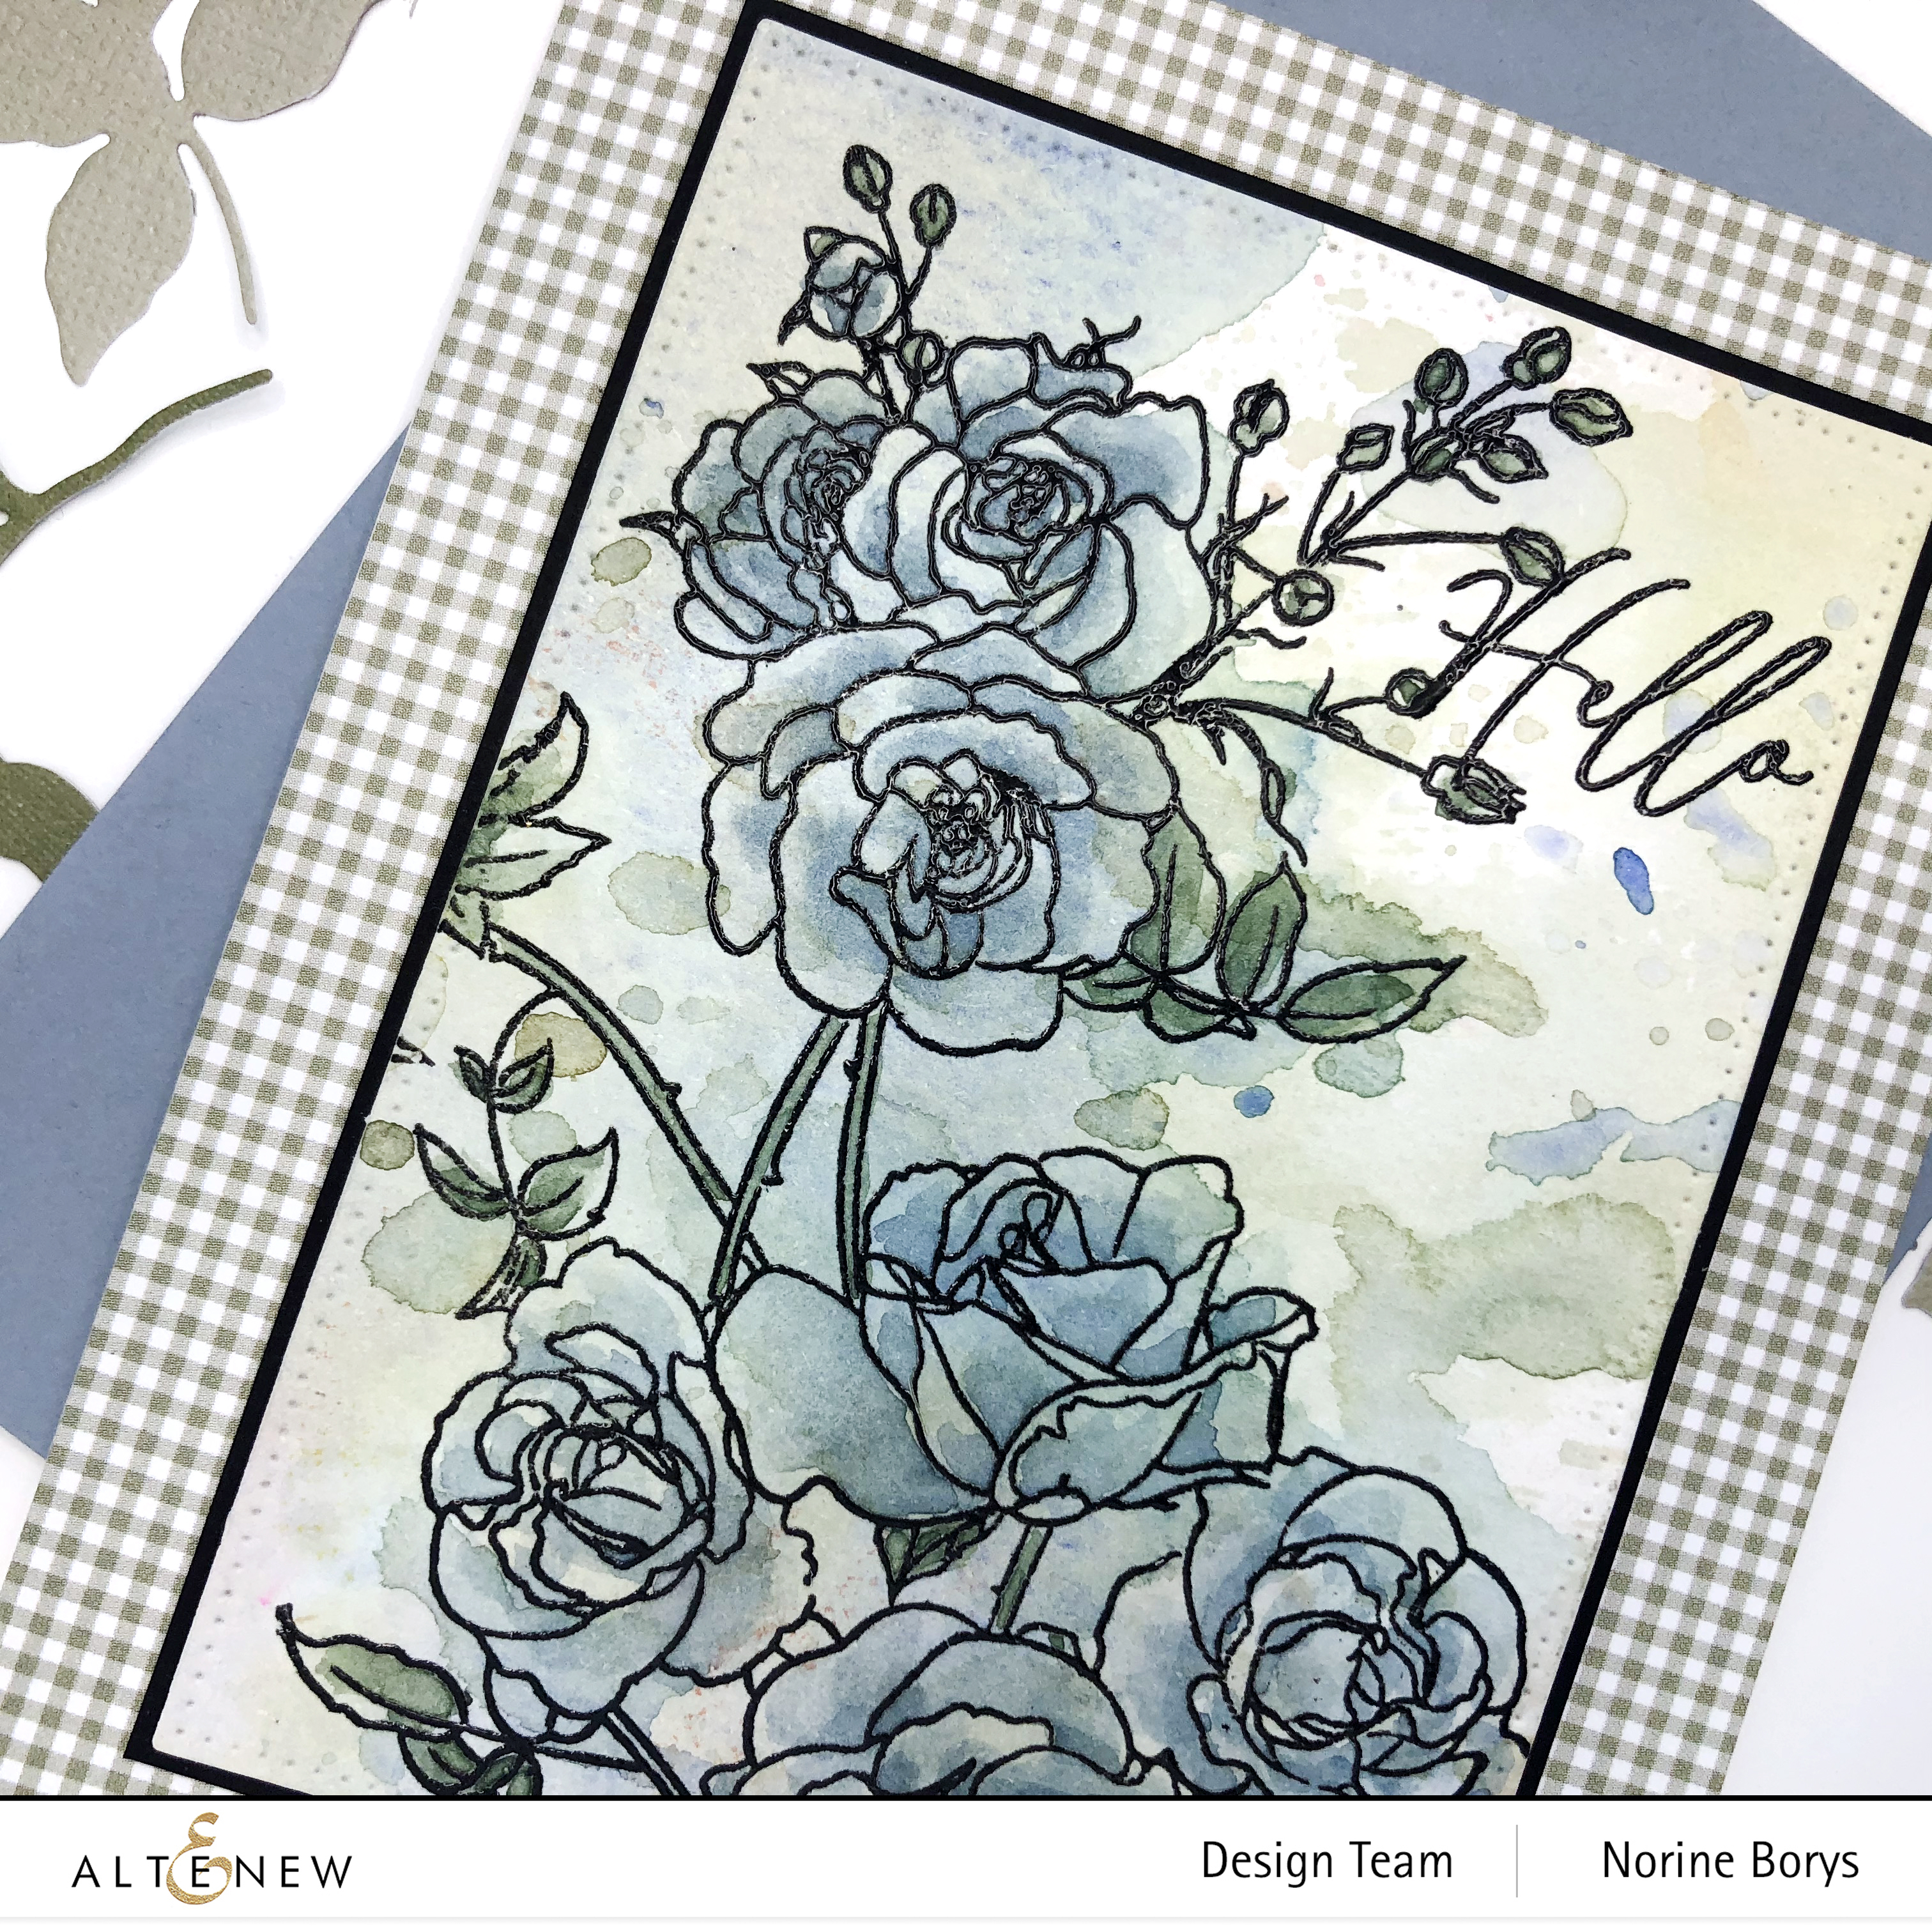
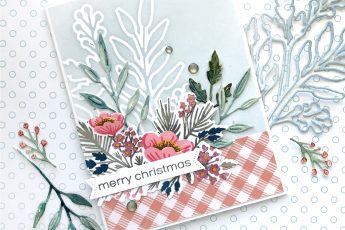
Once I had stamped the smooshed panel with black ink and heat embossed with clear embossing powder, I then added some very dilute color to the shapes of the leaves and the flowers, duplicating as closely as I could the colors beneath but keeping green for the leaves and stem and blue for the flowers. The sentiment is from the Vintage Garden stamp set, and the gingham paper is from the Petite Gingham 6×6 paper pad from My Favorite Things.
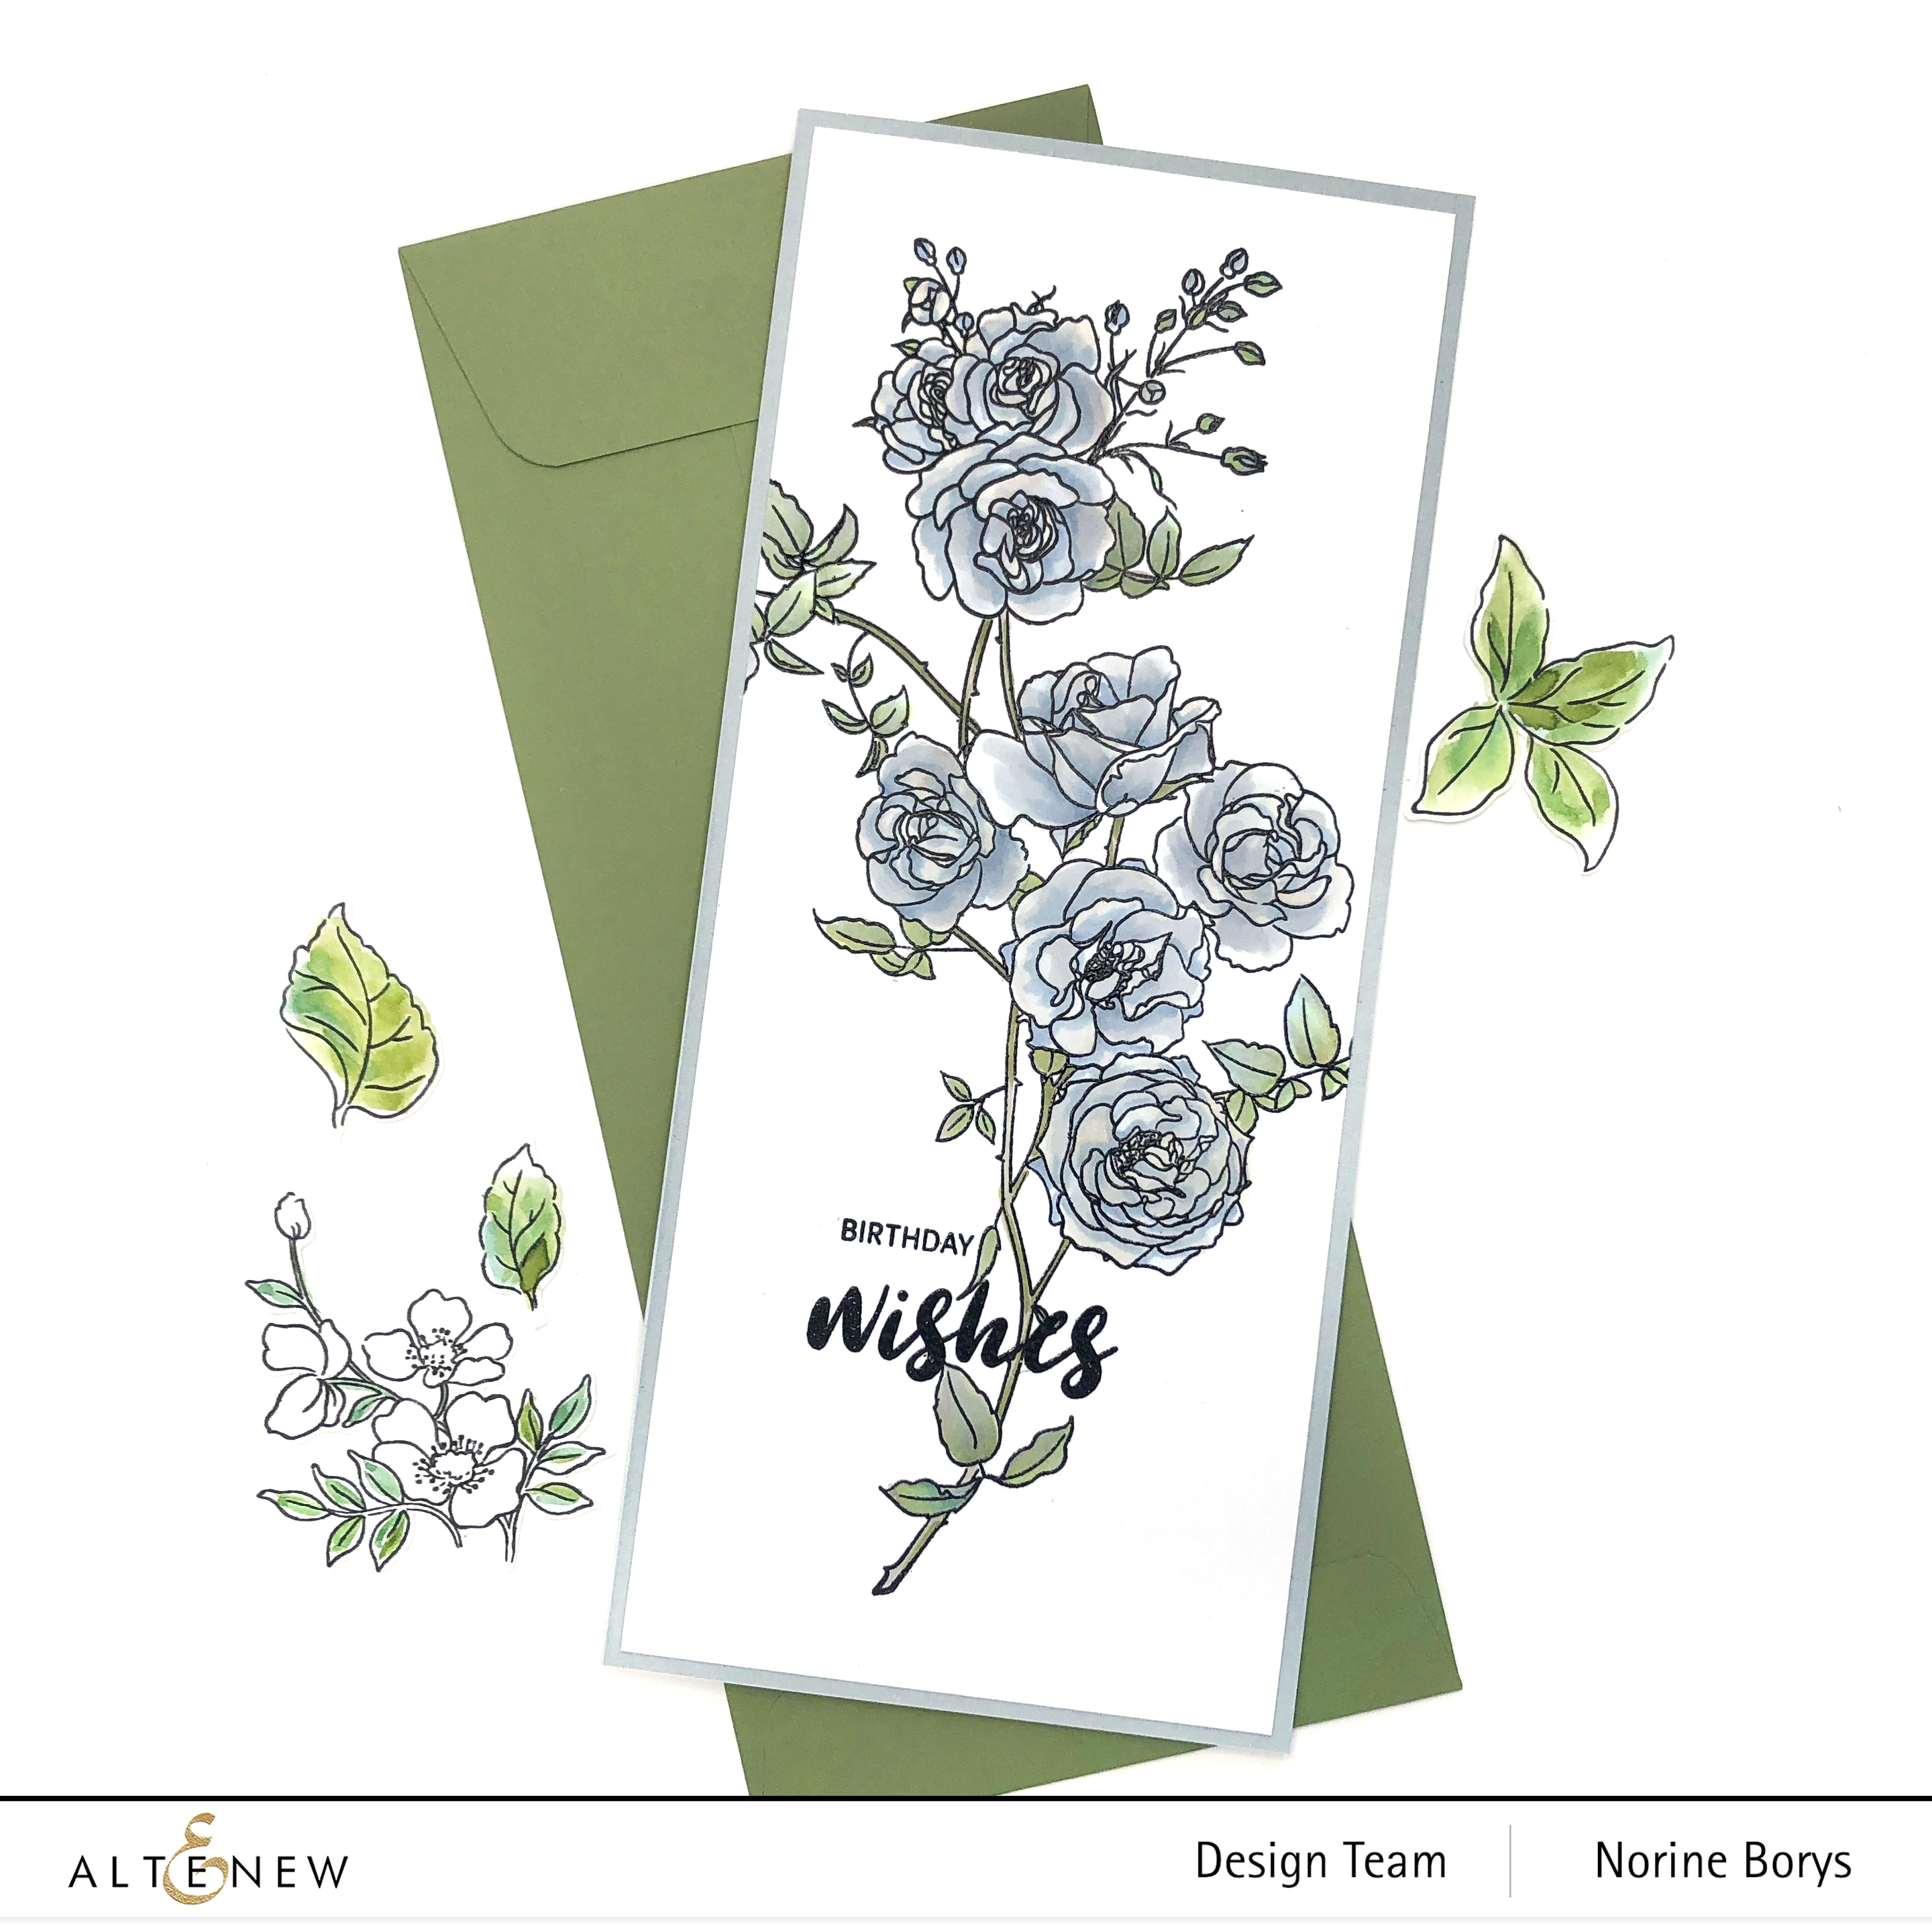
The next card is a slimline, because I knew from the beginning that this stamp set needed to be made into as big a card as it would take to be able to see the complete stamped image. I got pretty close.
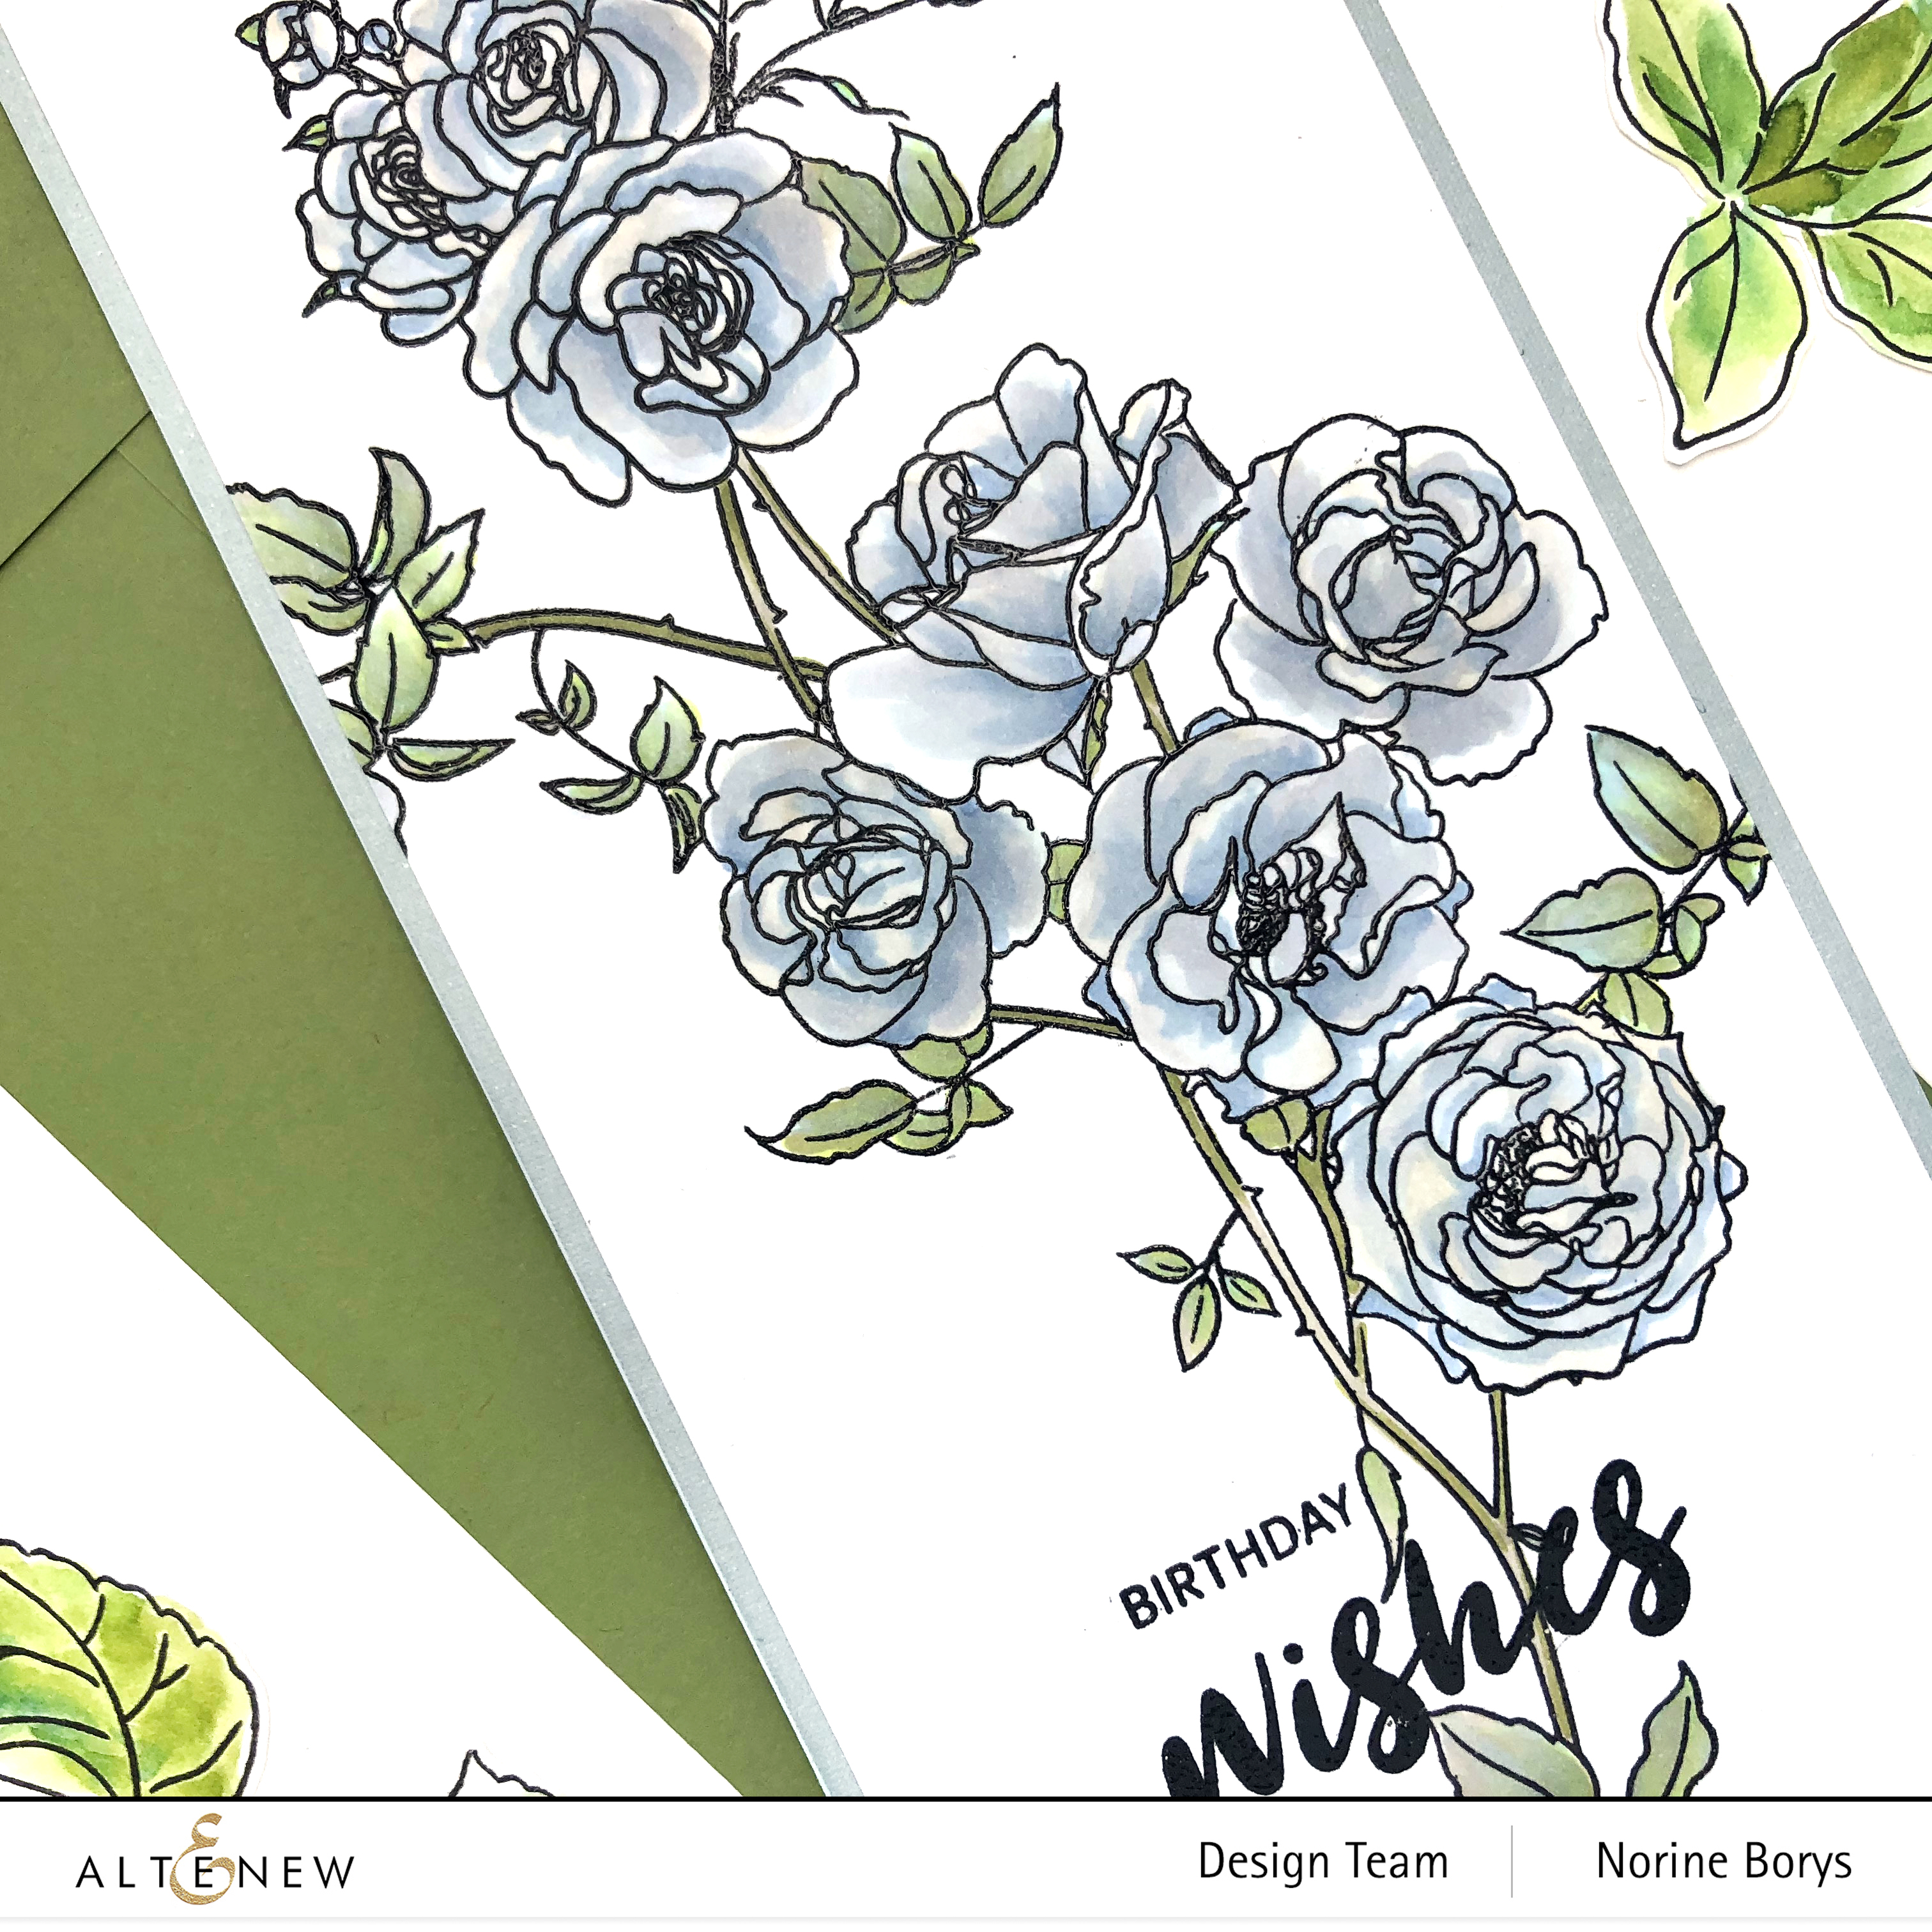
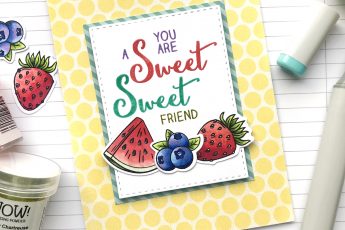
I also wanted to try and replicate the look of the watercolored card above, with the same color scheme and the even the same painterly look, but with alcohol markers!
For the leaves I used Altenew Artist markers – Frayed Leaf, Seaglass, then over colored with Limestone to mute the first two shades.
For the flowers I used Copic markers – B93, E40, BG70 and C2, all very pale shades to begin with, and then a neutral gray shade to over color with.

I stamped a greeting using two of the sentiments in the Enchanted Roses stamp set and clear heat embossed to match the flower stem. No embellishments for this card, as I wanted to take nothing away from the floral image.
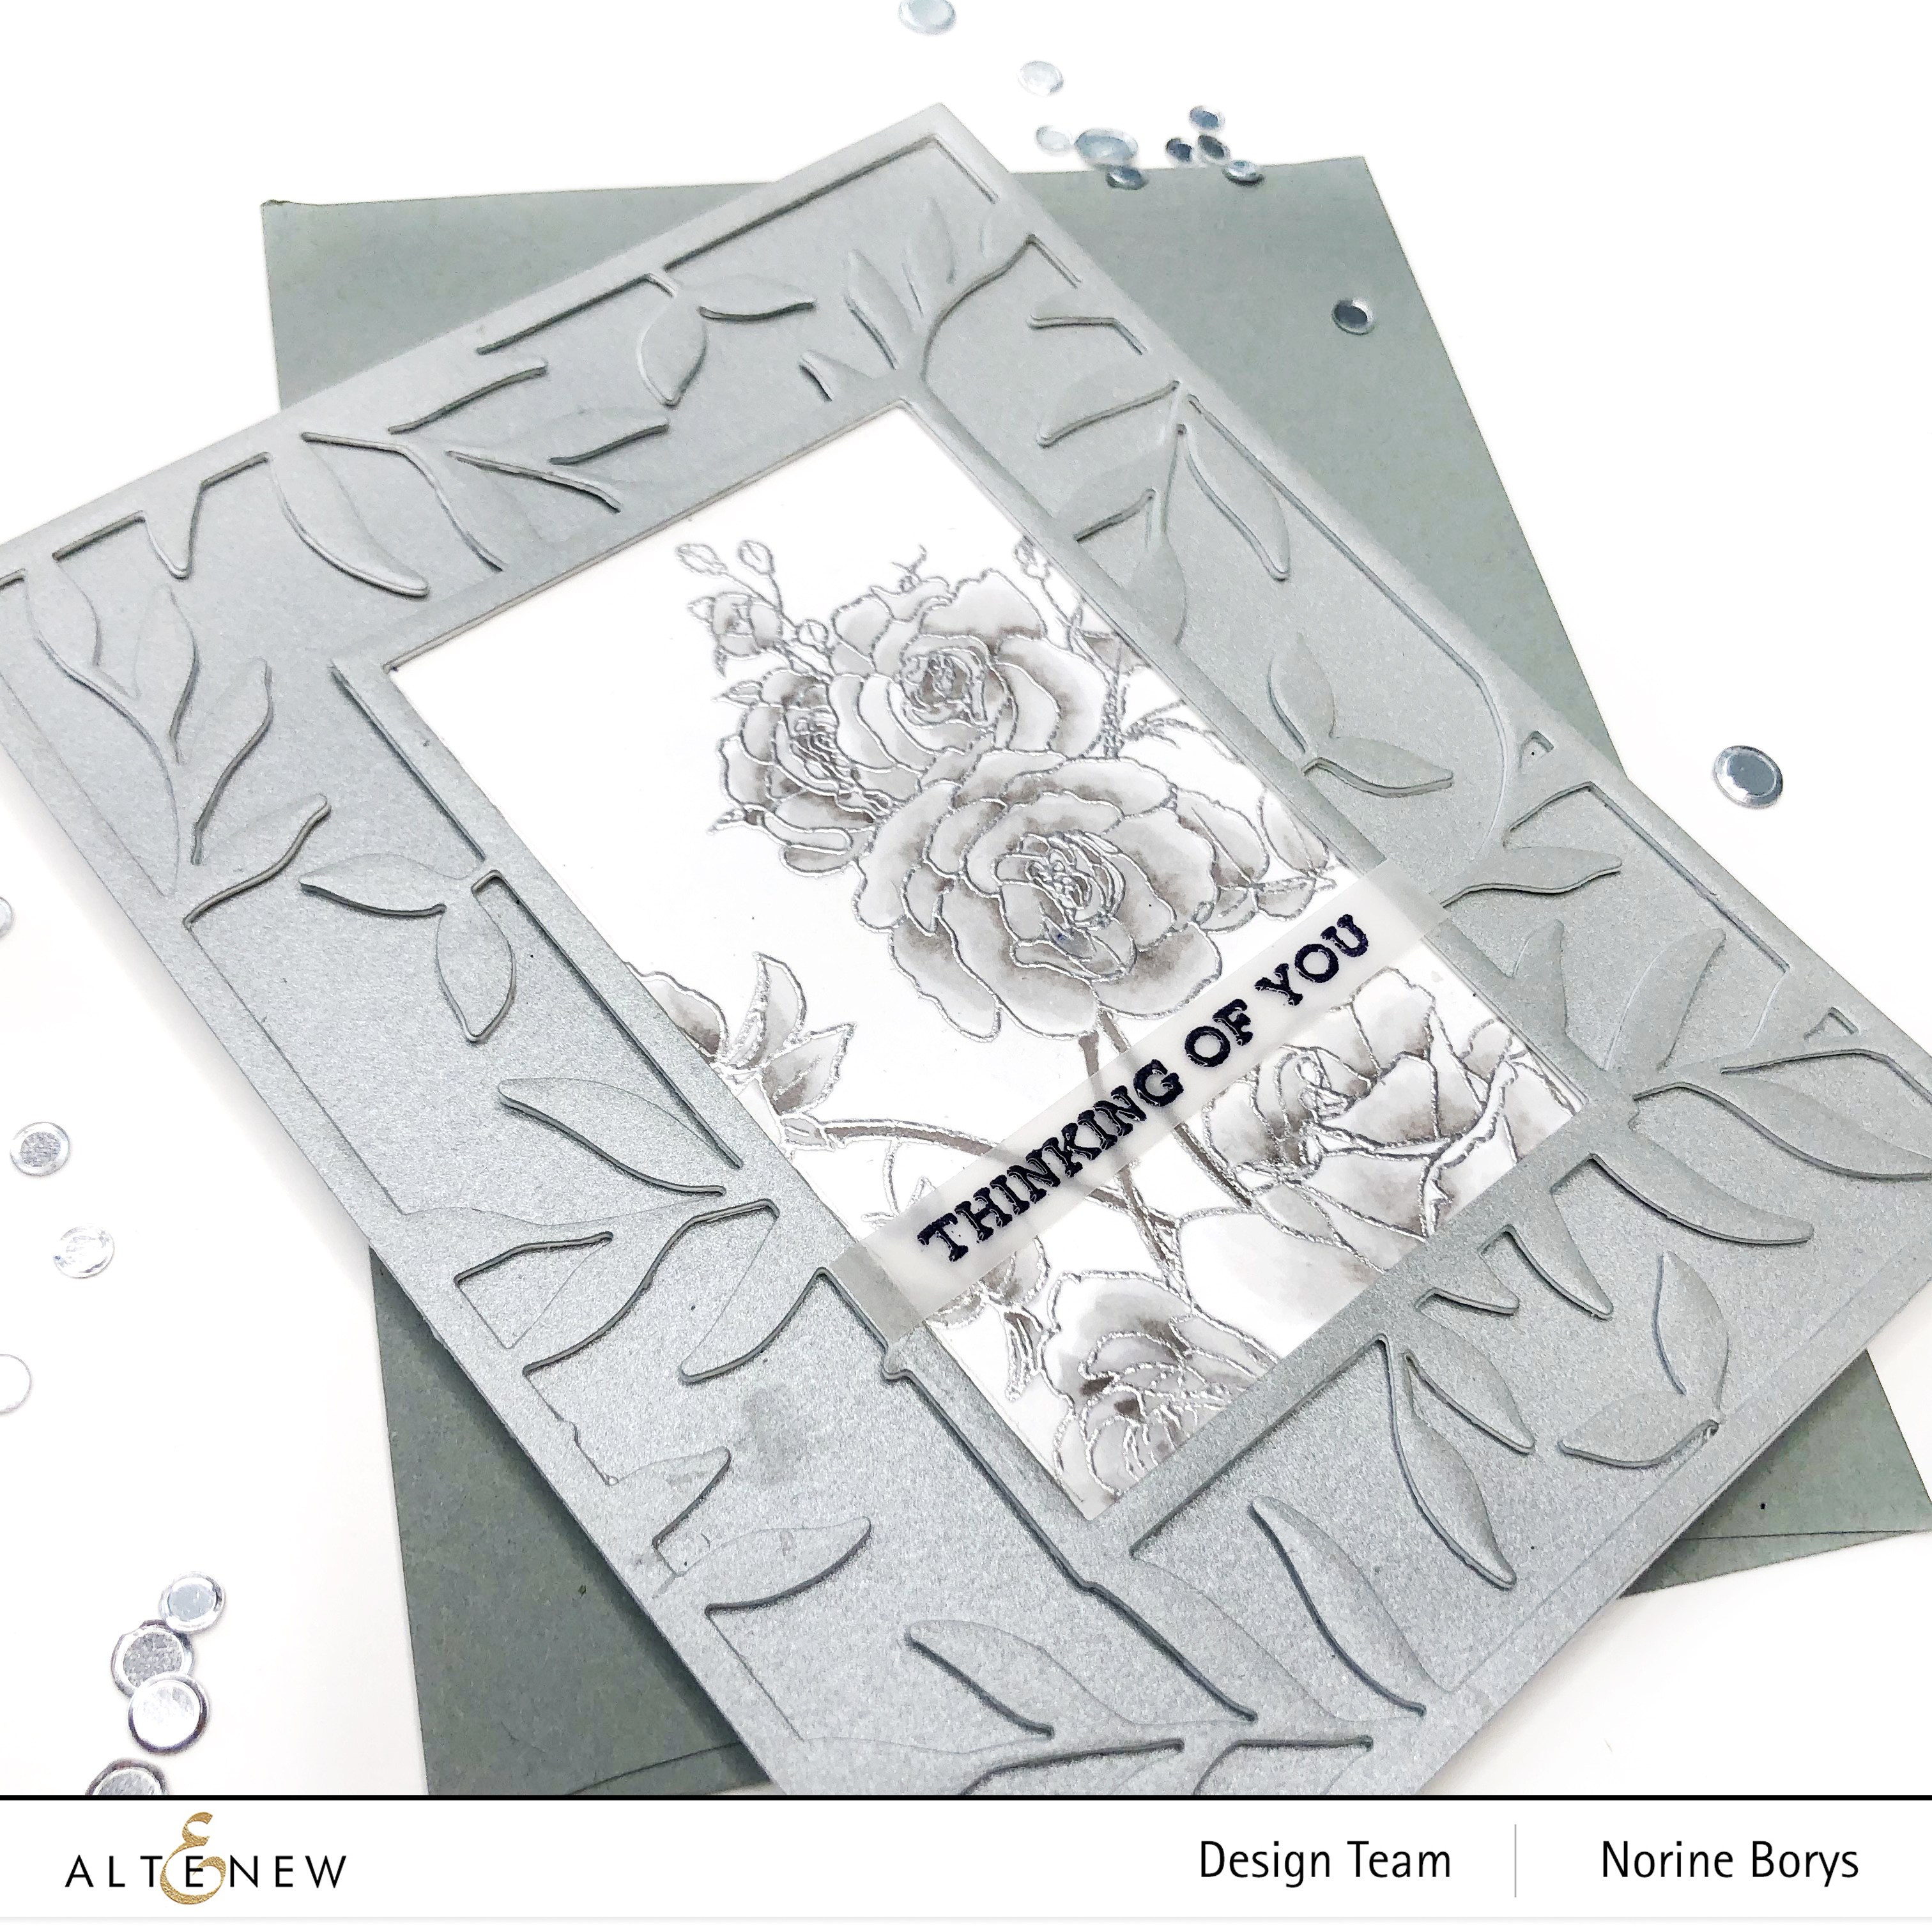
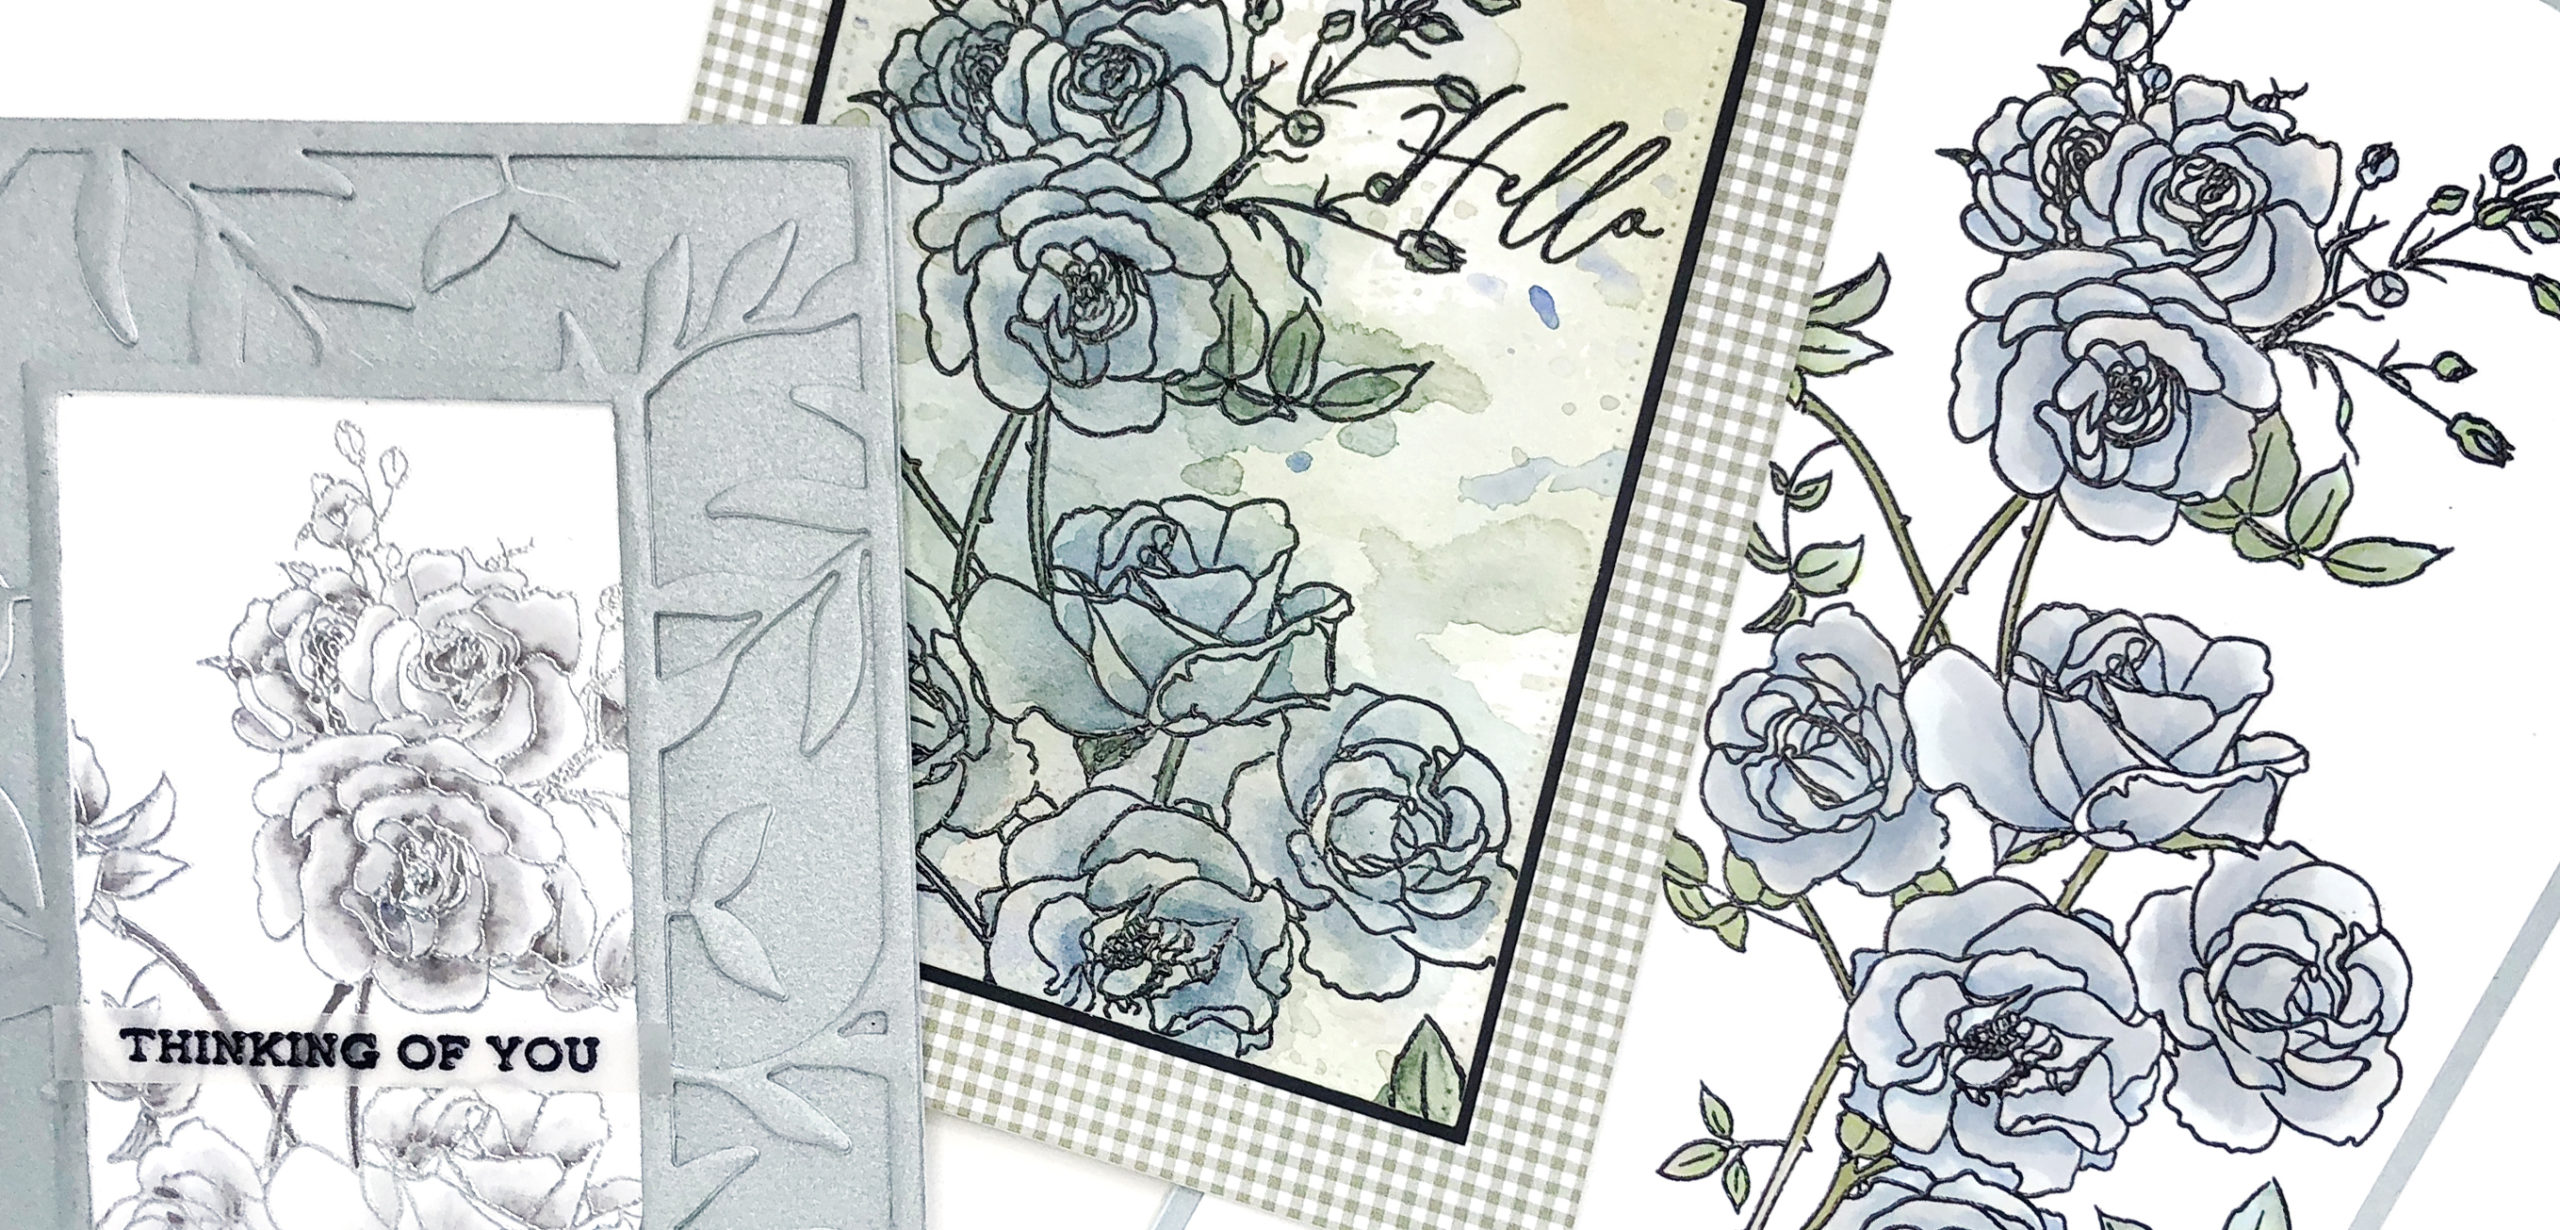
The third card today is, as I suggested above, a different look entirely simply by stamping only a small portion of the image. I stamped on white cardstock with embossing ink and heat set with silver embossing powder, then colored the flowers with the palest of the grey tone alcohol markers.
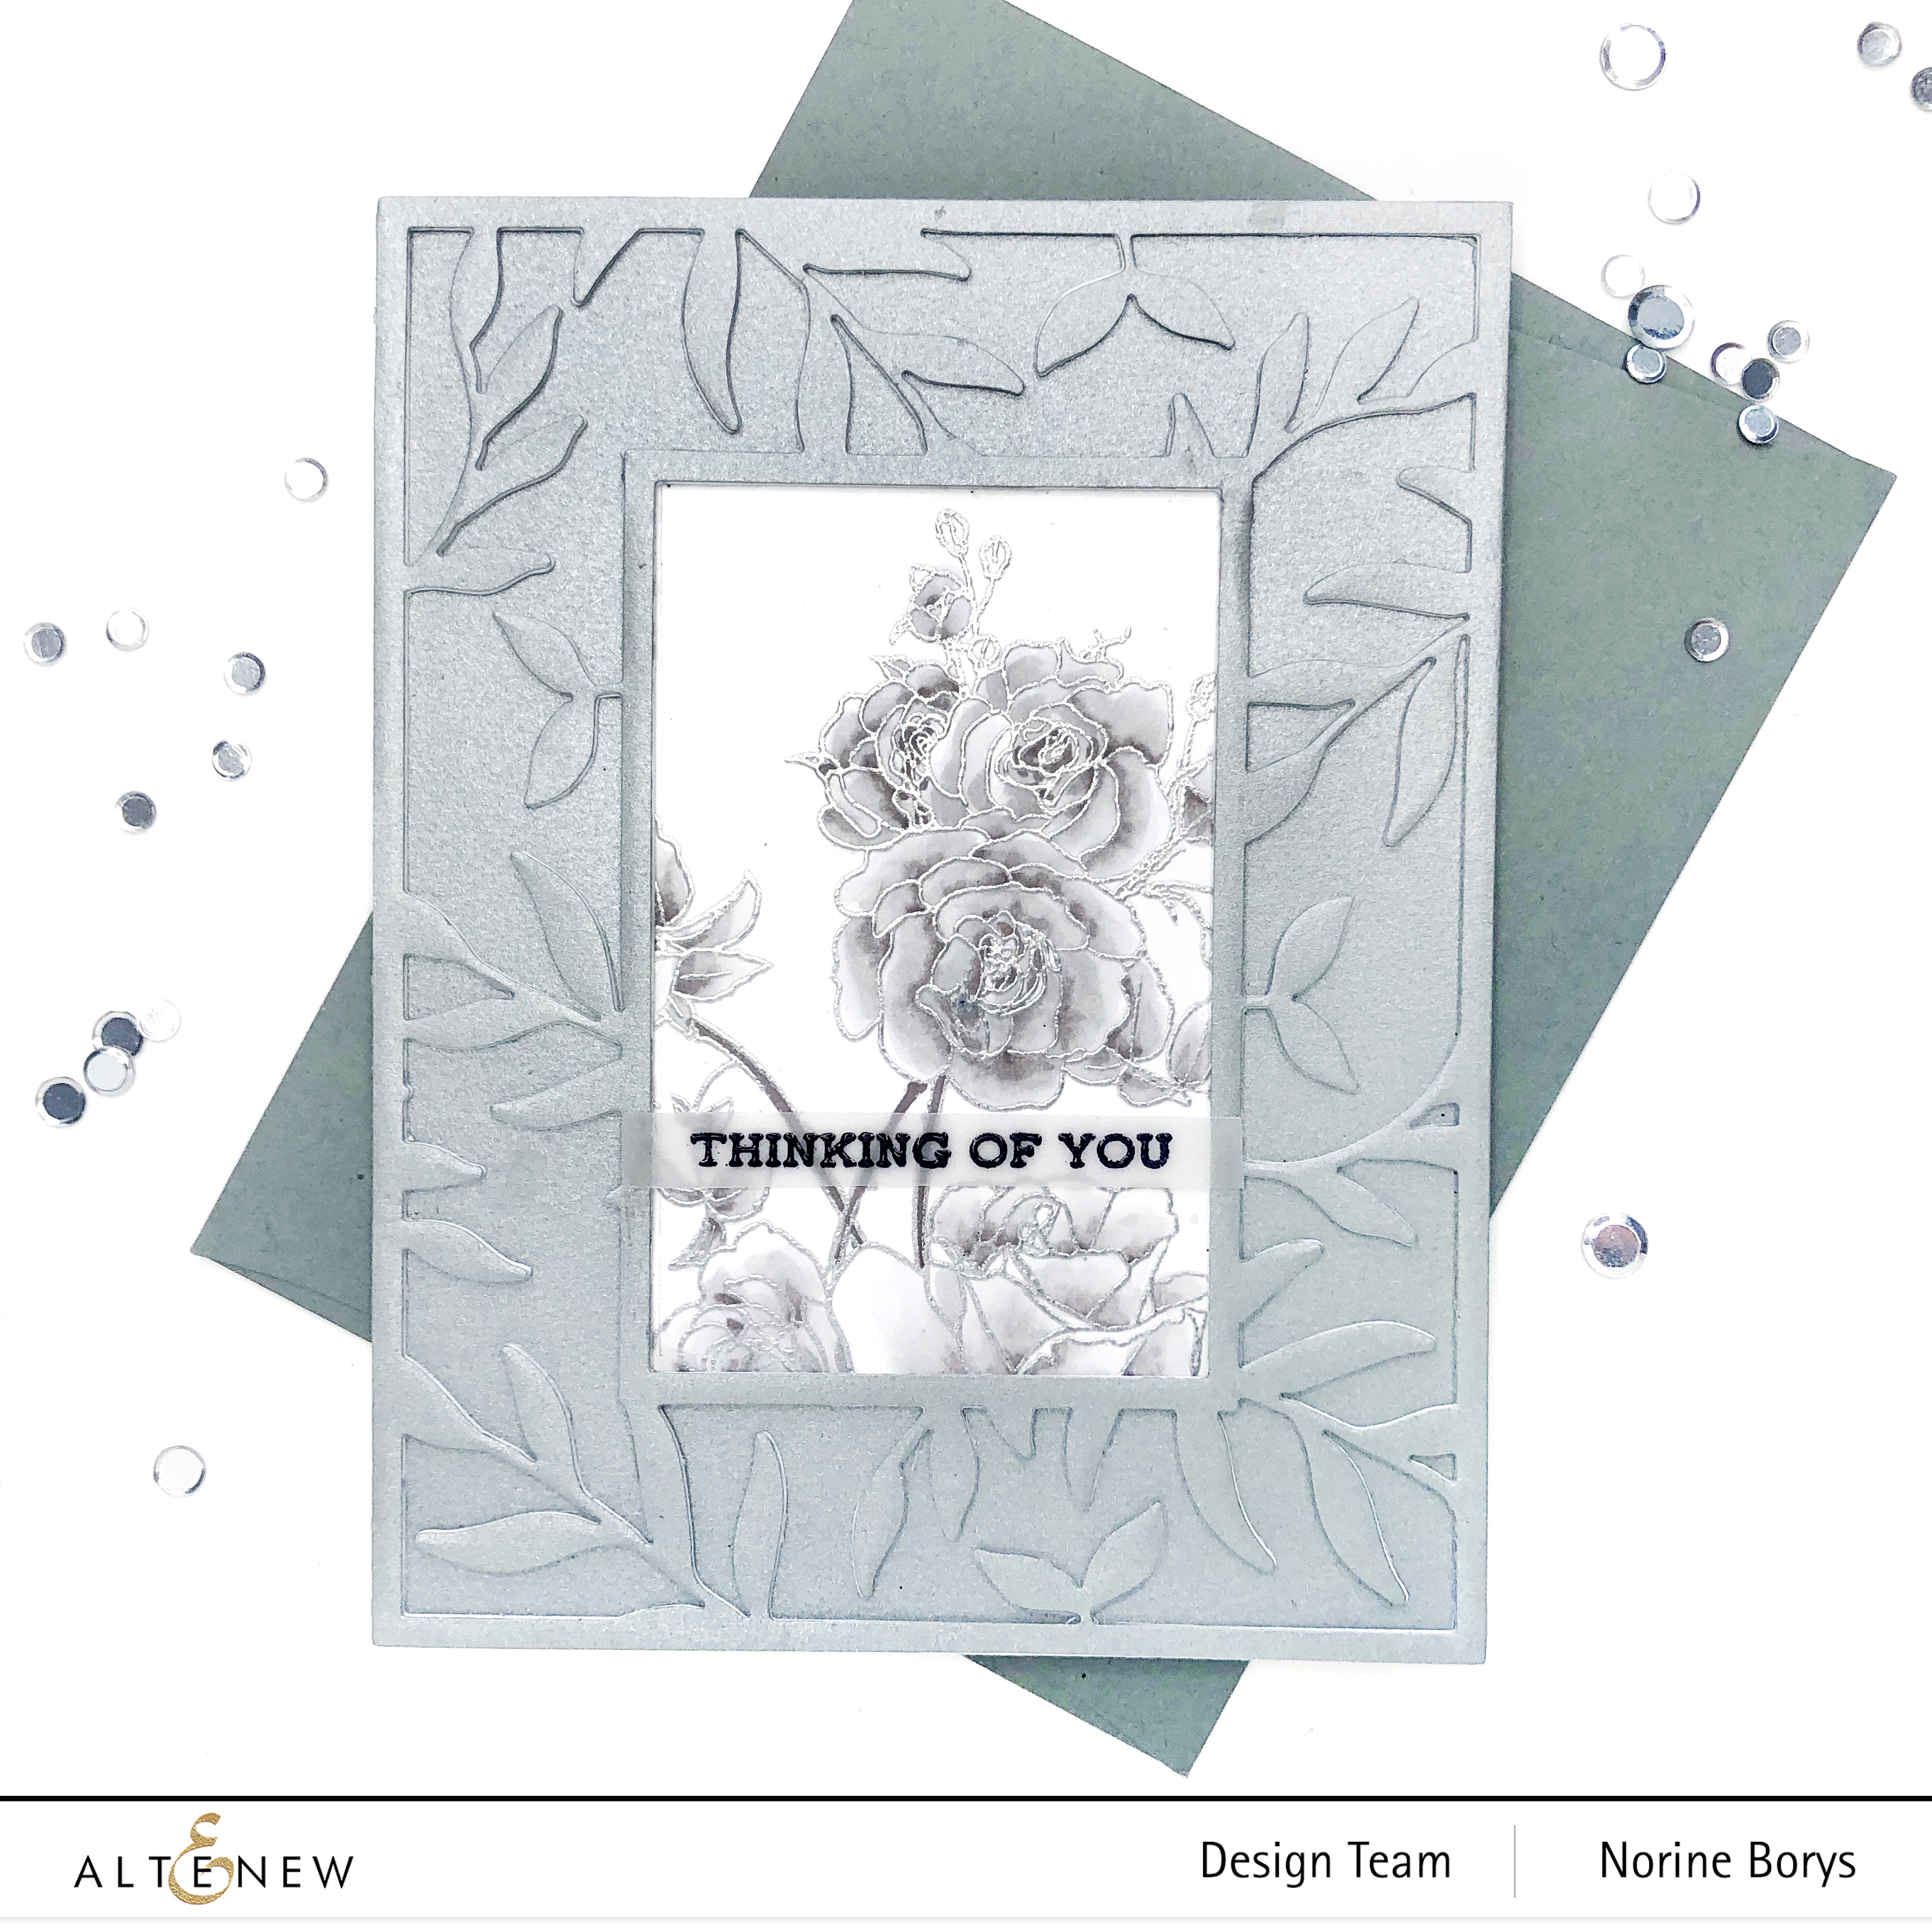
I wanted a very subtle tone-on-tone to offset the busyness of the card, so after stamping and coloring the flowers to match my metallic silver paper, I die cut the frame design with the Leaf Frame Cover Die and popped it up with two more layers of die cut cardstock underneath. Then I adhered the frame to the stamped and colored panel and all of that to another layer of the silver metallic paper. The sentiment for this card is from the Sentiment Strips stamp set and is stamped on a narrow strip of vellum paper.
Thanks so much for stopping by and have yourself a really good day!
SUPPLIES USED: