Hello, hi! I’m back again today with a variety of Love-themed cards for Technique Tuesday and to let you know about their promo running today until midnight January 24! 10% off all Love-themed stamp and die bundles, no code needed.
This post contains affiliate links listed below. Your clicking through to purchase products linked helps to support this blog at no additional cost to you and allows me to continue to provide you with creative inspiration and instructive help.

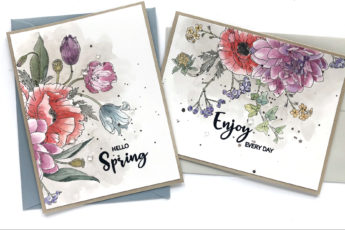
My first card is a stamped and brightly colored combo that doesn’t necessarily suggest Valentines; I actually think it would make a super cute engagement congrats card!

I began by stamping the hot-air ballon image, the “love” sentiment and the trio of hearts from the Love is in the Air stamp set onto Neenah white cardstock with Versafine Onyx Black ink and heat set with clear embossing powder.

I colored the balloon with Copic markers, then stamped the same image again onto masking paper and cut out just the balloon and the basket. I masked my colored balloon then ink-blended the clouds using a cloud stencil and Altenew Iceberg and Eastern Sky inks, covering the card panel from top to bottom. I positioned the cloud stencil so that I would leave the area around the hearts un-inked so that I wouldn’t have to fuss with heart masks that tiny!

COPICS USED:
Orange – YR04, YR12, YR21. Yellow – Y35, Y18, Y08, Y04. Green – YG17, YG23, YG25, TG01. Blue – B04, B02, B00. Red – RV29, RV25, RV23, RV21. Brown – E35, E34, E31, E30.
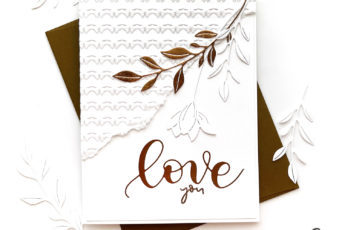
Next up, with one of my favorite dies this year, a Lacy Heart dimensional die cut card.

I made this card by die cutting the Lacy Heart Die 4 times with white cardstock, then stacking and gluing the layers together.

Next, I positioned the die in the center of an A2 sized card panel and die cut again, but then I kept the die-cut intact in the card panel by placing double sided tape on the back, covering the perimeter die cut line, and popping out the interior cut pieces.

Then I stamped and gold heat embossed the greeting from the Simply You 2.0 stamp set. I trimmed the card front slightly smaller on all 4 sides, and glued the stacked die cuts to the back of the card panel and filled in the rest of the back side with foam tape.

I cut a piece of pink cardstock a little larger than the heart die and adhered it to the back of the open, lacy heart. I covered a folded card base with an A2 sized piece of mirror gold foil paper, then adhered the card panel to the gold background card base. A few matching gold sequins finish the card.

Lastly, I have a card made with the Cascading Hearts Border Die. For this card I glued the red striped patterned paper to the front of a folded card base, then ran it through the die cutting machine with the Cascading Hearts Die.

From a second piece of plain white cardstock, I die cut the Cascading Hearts Border die again, and this time I colored the hearts with Copic markers in an “ombre” fashion, and adhered them to the inside of the card by lining them up with the open spaces in the front of the card.

That way they are perfectly lined up when the card is closed, but you can enjoy them on the inside of the card when it’s open. The greeting for this card is from the Love is in the Air stamp set and is stamped with black pigment ink and heat set with clear embossing powder.

COPICS USED: Reds – RV29, RV25, RV23, RV21
That’s it for me today! I hope you found some Valentine (or any love-occasion) ideas! Please head over to the Technique Tuesday page where you’ll find many more products than I’ve shown you here today!
Thanks for stopping by and have a wonderful day!
SUPPLIES USED: