Hi, hello! It’s been quiet over here, hasn’t it? We’ve been enjoying some travel (to Wisconsin for the annual airshow) (which my girlfriend and I turned into a crafty retreat (more on that soon!) while our husbands turned into aviation nerds), and some fantastic time at our summer cottage, both with family and by ourselves!

But it hasn’t been all books, boats and bears. (Actually no bears this year at all, thank goodness). I’ve been getting some paper crafting in as well!
Today I have my July Greeting Farm card projects to share with you, made using mainly the With Love stamp set, as well as a couple of other sets for the sentiments. I have three cards made with this one set and I tell you I had to make myself stop with just three! So MANY cute ways to use this stamp set!

I did all the stamping for these cards onto Neenah Solar White cardstock with Memento Tuxedo black ink and colored everything with Copic markers.

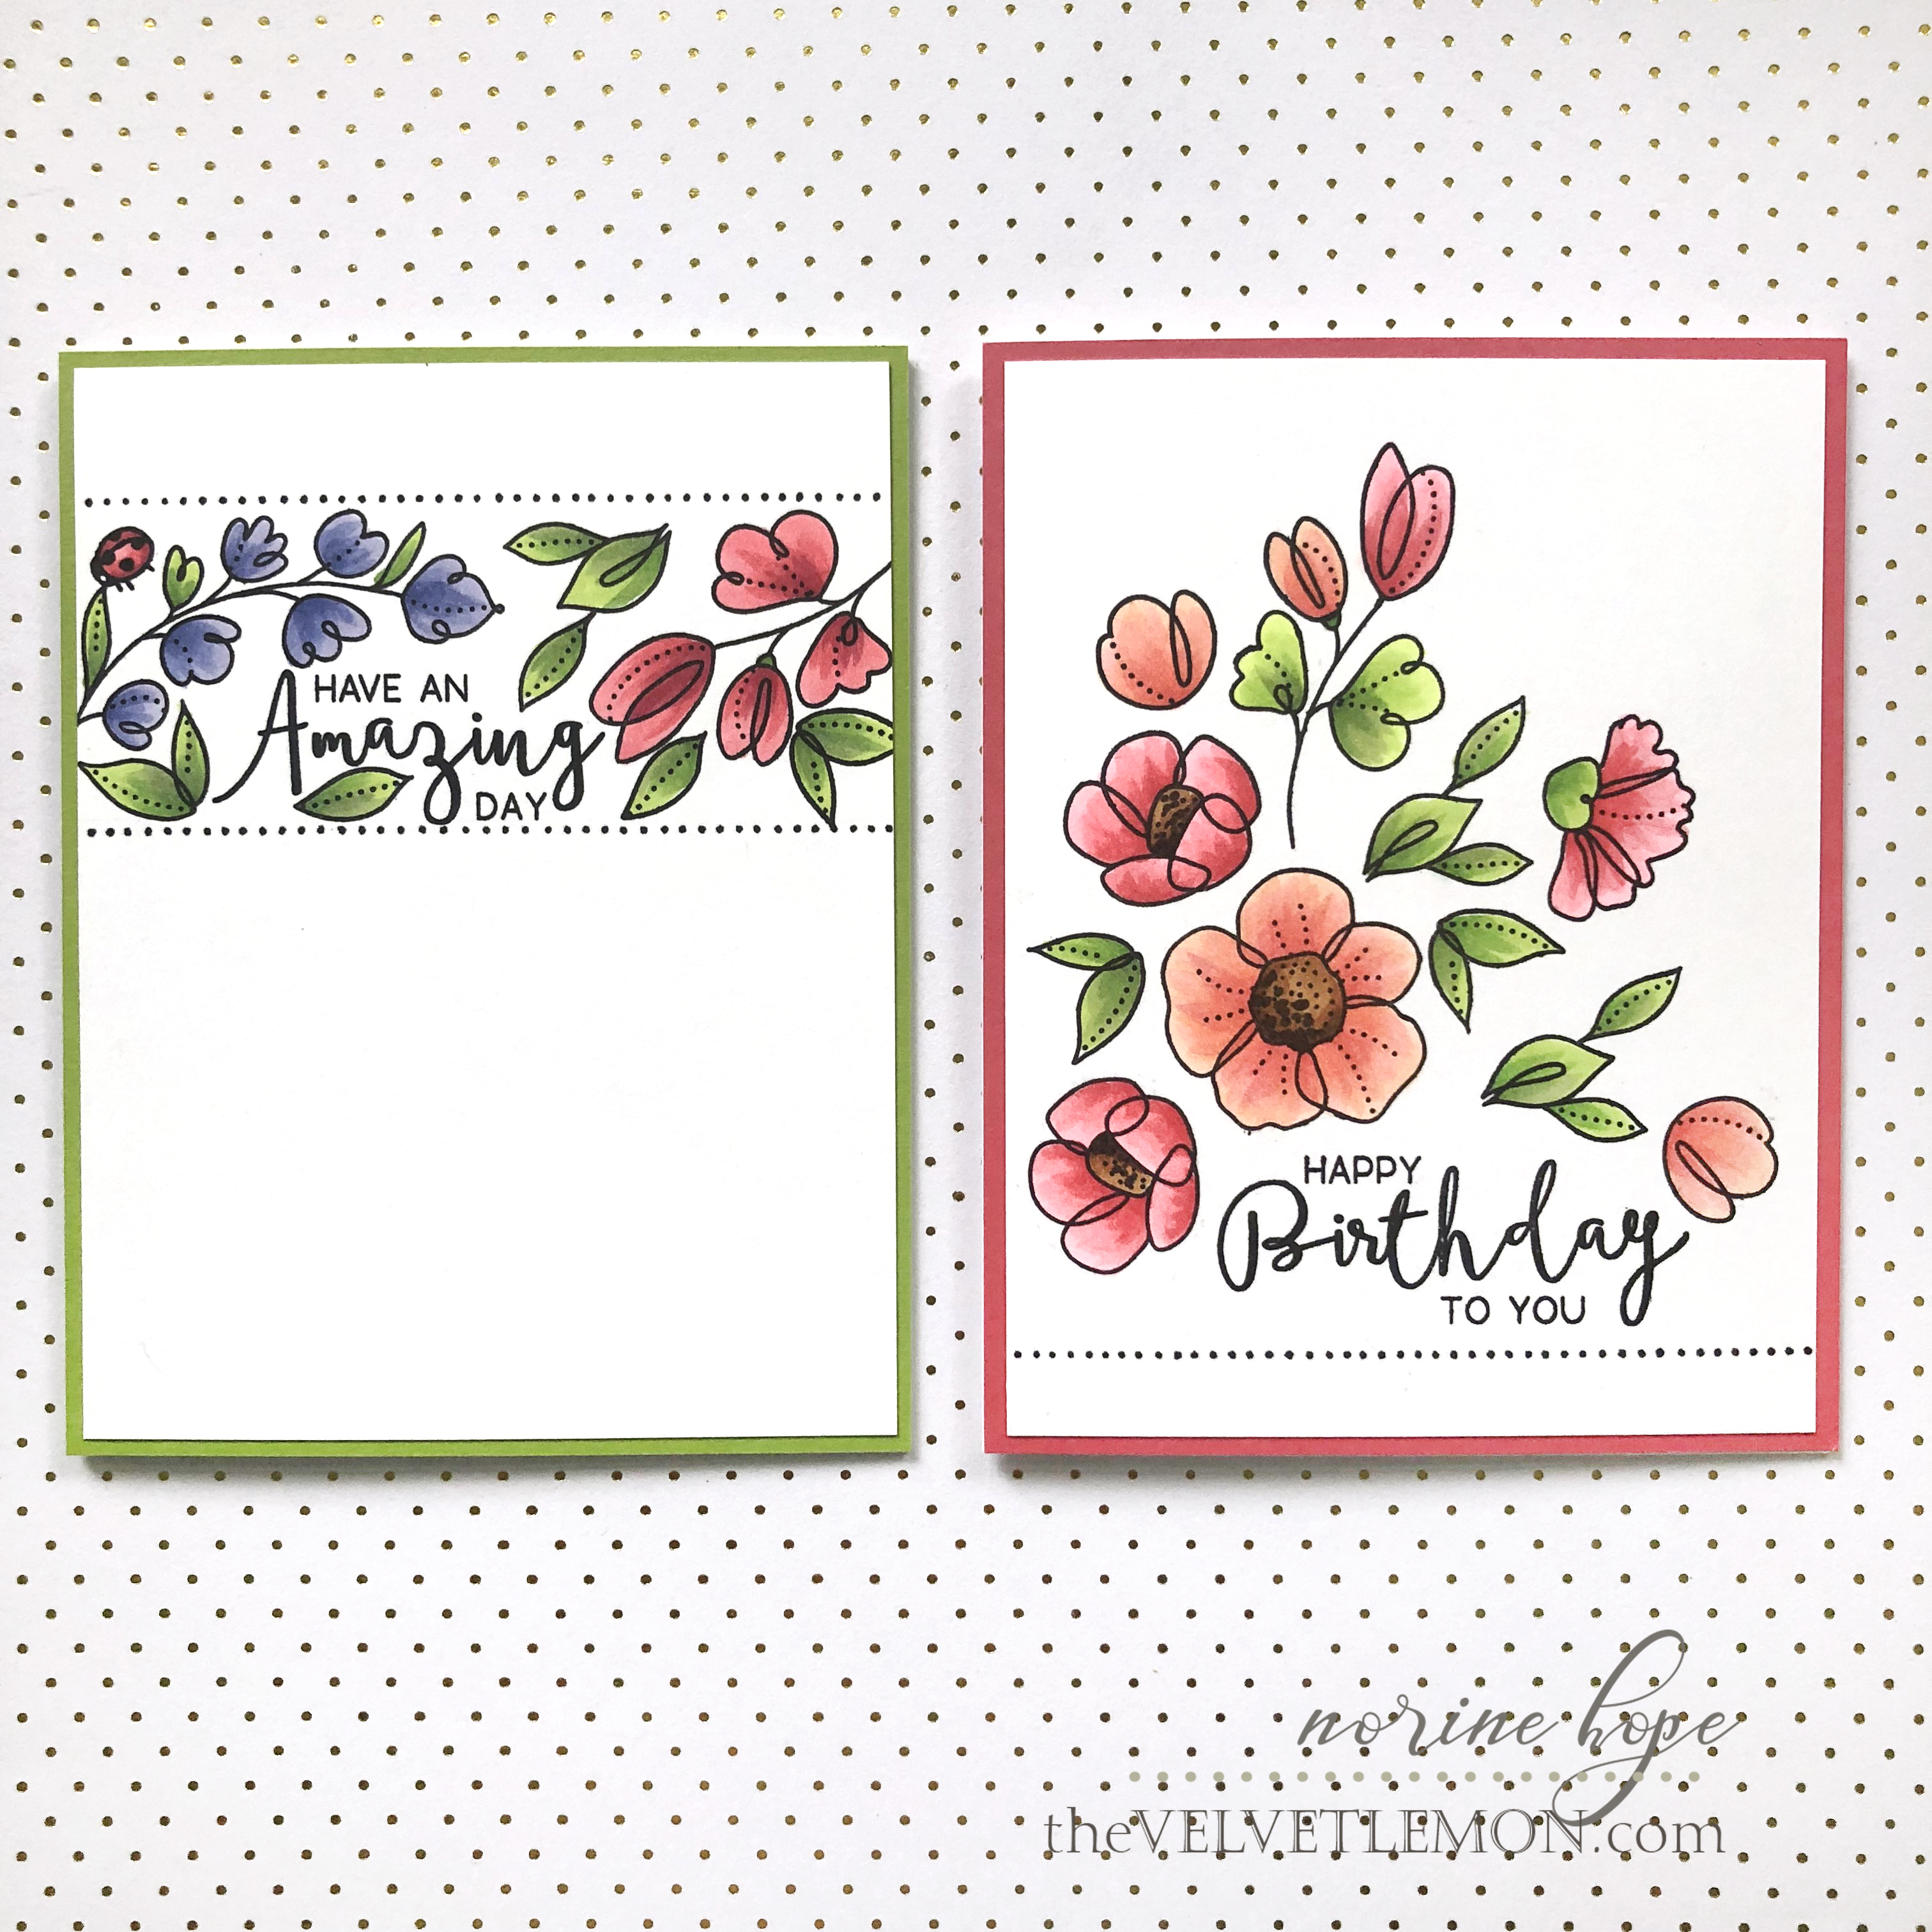
For the first card, I lightly drew two pencil lines to give myself a border to work within, then laid the individual stamps inside those lines, and stamping with the Tim Holtz stamping platform (on sale right now at Scrapbook.com!). I put the sentiment (from the Greeting Farm – Say Bday stamp set) where I wanted it first, then added the branches and leaves around that.

And happily, where I had a small gap that needed a little somethin’ somethin’, there was a perfectly sized little lady bug stamp! Once I had colored in all the images, and erased the pencil lines, I felt like it needed a little more for definition so I laid my T-square ruler along the design, above and below and drew a dotted line with a Copic Multi-liner pen (0.5 size tip).

The next card uses many of the same stamps used above, plus more of the blooms. While I can easily justify the effort required to cut and mask stamped images to layer and “build” a bouquet, I do really love creating the impression of a bouquet where none of the elements touch another.

I placed the largest bloom image first, then the sentiment (again from the Say Bday set), then added the others around to give it the peaked bouquet shape.

I colored in all the images and then decided to give this card panel a dotted line to match the first card. I trimmed the edges of the card panel by 1/8th” on all sides and mounted it on a coordinating cardstock base. And let it be noted! Neither of these cards has any enamel dots embellishments! See, it IS possible!

The last card for today is another CAS card with just three little stamped images, combined with a sentiment and die cut with a Lawn Fawn stitched square die for definition. The sentiment on this card is one from the You stamp set – another fun collection that will see repeated use!

It might be hard to see, but I’ve added a little of the pink/red Copic color used on the bud, in the leaves as well. I like the way that adds a measure of “reality” to the coloration as well as coordinates the bloom and leaves overall.

As well as die cutting the stamped square, I also die cut a piece of pink fun foam that matches the colors used on the card. When you stack them up and adhere them to the card front, the colored foam isn’t visible straight on, but is a fun little surprise when viewed from the side!

Thanks for stopping by and enjoy the rest of your day! I’ll have another post soon with a watercolored version of these stamps, so check back for that!