Hey there, hi there, it’s a double post day, starting off with Day 1 of The Greetery’s Merry Makings reveal blog hop! (If you’re looking for the Altenew Simple Roses post, you can find that here.) You should be arriving here from Kelly’s blog, and if you’ve landed here in the middle of the hop, the complete list is at the end of this post for you to click through.
Today’s reveal includes:
- Written in Ribbons Holiday stamp and die
- Merry Sprigs stamp and die
- Wood Slices die
- Banner & Bough stamp + stencil and die

My first two cards today are created using everything listed above except the Wood Slices Die, but if you keep scrolling you’ll see that showcased further down.

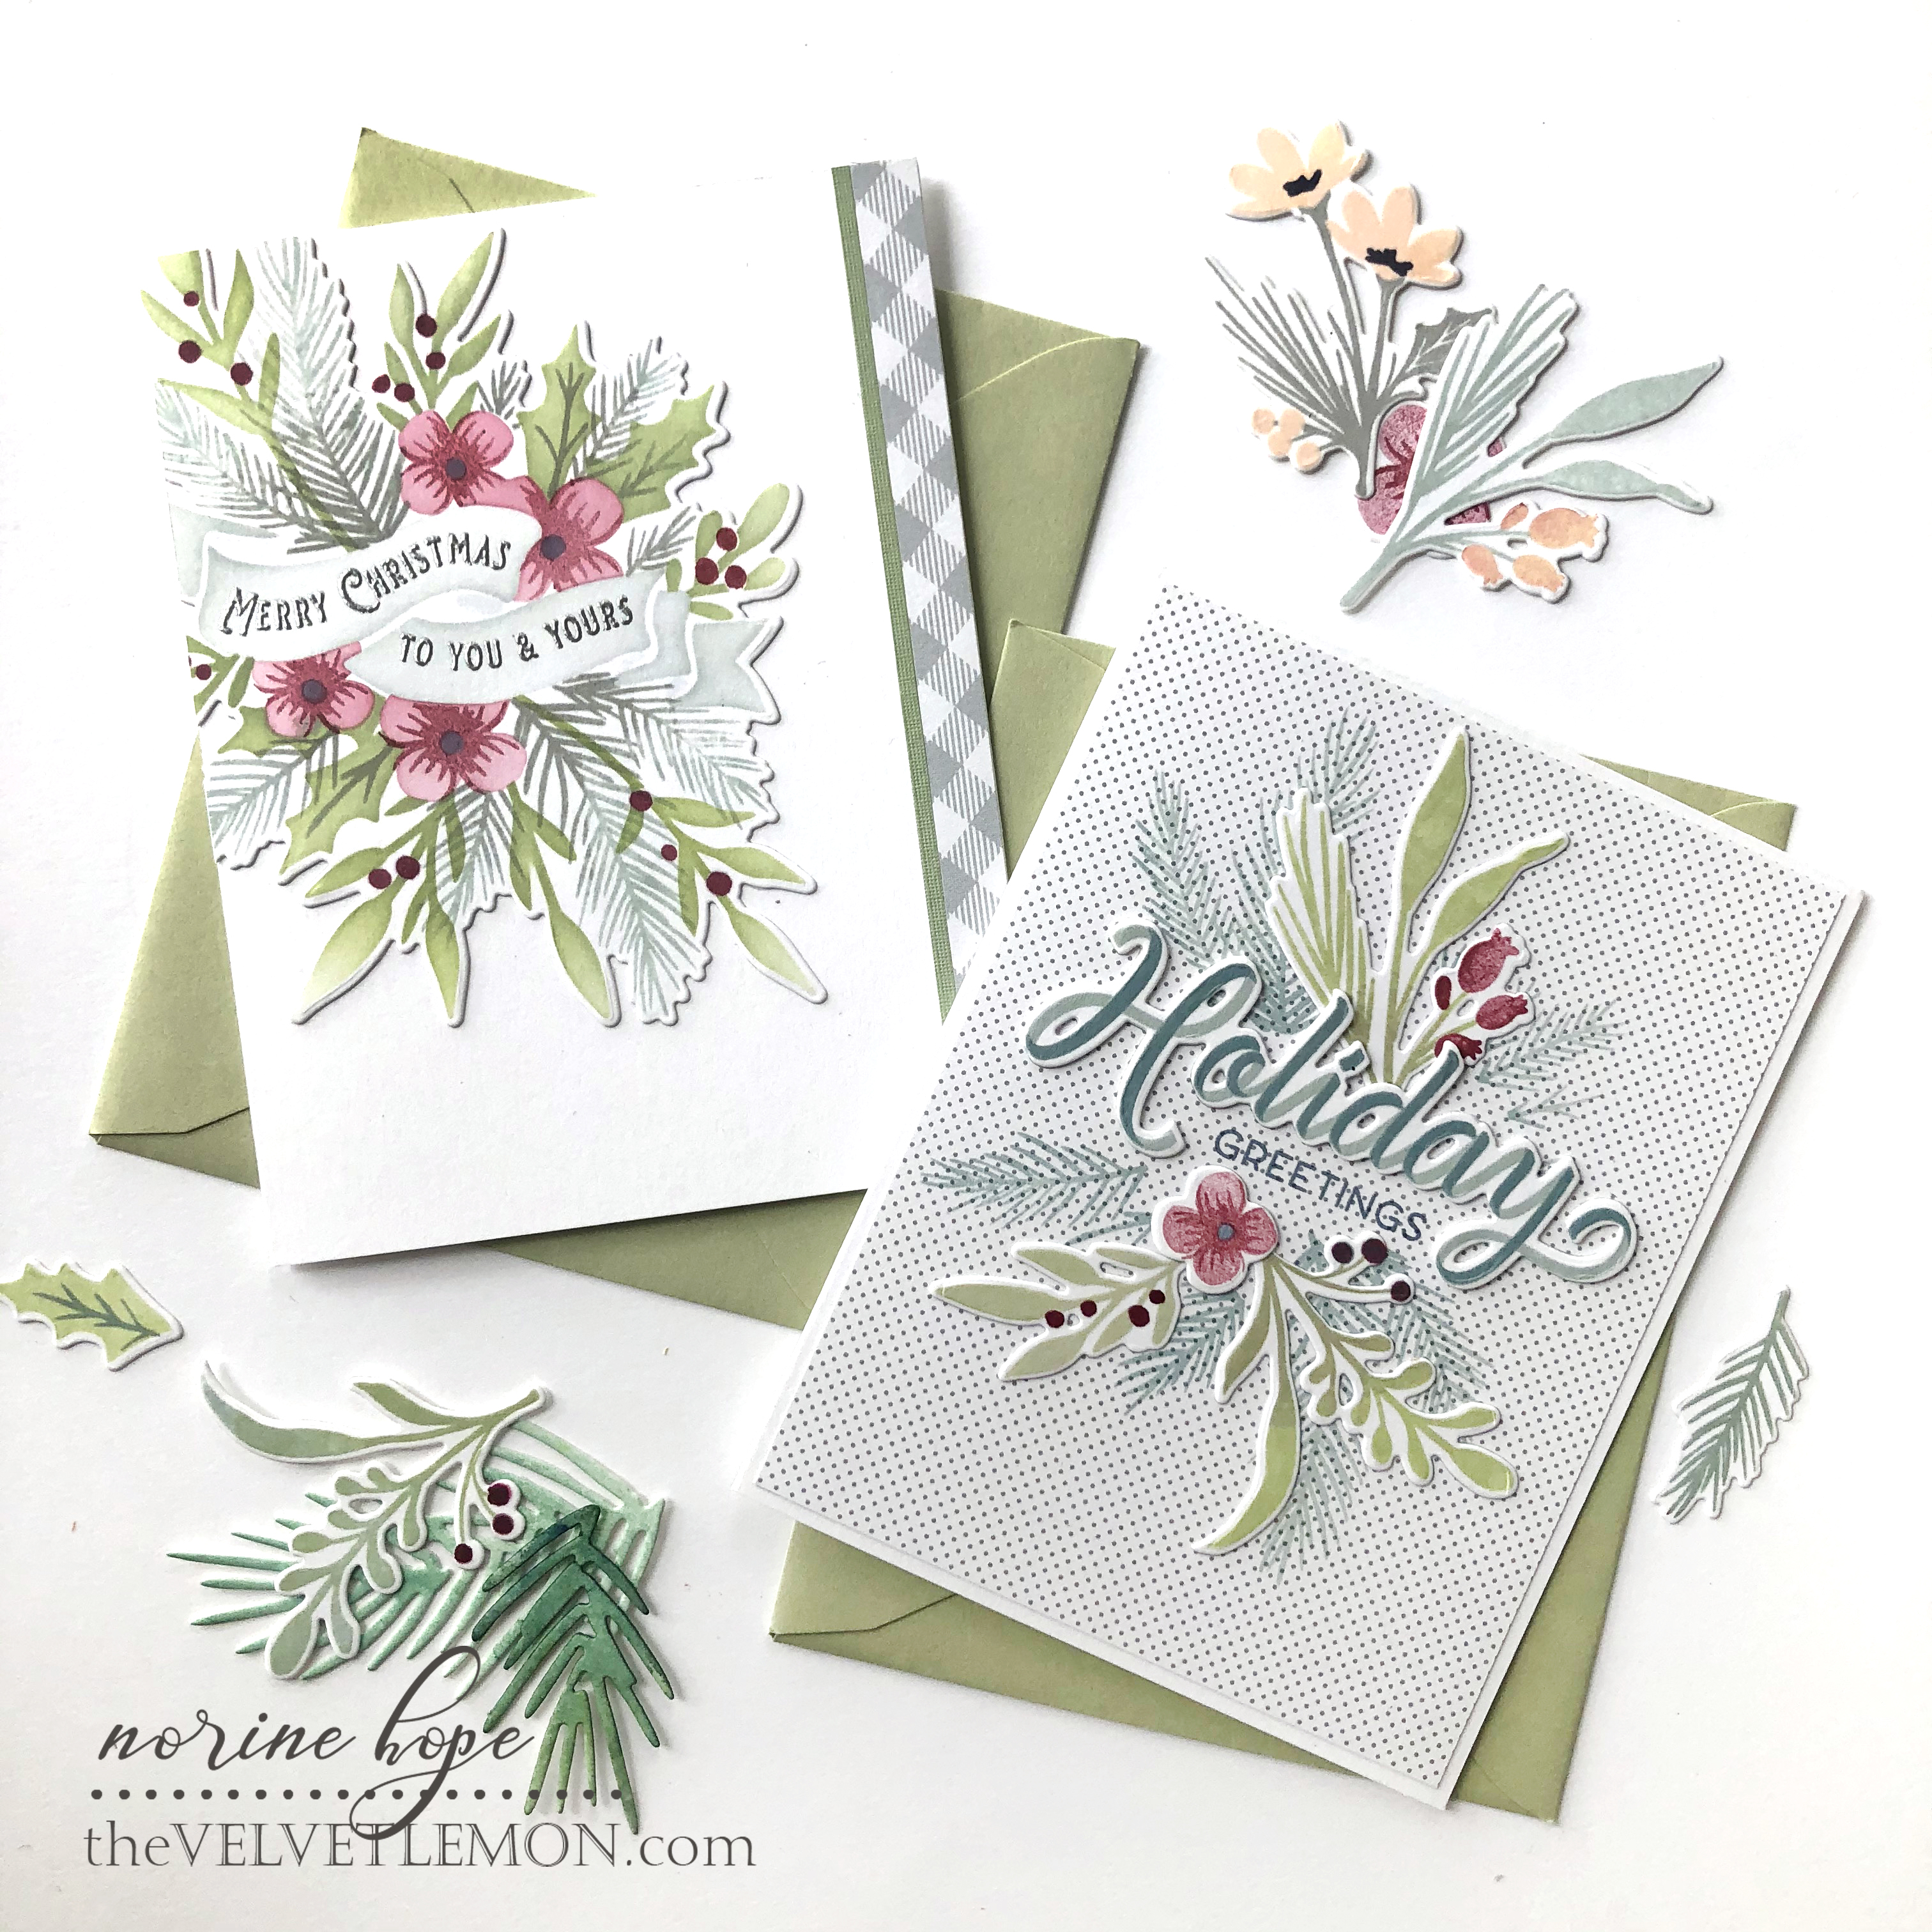
Card #1 features the Banner and Bough Stamp, Stencil and Die. I began by stenciling the banner in Misty Morning ink. Then I filled in the boughs with the stamps, layering with the Tranquility color family for the pines, Frayed Leaf and Moss for the leaves and the Red Cosmos color family for the flowers and berries.

The Banner & Bough stamp set includes 3 choices of greetings that perfectly fit the banner, and for this card, I chose Merry Christmas to You and Yours. I stamped with clear embossing ink and heat set with silver embossing powder. Then I used the coordinating die to die cut the complete stamped image.

I positioned the stamped die cut offset on the folded card base and added a strip of patterned paper and another of cardstock along the right side to balance the whole.

My next card features the latest in the Written in Ribbons greeting stamp sets – this one Holiday themed. I stamped the layers of the “Holiday” greeting with Misty Morning and Nimbus inks in the Tranquility color family from Altenew. Then I die cut it, plus another layer and stacked them together for a “low profile” stacked die cut greeting.

I found some beautifully subtle dotted patterned paper in my stash and stamped only the pine needles layer of the Banner & Bough stamps. Next, I stamped a variety of the floral branches in the Merry Sprigs stamp set, die cutting them afterwards. I used the same ink colors as the card above for the leaves, flowers and berries.

After placing the Holiday die cut where I wanted it to be, I could stamp the “greetings” word in the space between the word and sprigs die cuts.

Next up are a couple of gift tags made using the Wood Slices dies. I. Love. This. Set! There are two sizes, (I’ve used the larger one for these tags) and they make such a cool, holiday/woodsy/fall/outdoorsy themed die cut perfect for so many different uses and purposes.

For this tag, I used the banner stencil and die cut to make the greeting, much the same as on my first card, using the Misty Morning ink to stencil and Nimbus ink to stamp the greeting. Then I arranged a couple of the Merry Sprigs die cuts along with some pine boughs from last year’s botanicuts release – Pine Bough Die.

For the second tag, I used the same banner greeting along with the pine cones and pine branches from the Pine Bough Die set. I die cut the pine cones from kraft cardstock and accented the edges and shadows with dark brown ink.

For each of the wood slices, I die cut the inner circle from white cardstock and the outer ring layer from brown card stock. Then I inked the edges with brown ink to mimic the look of real wood and to add definition to the circle lines impressed in the paper.
Preparing for cold fall days, my husband has been busy felling dead wood in the bush around our cottage, and splitting them for future use. He is nearing 4 cords of wood so far this year! Some of the trees that have had to come down (before they take out our cottage) are 150 years old or more, so I feel particularly aware of tree rings and the need to pay tribute to them!

Each of the wood slice tags has a backing layer die cut and adhered to the back to cover the layers on the front and to provide a place for the “to:” and “from:”. To finish the tags, I punched a hole through all 3 layers and ran some butcher’s twine and gold thread or jute cord through the holes and tied them up.
Your next stop on the hop is Wanda’s blog. The complete blog hop list is below. Remember to leave a comment on each of the stops for a chance to have your name/comment drawn to win a $50 gift card for the Day 1 blog hop. Winners will be announced Friday morning when the release goes live in the store.
Participating blog links:
Thank you so much for stopping by and have a wonderful day!