
Hey, hi! Y’all know how much I love florals, but today I have something to share that’s a little different from my typical floral cards! I have always loved the bright, cheery, bold style of Mary Engelbreit, and that’s what I was trying to create here.

I have a blog post up at Altenew today with all the how-to details which I’ll outline very briefly here, so click on over to the Altenew Card Blog for more in depth instructions.

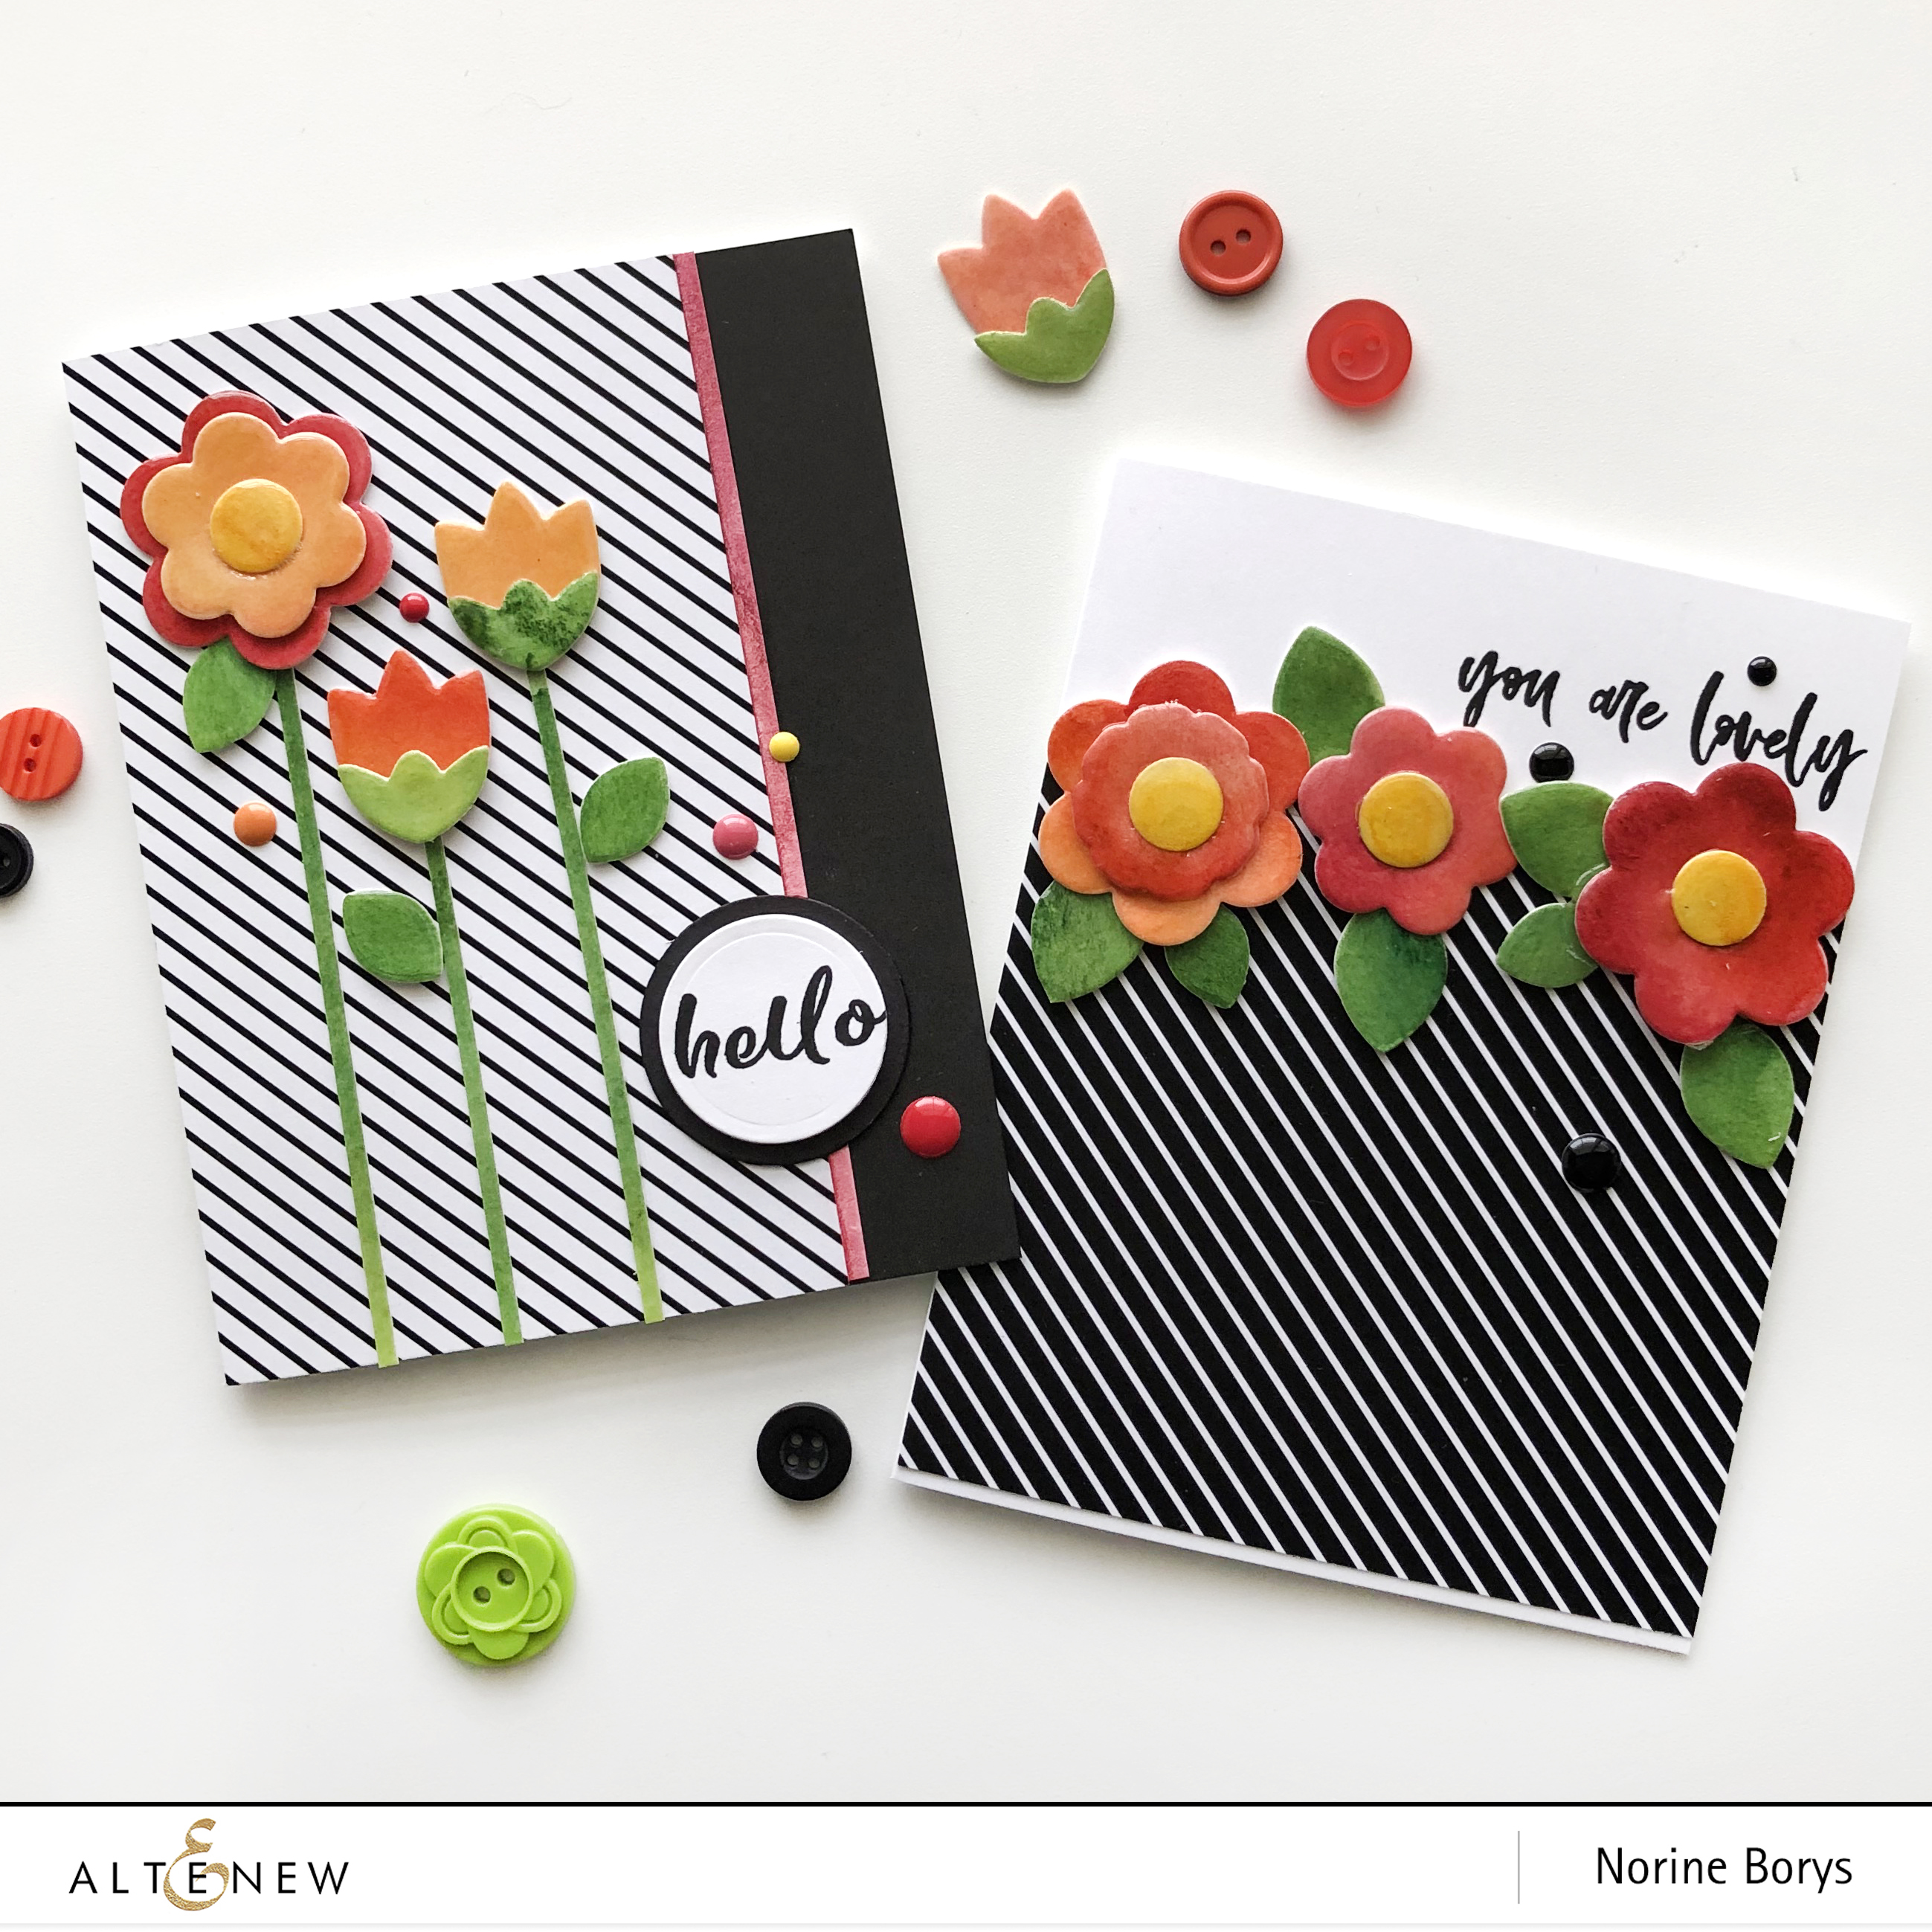
I started with these three watercolor painted sheets of watercolor paper. I die cut an assortment of the die shapes that correspond to the Folksy Floral Stamp & Die Bundle. After some extensive trial and error, I came up with the best way to make these fun designs.

I assembled little clusters of die cut petals, flower centers and leaves, and used good strong Be Creative tape to make sure they were well adhered. Then I folded a long strip of card stock in half lengthwise to make it sturdy, then used temporary adhesive to stick the flower clusters to the end. I smooshed my embossing ink all over the entire flower cluster and then covered it with Ultra Thick Embossing Enamel. I heat embossed until the crystals were melted and thickly covering the entire surface of the flower and leaves. While still hot, I sprinkled on a 2nd layer of UTEE and heated that too. Then I set the flower cluster aside to cool.


While they cooled, I assembled my card bases using paper from the Altenew Essential Black & White paper pad. I stamped sentiments from the Inked Rose Stamp set then added the flowers to the card fronts, again using strong Be Creative Tape. For the card above, I cut very narrow strips of the same green painted paper, clear heat embossed them and adhered them with liquid adhesive to be the stems for the flowers. I die cut the sentiment with a circle and added a mat of black cardstock behind it and finally some enamel dots to complete the card.
For the 1st card shown above, I stamped the sentiment directly onto the card base, then adhered three of the flower clusters to cover the edge of the patterned paper and finished with a few black enamel dots.
Handling the melted enamel flower clusters while assembling the cards left dull finger-print covered surfaces, so once the cards were finished I briefly heated the flowers again with the heat tool to re-melt the enamel and restore that fun glossy surface.

I love this bold, graphic style and I love to try new techniques (like the UTEE I forgot I even had!) and I hope you’re inspired to try something fun like this too! Have a wonderful day and thank you for stopping by!