Hello, friends, I’m back again for Day 2 of the Let’s Make Memories Holiday Collection reveal from The Greetery! Today’s projects are unbelievably cute!! (Well, I think they are, I hope you agree!) Be sure to check out more projects on The Greetery’s blog as well as at each of the contributing design team member’s blogs. (List below)
We’ve got a bit of a van theme going on…and yes, there is a Holiday Collection connection, but I did also go off on a tangent! I love product that can easily do double duty as what it was designed for but for other occasions as well.
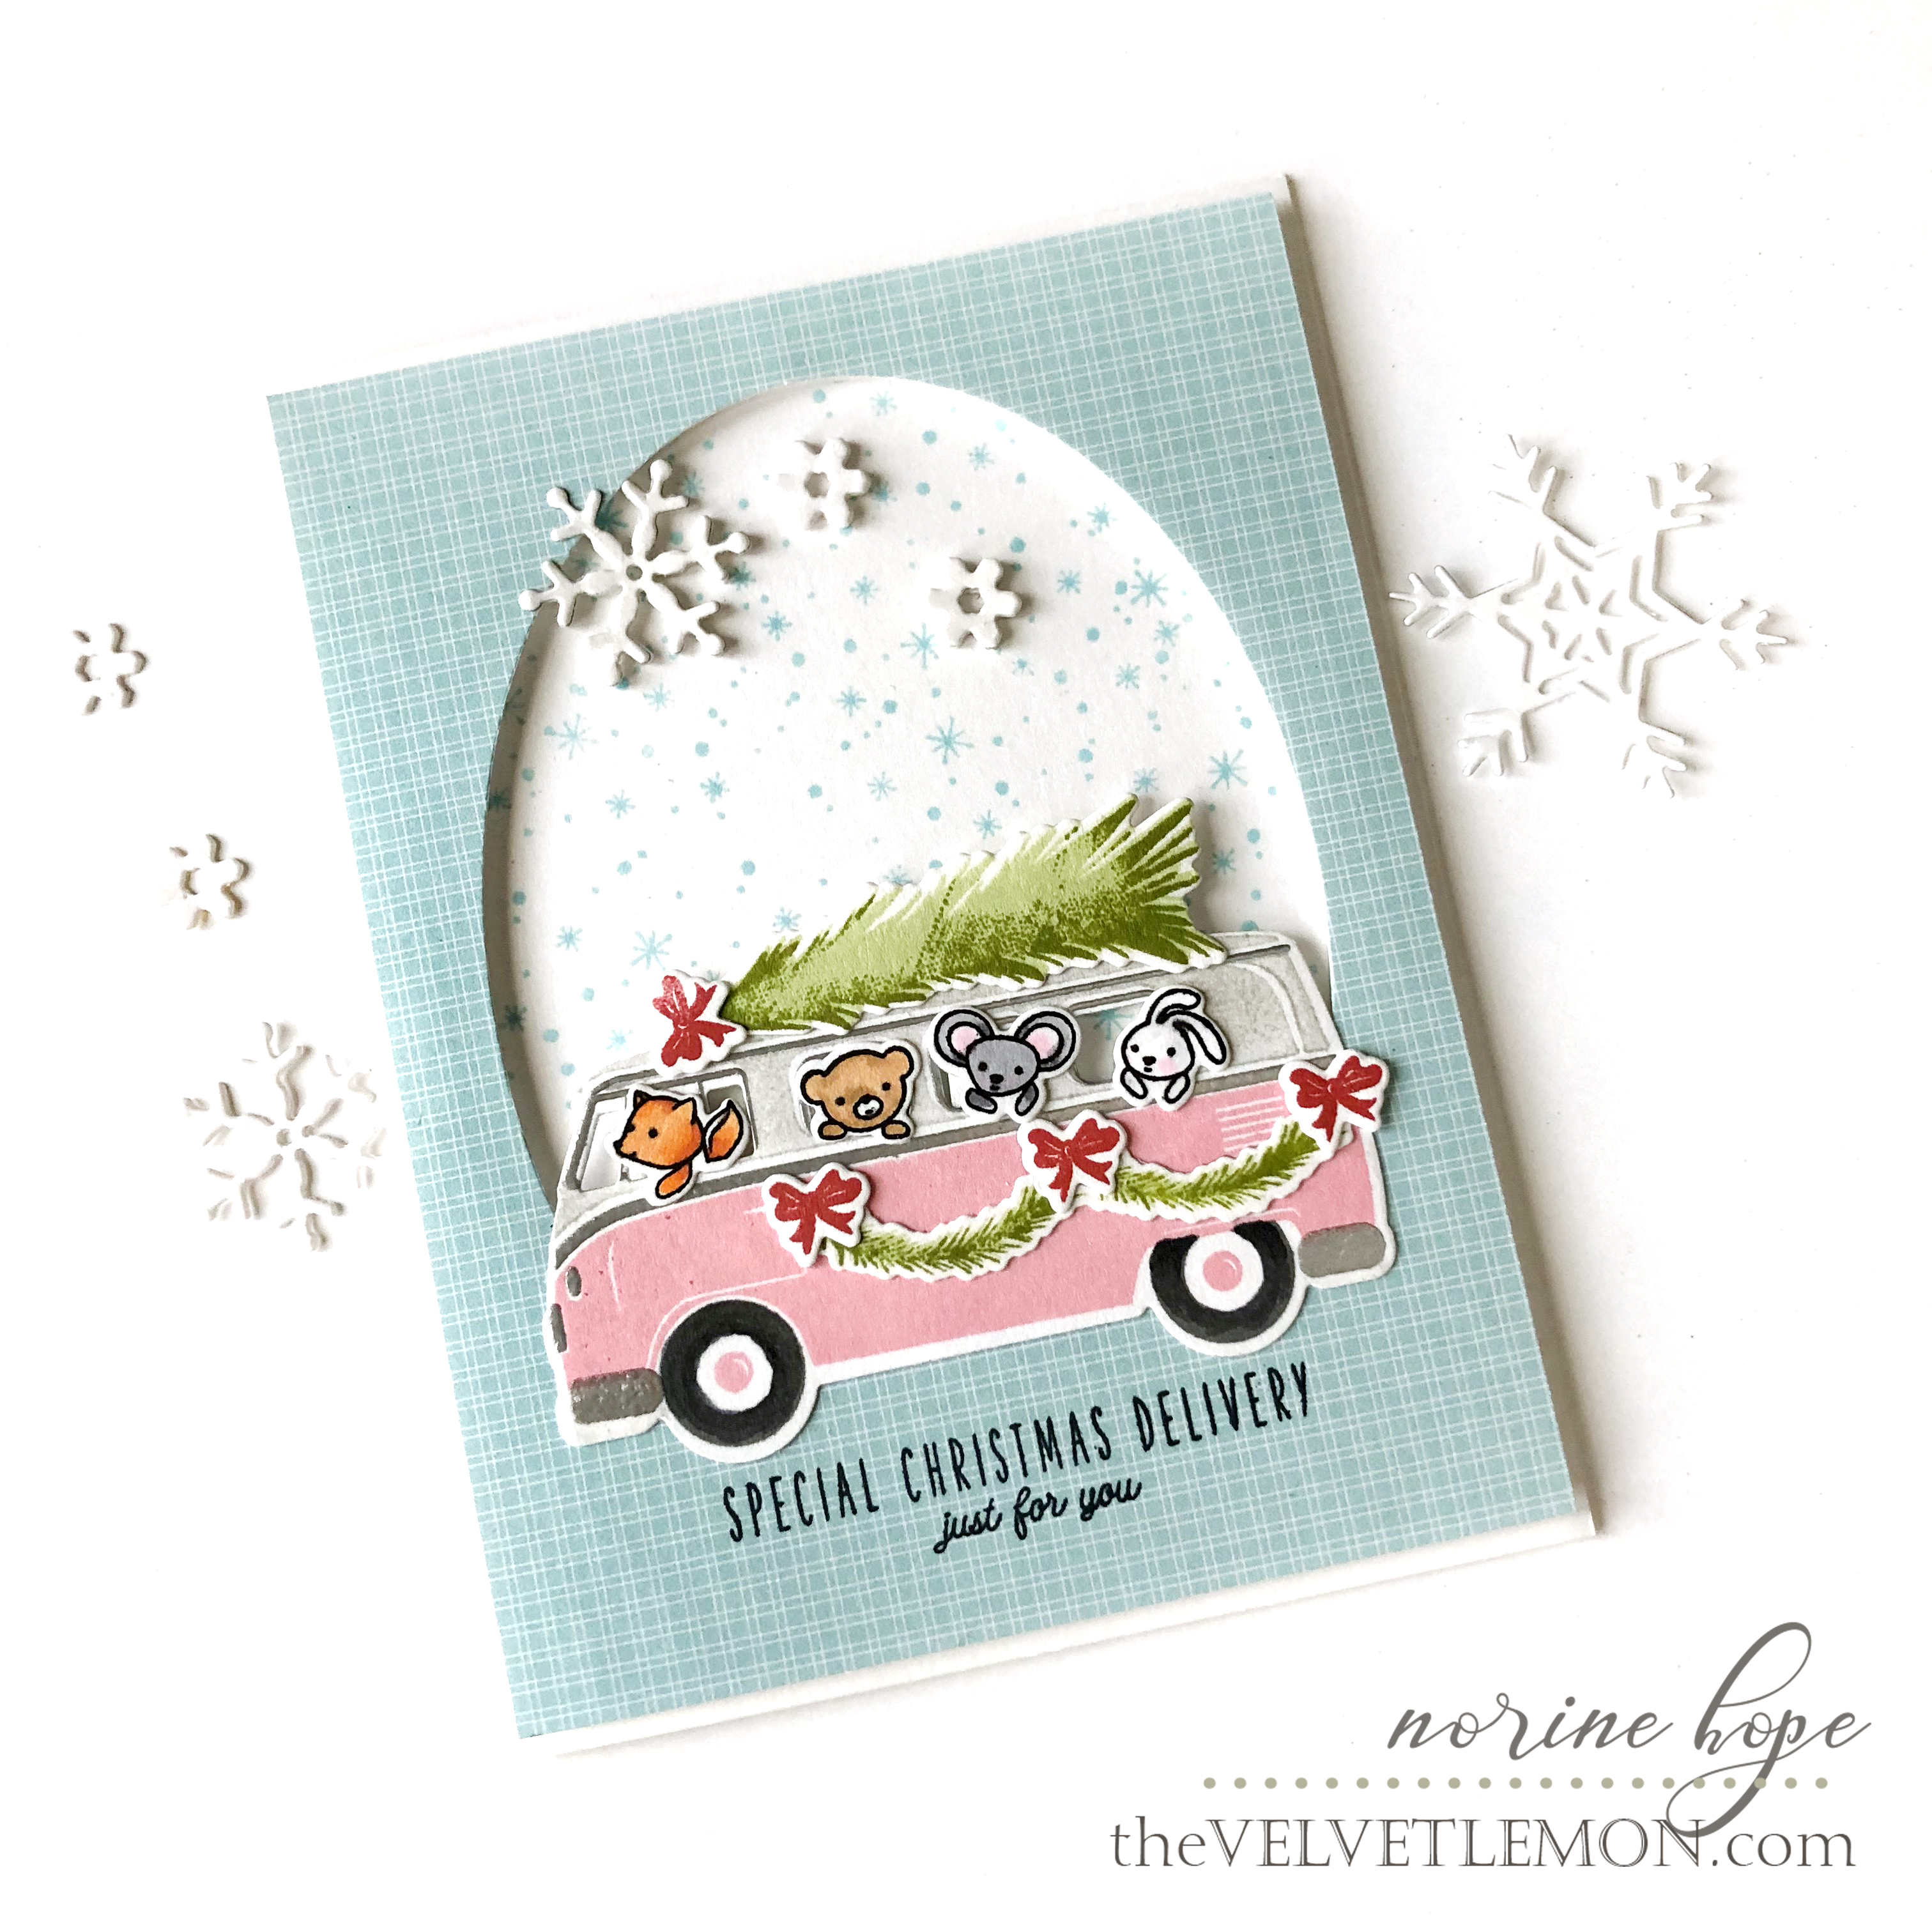
To begin, let me show you a card I made with the Christmas Care-A-Van! There’s a wonderful back story to this set. The tagline at The Greetery is “where making and giving meet”. With the desire to extend that motto from the company level to include the customer and artist, every Care-A-Van stamp set sold will give back $3 to the worthy cause, Operation Christmas Child!

I built the little Caravan scene with the layers of the van itself in the Christmas Caravan stamp set, adding additional elements like the pine bough swag, the red bows, the tree up top and the cute little passengers!

I stamped the van with Altenew inks. The van stamp layers consist of the top of the van which I stamped in pale gray, and the bottom of the van – I opted for vintage pink – and the “metal” layer – bumpers, window trims and metal strips, which I stamped and heat embossed with silver embossing powder for an authentic look. After stamping, I die cut each piece with the coordinating die set and adhered all the pieces together.

Next, I die cut an oval opening from some blue patterned paper, using the partial die cutting technique so that I had the oval shape at the top but cut off square along the bottom where the van sits. I backed the opening with a snowflake stamped background from the Care-A-Van stamp set, then popped up the blue frame with fun foam. Then sentiment is one of several cute and varied choices from this set.

I also die cut several layers of cardstock snowflakes from the Frosty Corners die set that I shared yesterday, stacked them together and adhered them to the card frame and background.
And if that isn’t cute enough….!!
Today’s reveal includes a 3-D die cut and foldable, treat carrying, Happy Hippie Van!! I did make one in a Holiday theme, in keeping with the release and other projects created with this release, but keep reading for the vintage, 60’s, pastel colored hippie vans covered in mod flowers!


Here is what the die cut pieces look like before you assemble them. The main die set comes with all the dies for the little pieces, the windows, lights, bumpers, wheel caps, etc. There is also a coordinating die set to cut the portions that are colored red in the photo above, but to provide a more economical option, there is also a stencil you can use to ink blend the color on as I did for all my vans.

I colored the windows with Copic markers and I used a Liquid Chrome Molotow marker to color all the shiny silver parts. The chrome ink goes on SOOO shiny – I wish it stayed that way, but it does dull back as it dries. I added the little tree and wreath from some Hobby Lobby supplies.

However, as I thought about hippie vans and what I remember (very vaguely) from the 60’s, (I wasn’t even born yet! Ok, I was, but only just!) I couldn’t get away from the vibrantly and happily painted vintages vans from the Love Ins and music festivals. So that’s what I made next!

First off, please forgive my makeshift “beach scene” that had to suffice inside my underlit little apartment on a drizzly day. Also, if I were only making one little van I would definitely stamp the little passengers from the Christmas Care-A-Van stamp set in the little windows. Next time.

So, why three little vans? Well, I made the mistake of assembling my first prototype outside on the front step whilst visiting with the neighbor children who instantly expressed the necessity of owning one of these for each of themselves!!


Ok, but wait! Here’s the best part!

The back hatch opens and the little van becomes a cute little treat box! The treats I am enclosing in these little vans are Sunny Seeds and they come in the size of container (a little larger than a TicTac box) perfectly proportioned to store inside the van!

To create the floral decorations for the vans, I used the Blooming Wave die and cut several sets of flowers which I then colored with Copic markers and adhered to the vans.

Some helpful tips. Do everything you plan to do on the outside of the vans before you fold them up and glue them together. It’s just easier. I used liquid adhesive to glue the flaps and tabs and find they are sticking very well.

One thing I proved while the kids played with the prototype, is if this is intended for kids, the back flap could use a little reinforcing. If it’s just going to be a decor piece and left untouched, it’s fine as is. I just adhered two narrow strips of 110 lb cardstock over the corner folds. I also colored the inside of the tires because I didn’t like seeing them uncolored after the vans were assembled.

See how cute they are at the actual beach??

As I mentioned earlier, please visit The Greetery blog where all the stamp and die images are posted so you can see all the possibilities. And don’t forget that leaving a comment on The Greetery blog and on each of the Inspiration Team’s blogs is an additional chance to win a $50 Greetery Gift Card! Comments close at midnight Thurs, Oct 3 and the winners will be announced Fri, Oct 4 at 7 am! Friday at 10 am ET the entire collection is live in the store and you can go shopping!! Below is the complete list of team members participating today.
Norine Borys – you are here!
Thanks for visiting today and enjoy the rest of the reveal!