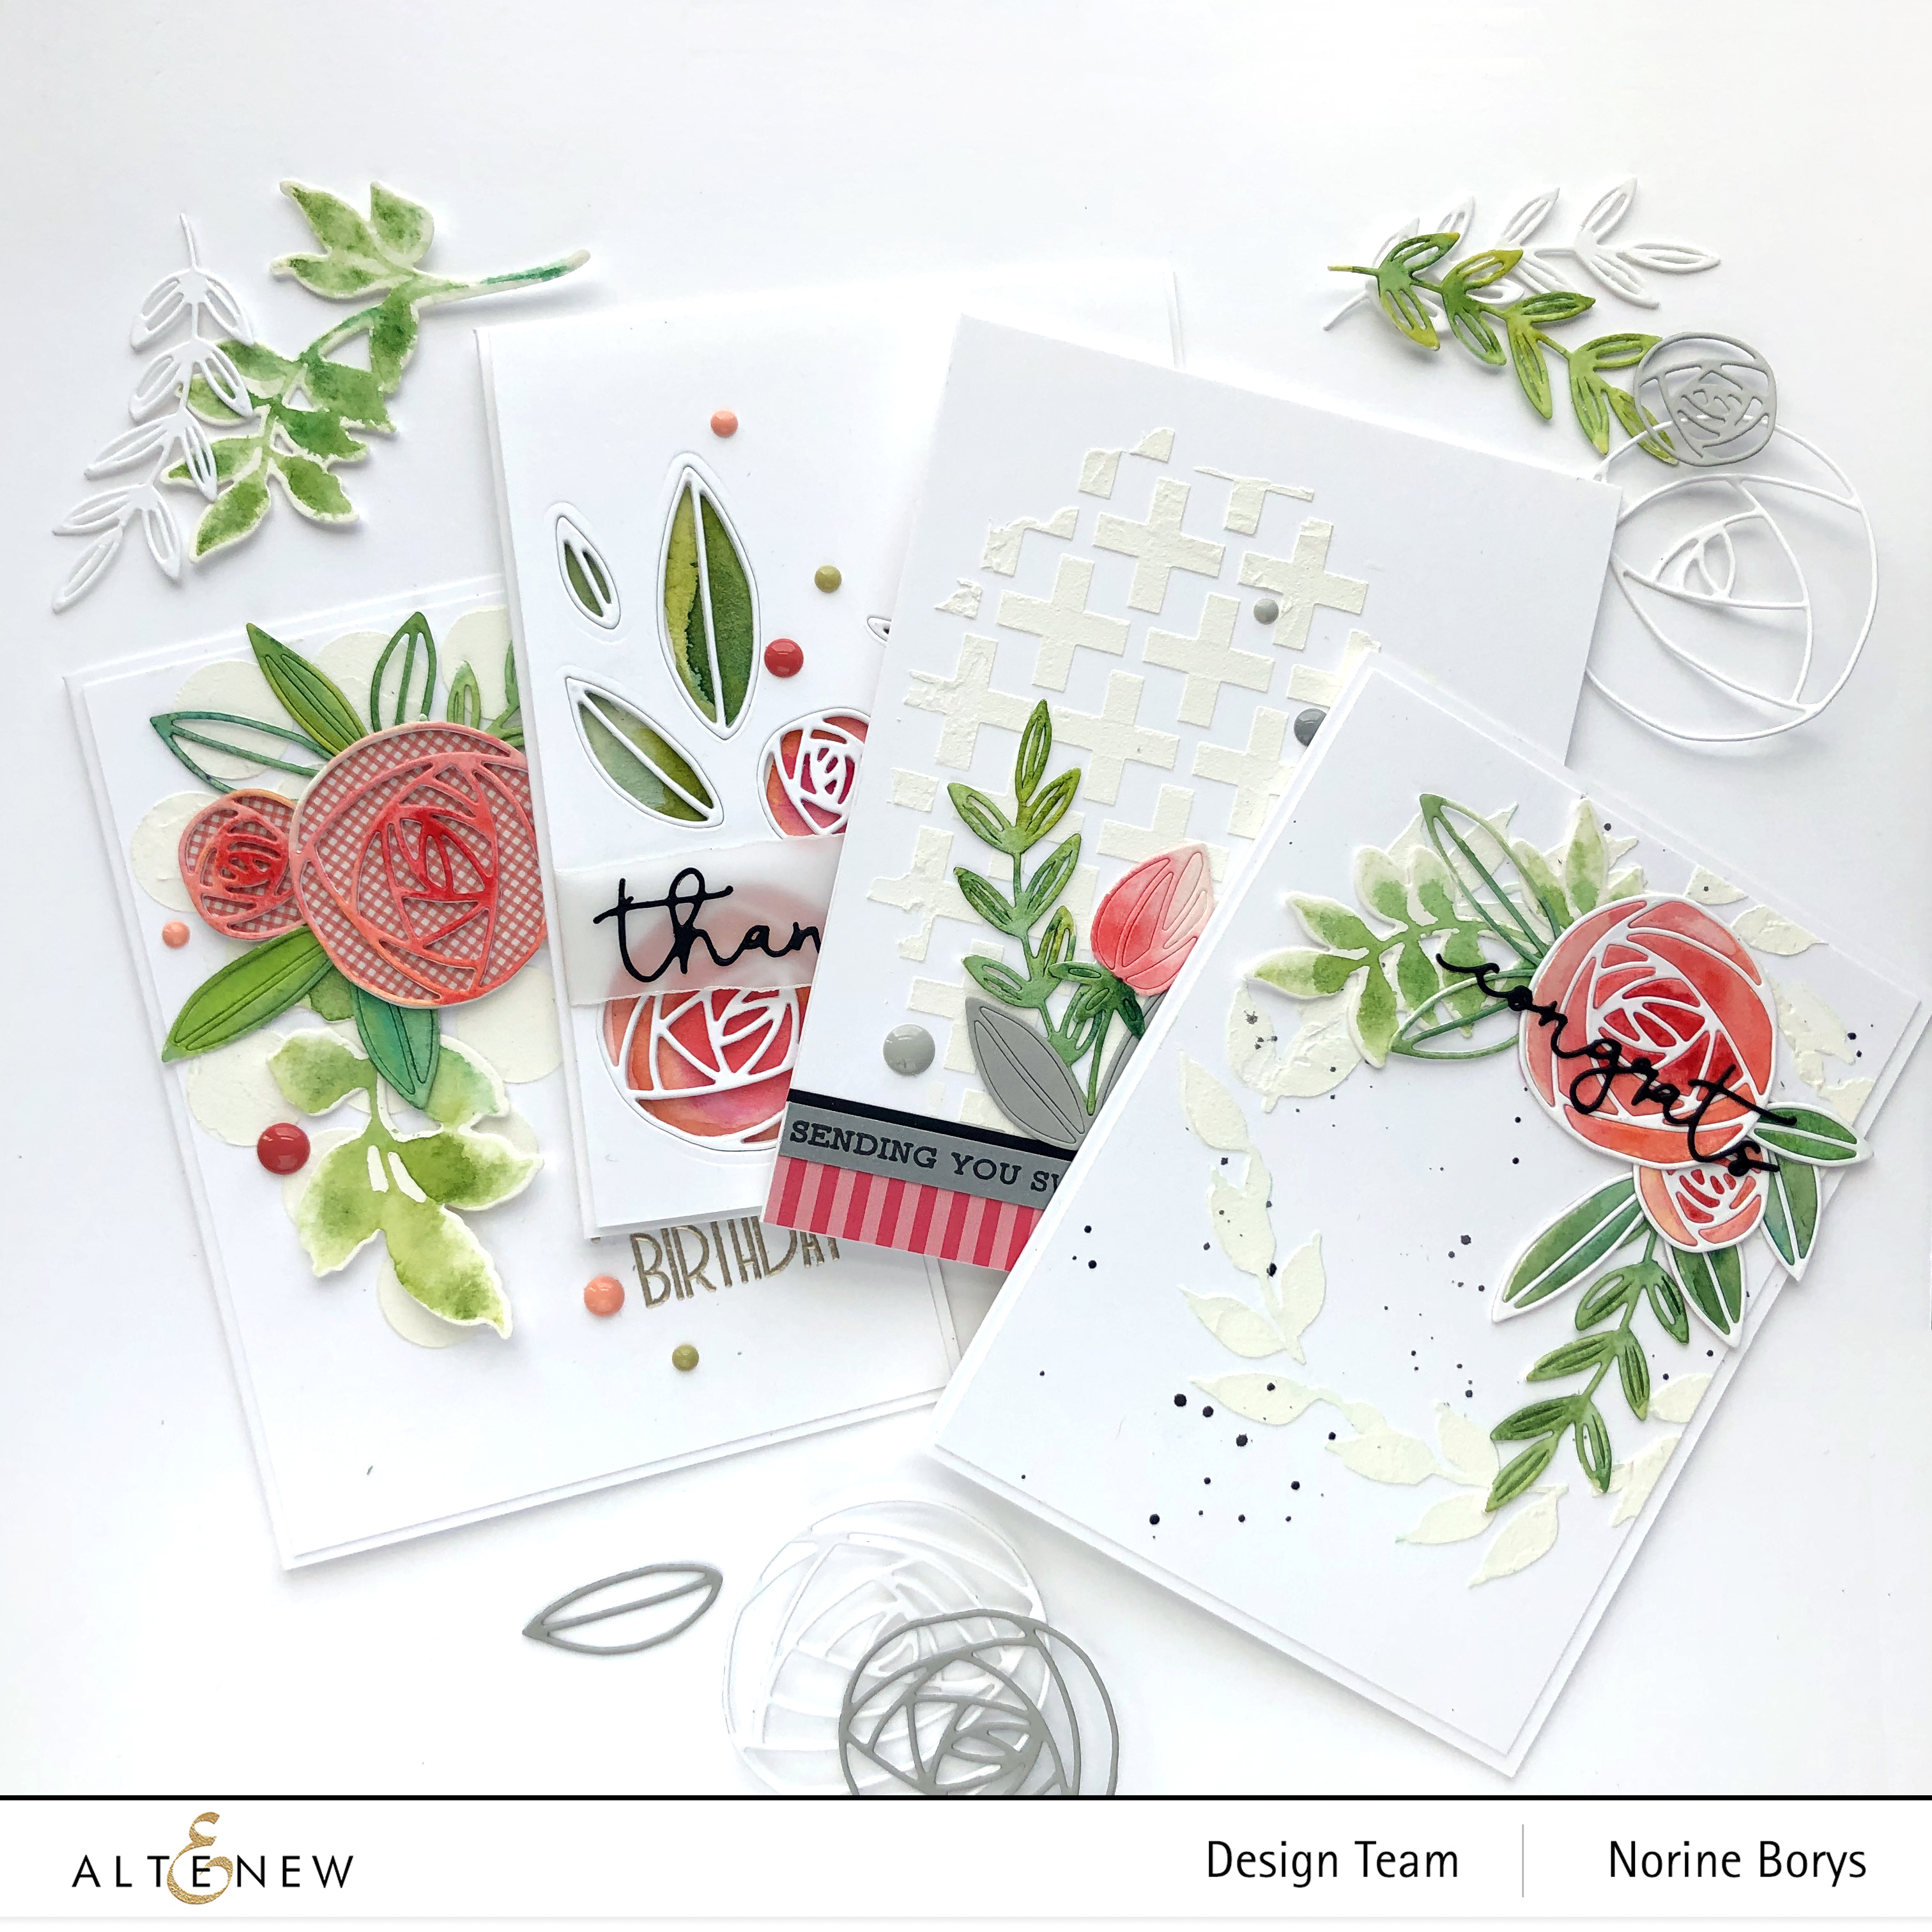
Hey, hi! I’m up on the Altenew Card Blog today with a post that shows 4 different ways of using the Rolled Roses Die Set from Altenew!

For most of the die cutting today, I used watercolor paper, so that I could paint them each in colors and shades that I liked best. 3 of the 4 cards have a background design created by combining Altenew Embossing Paste with different stencils.

The first card has a background made using the Wonderful Wreath stencil. For the arrangement, I combined the white cardstock outline of the Rolled Roses die cuts with the painted inserts from another set of die cut flowers. A few leaves are done the same, and they are combined with some painted outlines (no inserts) the small leaf vine from the Rolled Roses set, and a paint-stamped die cut from the Leaf Clusters stamp and die set.

Once the embossing paste was dry, I splattered the card panel with black watercolor paint speckles, then arranged the die cuts and adhered everything overtop of the embossed wreath. The sentiment is die cut from the Signature Words die set.

The next card is similar to the first, but in reverse. This time I used the Bubble Wrap Stencil with embossing paste to create the background texture. I used the outline portion of the two blooms from the insert sections used on the card above.

I backed the two roses by adhering a stack of outline die cuts onto a piece of patterned paper and using fine tipped scissors to closely cut around the outline. The sentiment is stamped using the Birthday Builder stamp set, and the card is completed with some color coordinated enamel dots.

Card number 3 used the On the Plus Side stencil with embossing paste to create the texture on the back ground. I used one of the sweet little rose bud dies and the small leaf vine die from the Rolled Roses die set to create the focal point, adding a couple of larger leaves die cut from grey cardstock for contrast.

I made a matching grey sentiment strip using the Sentiment Strips stamp set and added a coordinating color paper strip for balance. Some grey enamel dots to finish things off!

My last card today is different from the others. This time, I arranged an assortment of blooms, leaves and buds in a way that suggests a bouquet. I positioned them as closely as I could to be able to cut cleanly with one pass, and still look cohesive. (I thought of running the paper through multiple times in order to place the dies closer together but I find the paper gets very tired looking after several passes through the die cutting machine.)

Using the die cut panel as a guide, I painted a panel of watercolor paper to reveal flower and leaf color through the die cut openings. Then, because I wanted the die cut panel to be popped up, I cut three more die cuts of each of the pieces and stacked them behind the one adhered to the surface cardstock. I filled in the open spaces on the backside with foam tape.
The sentiment is a combination of die cut from the Signature Words die set and stamping part of a sentiment from the Sentiment Strips stamp set onto vellum paper. I tore the vellum strip by hand and wrapped the ends around the thick layers of the card front and glued the whole works to a folded card base. More enamel dots, and this card is finished!
Thanks so much for stopping by and have a wonderful day!