Hello, hi! I’m participating in an Instagram Hop today, so if you’ve come from there for more details about my project, you’re right where you should be!
This post contains affiliate links that are listed below. By clicking through to purchase products linked, you are helping to support this blog at no additional cost to you and that allows me to continue to provide you with creative inspiration and instructive help.
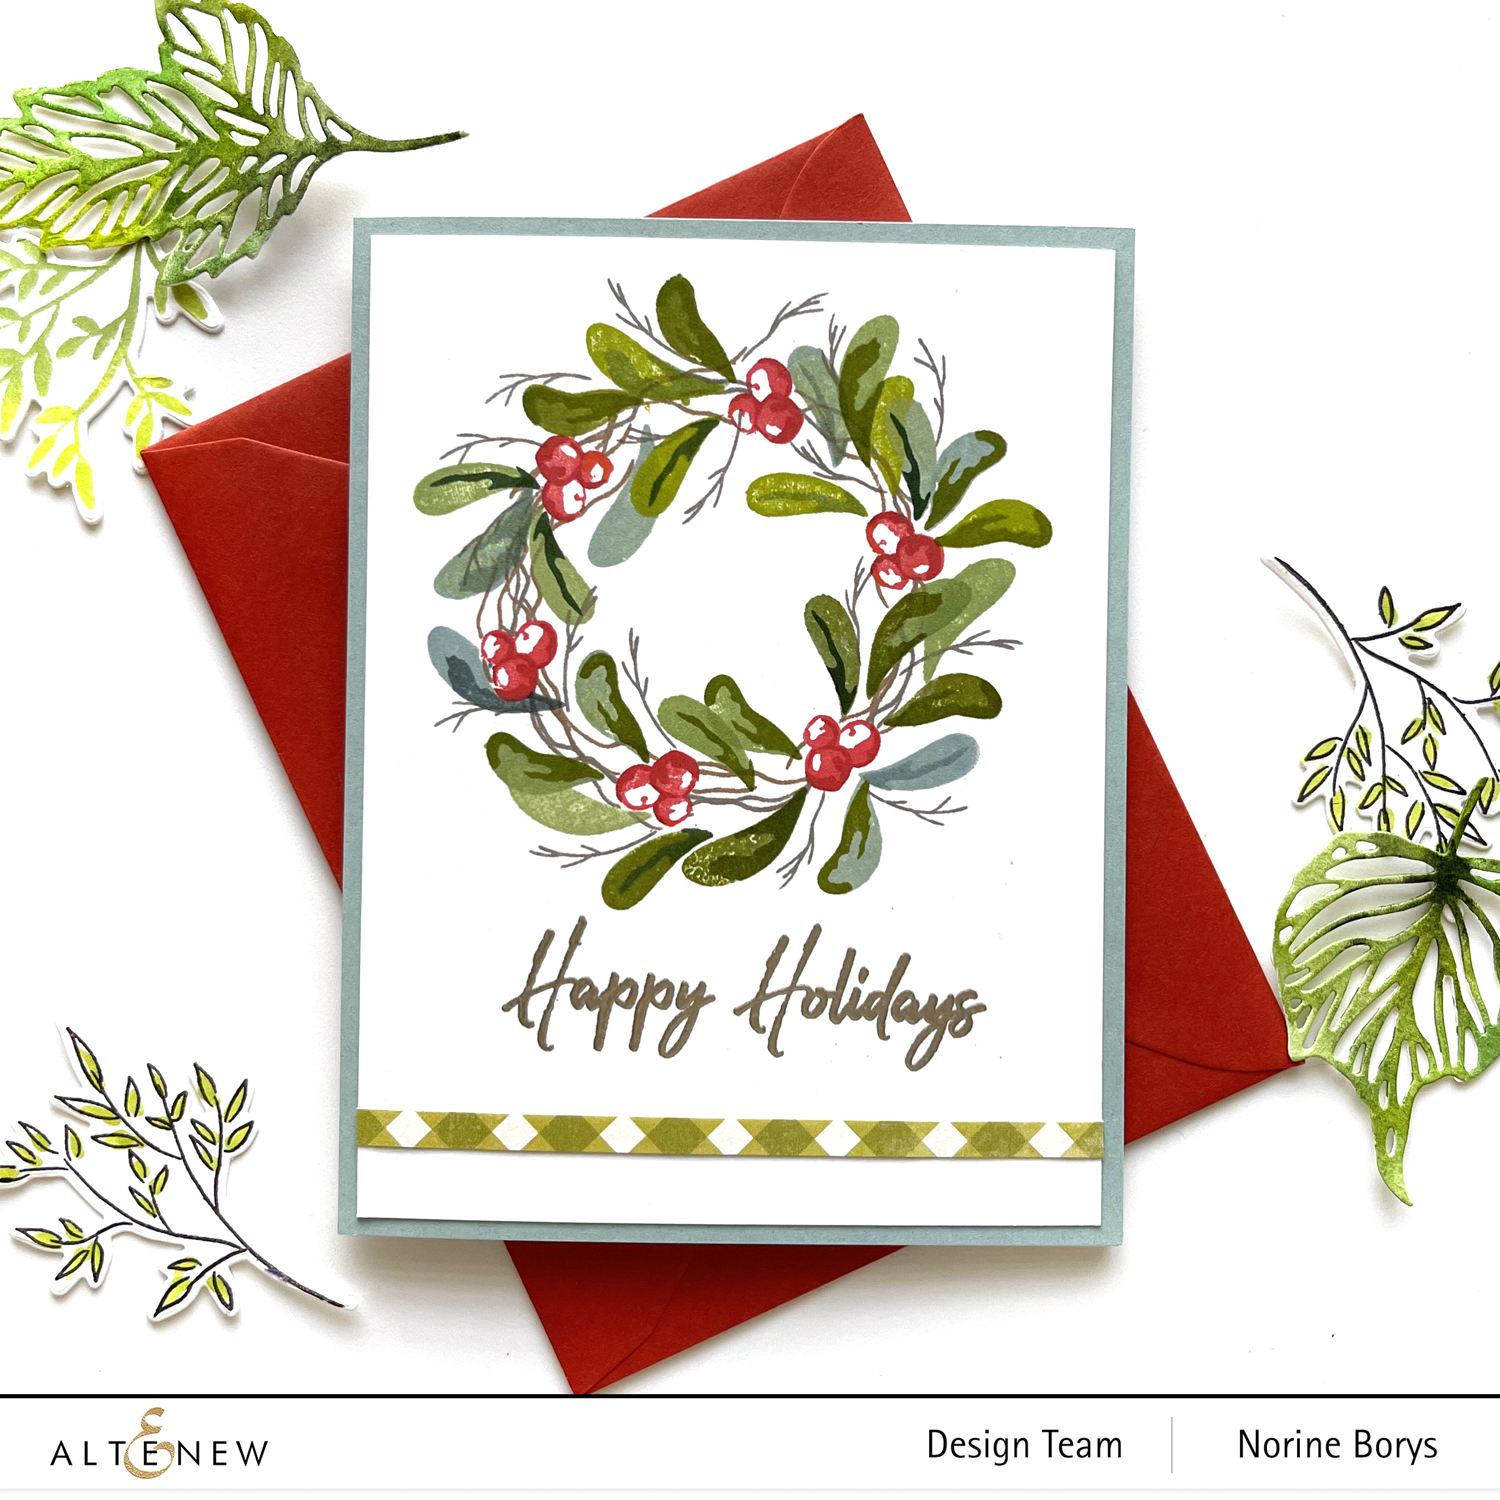
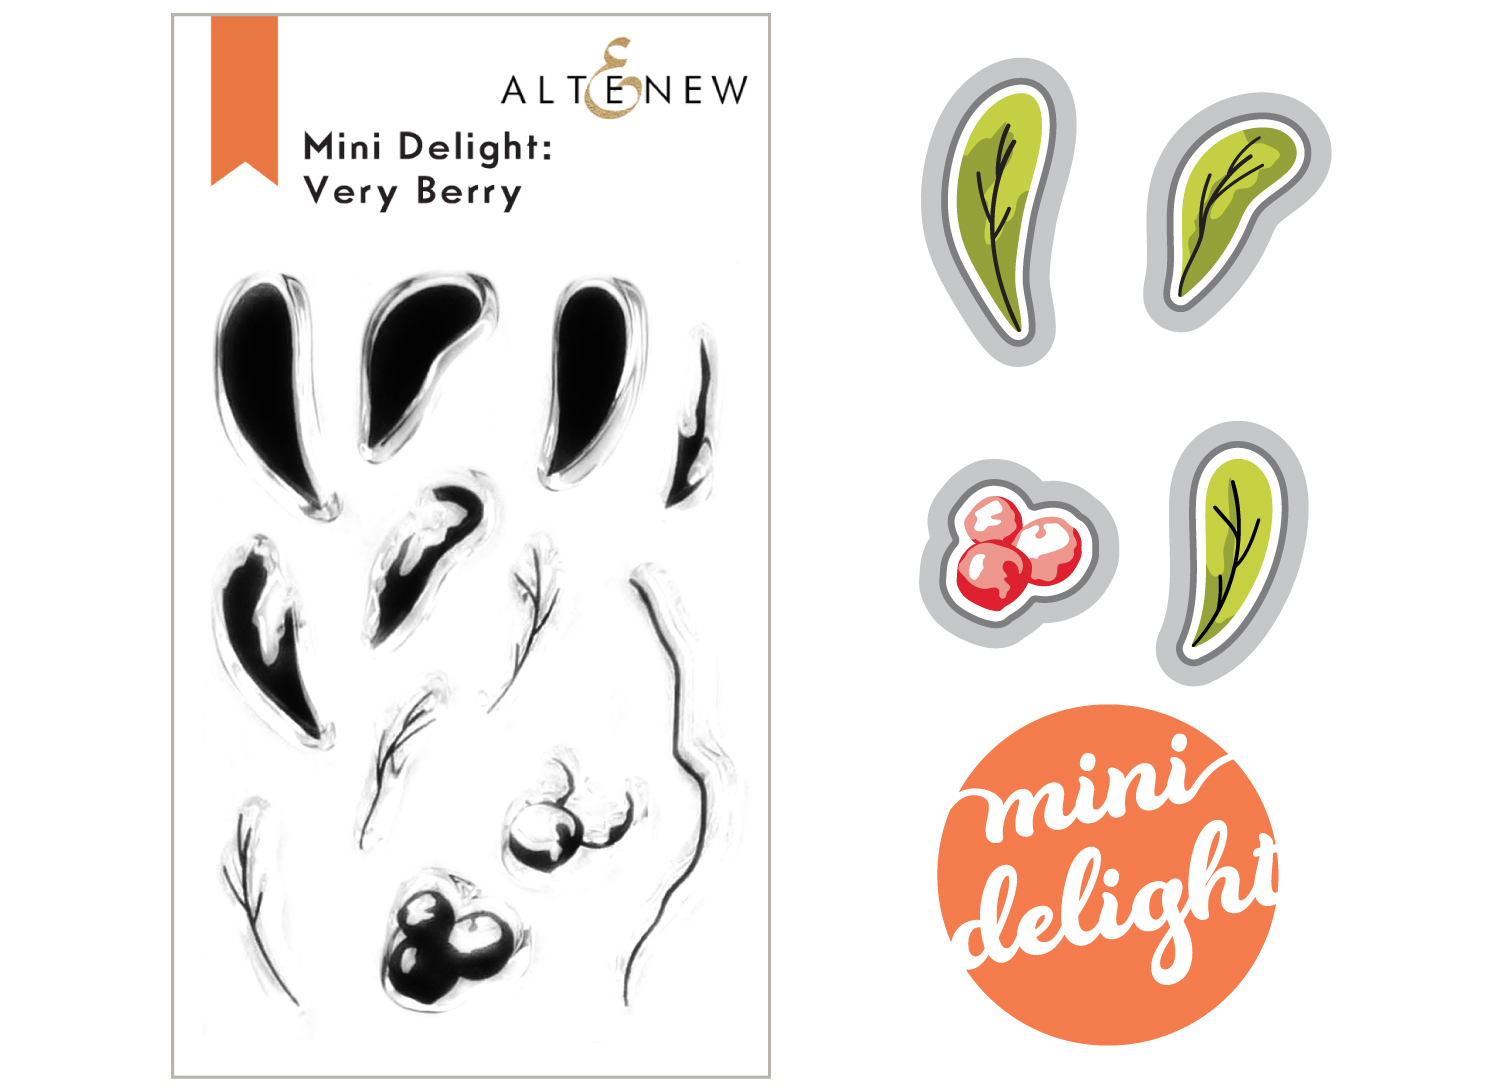
The Mini Delight stamp and die set this month consists of 12 small stamp shapes with layers and 4 dies for the berry cluster and the three different leaves. I didn’t end up using the dies for today’s card.

The best part about the single stamps for each of the shapes is the freedom to take your projects in any direction you like. I made a wreath today, (original, I know) but it would also be cool to stamp some draped greenery boughs or a perimeter design or just a random wandering line of greenery on your card front!

I started by drawing a circle shaped, in pencil, very lightly, on the upper center portion of the card panel. Then I stamped the berries in Crimson ink, just inside the circle spacing them equally around the circle. I stamped and cut out two small masks for the berry clusters and stamped the thin twig stamp all the way around the circle, varying the angle and position of the branch and stamping about three times between each pair of berries.
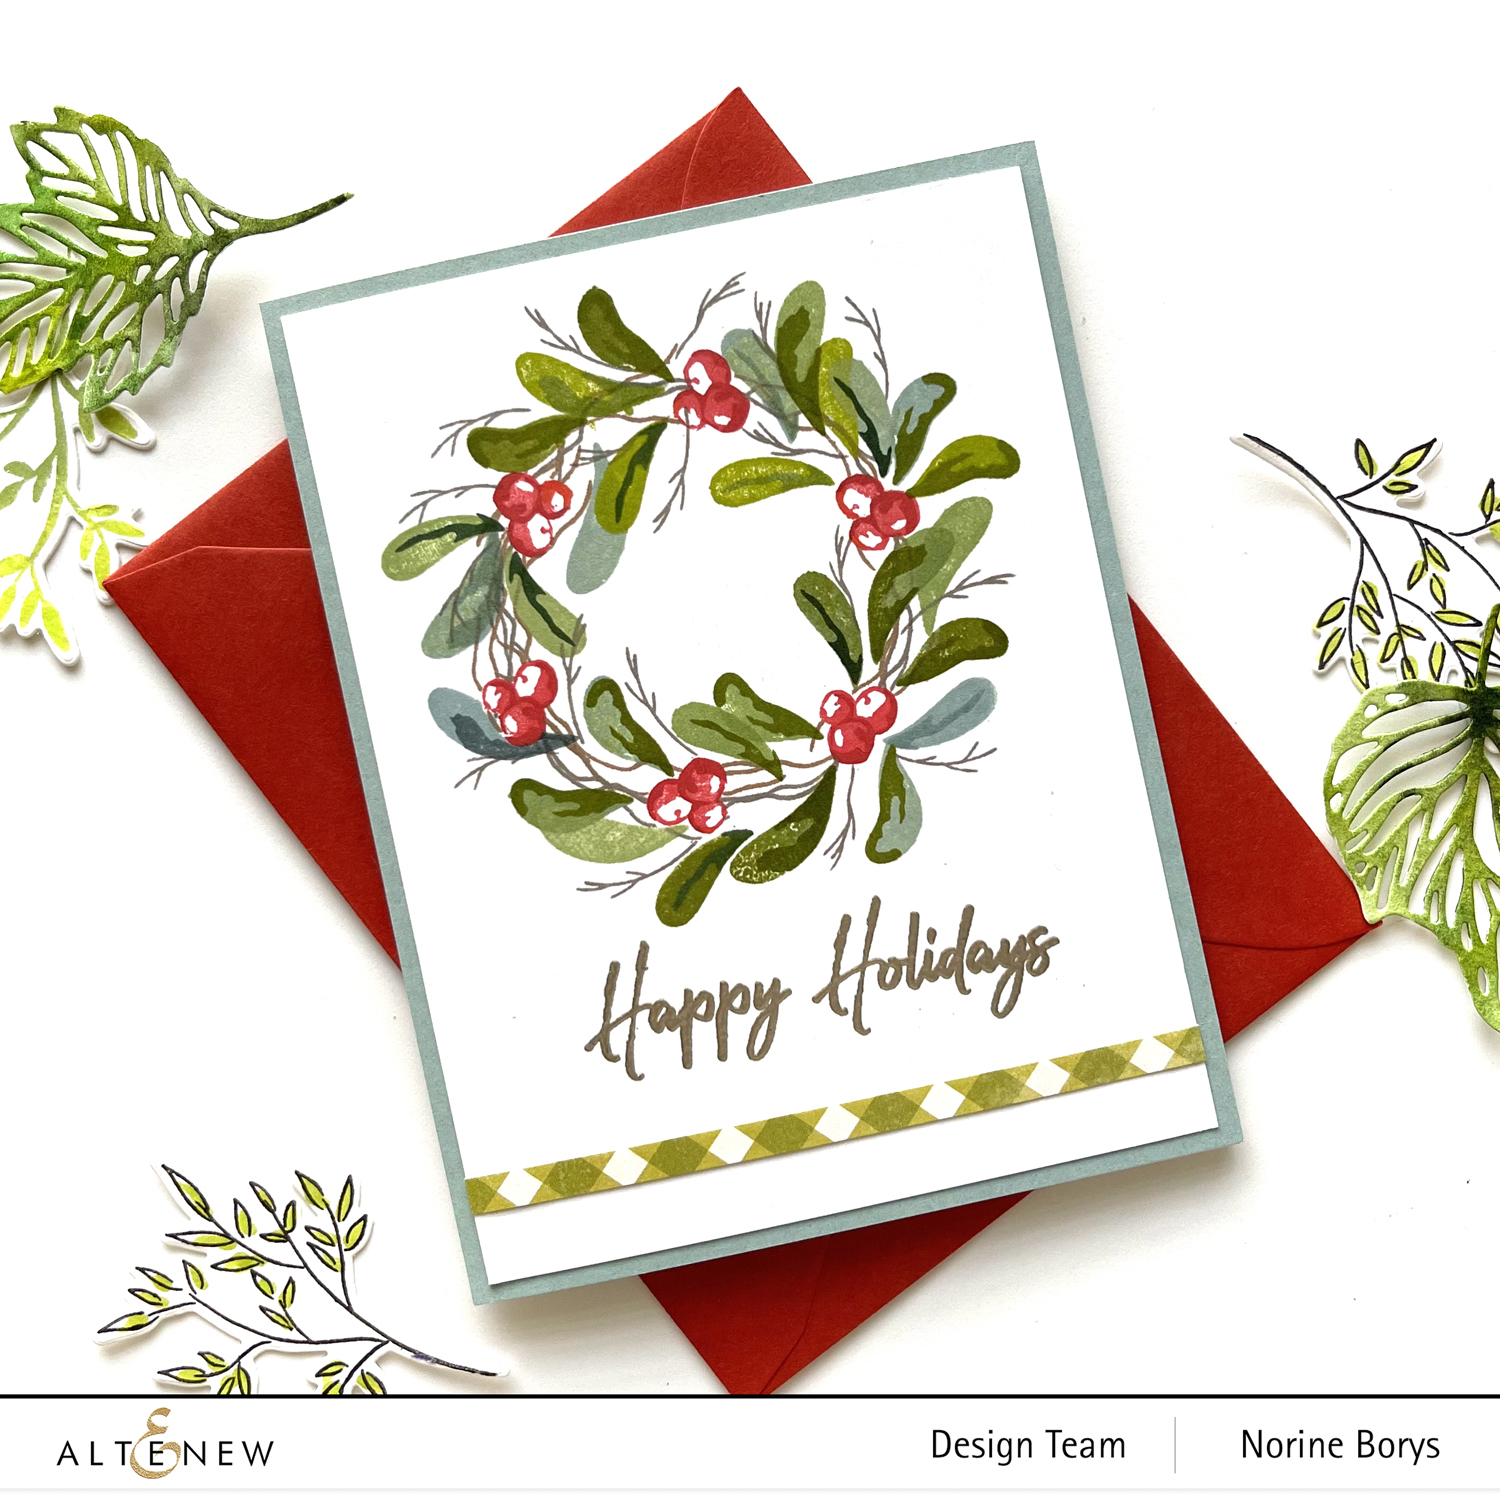
I stamped the second layer of the berries with Velvet ink, then moved on to the three different leaf stamps. I used a stamping positioner tool to make it a bit easier to lay the leaves down randomly and stamp with three different colors of ink – Forest Glade, Olive and Cloudy Sky.
You’ll notice the bottom right corner of the wreath has leaves going in opposite directions from each other, which means that at some point around the circle they will also have to run into each other at the tips. If I were to make this design again, I’d keep all the leaves going in one direction only for simplicity of arranging the leaves. I didn’t worry about keeping leaves from overlapping each other, but did try to avoid stamping over the berries and needing to use the mask again, although that did happen in one spot.

Once the whole circle was covered with leaves, I stamped the 2nd layer for each, in a darker shade of ink, and then used the 3rd leaf layer stamps to filled in the remaining nooks and crannies with tiny “twigs”.
I used a sentiment from the Winter Wishes stamp set, stamping with embossing ink and heat setting with Silver embossing powder.
I trimmed the card panel on all sides and matted it with a coordinating shade of colored cardstock, and added a narrow strip of patterned paper to compliment the green leaves.
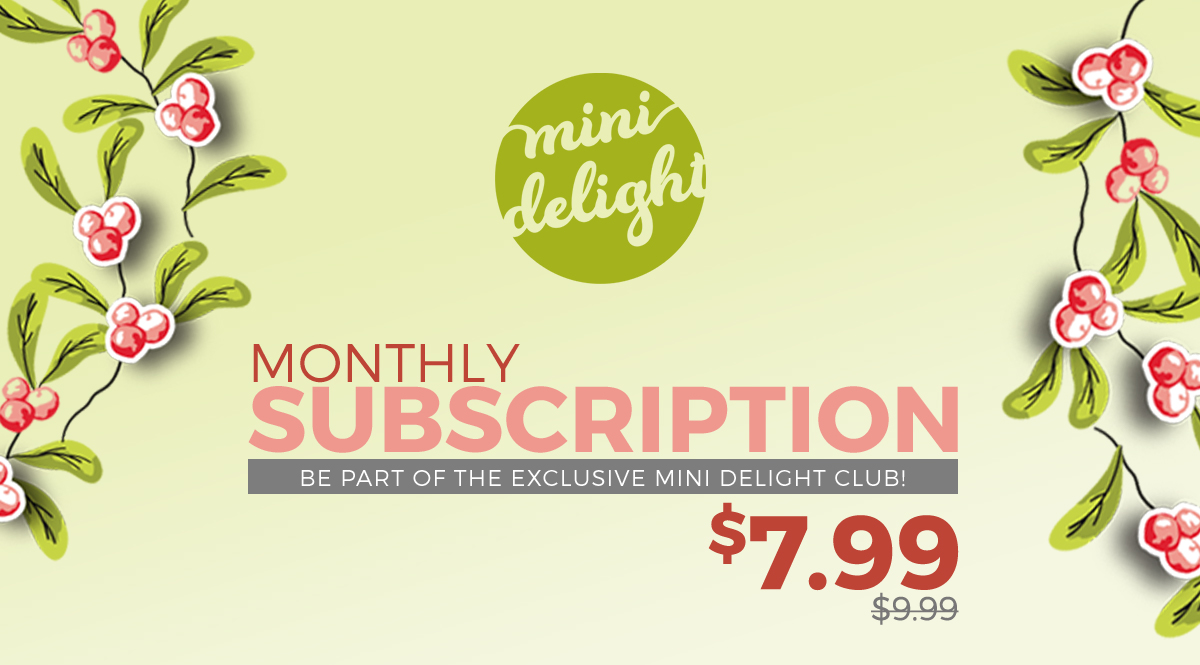
If you’re interested in learning more about the subscription plan check out the link here.
Thank you very much for stopping by! If you’re interested in any of the supplies I’ve used, you can find links for most down below. Have a wonderful day!
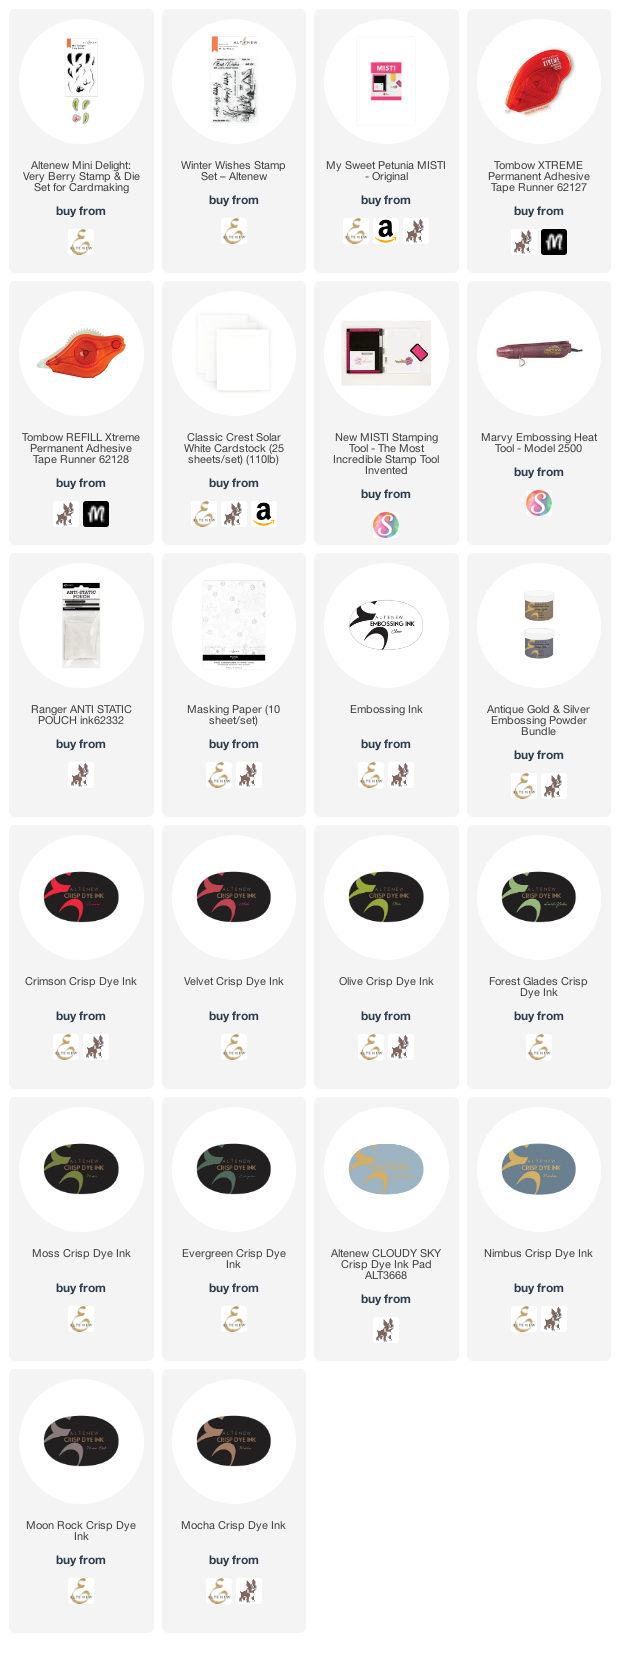
SUPPLIES USED: