Hi, hello! It’s blog hop day at Altenew and today we’re showcasing many, many beautiful products that will serve their purpose to have you drooling! You may have arrived here from Keren’s blog and if so you’re on the right track. If not, just click back to the Altenew Card Blog where it all starts, and that way you won’t miss anything! Also, be sure to read to the end where you’ll find the details about how you could win a giveaway prize!

Let’s begin with these two cards. I used the Vase Fillers Stamp and Die set for these cards, along with the Hello and Hugs Stamp and Dies for the sentiments.

For this card, I stamped a few of the images in the Vase Fillers Stamp set, in Caribbean Sky, Frayed Leaf and Forest Glades then used the coordinating dies to die cut them.

I die cut the word “hugs” from white cardstock and the shadow image from green cardstock to match the green of the ink colors. I stamped the “sending warm” portion of the sentiment from the Hello and Hugs Stamp Set with Obsidian Black Pigment Ink.

I used the Rounded Rectangles Die Set to die cut the white cardstock panel and layered the Vase Fillers to the edge of it and the hugs die cut in the center. A few coordinating enamel dots complete this card.

Next, I stamped an A2 sized card panel with the Dainty Swiss Dots background stamp using all the ink colors in the Glacier Caves family graduating the color from top to bottom.

Then I die cut another of the Rounded Rectangles and this time, I blended the same ink shades from top to bottom with a blending brush. I let that ink dry for awhile, then stamped three different images from the Vase Fillers set again, using Embossing ink to stamp, and heat embossing with white embossing powder.

I die cut the “hello” from coordinating blue cardstock and a second layer with blue Fun Foam for extra dimension. I matted the rounded rectangle with green cardstock, adhered it to the Dainty Swiss Dots card panel, and wrapped some white thread around the layers tying it with a knot. Then I adhered the hello die cut and attached everything to a white cardstock card base.


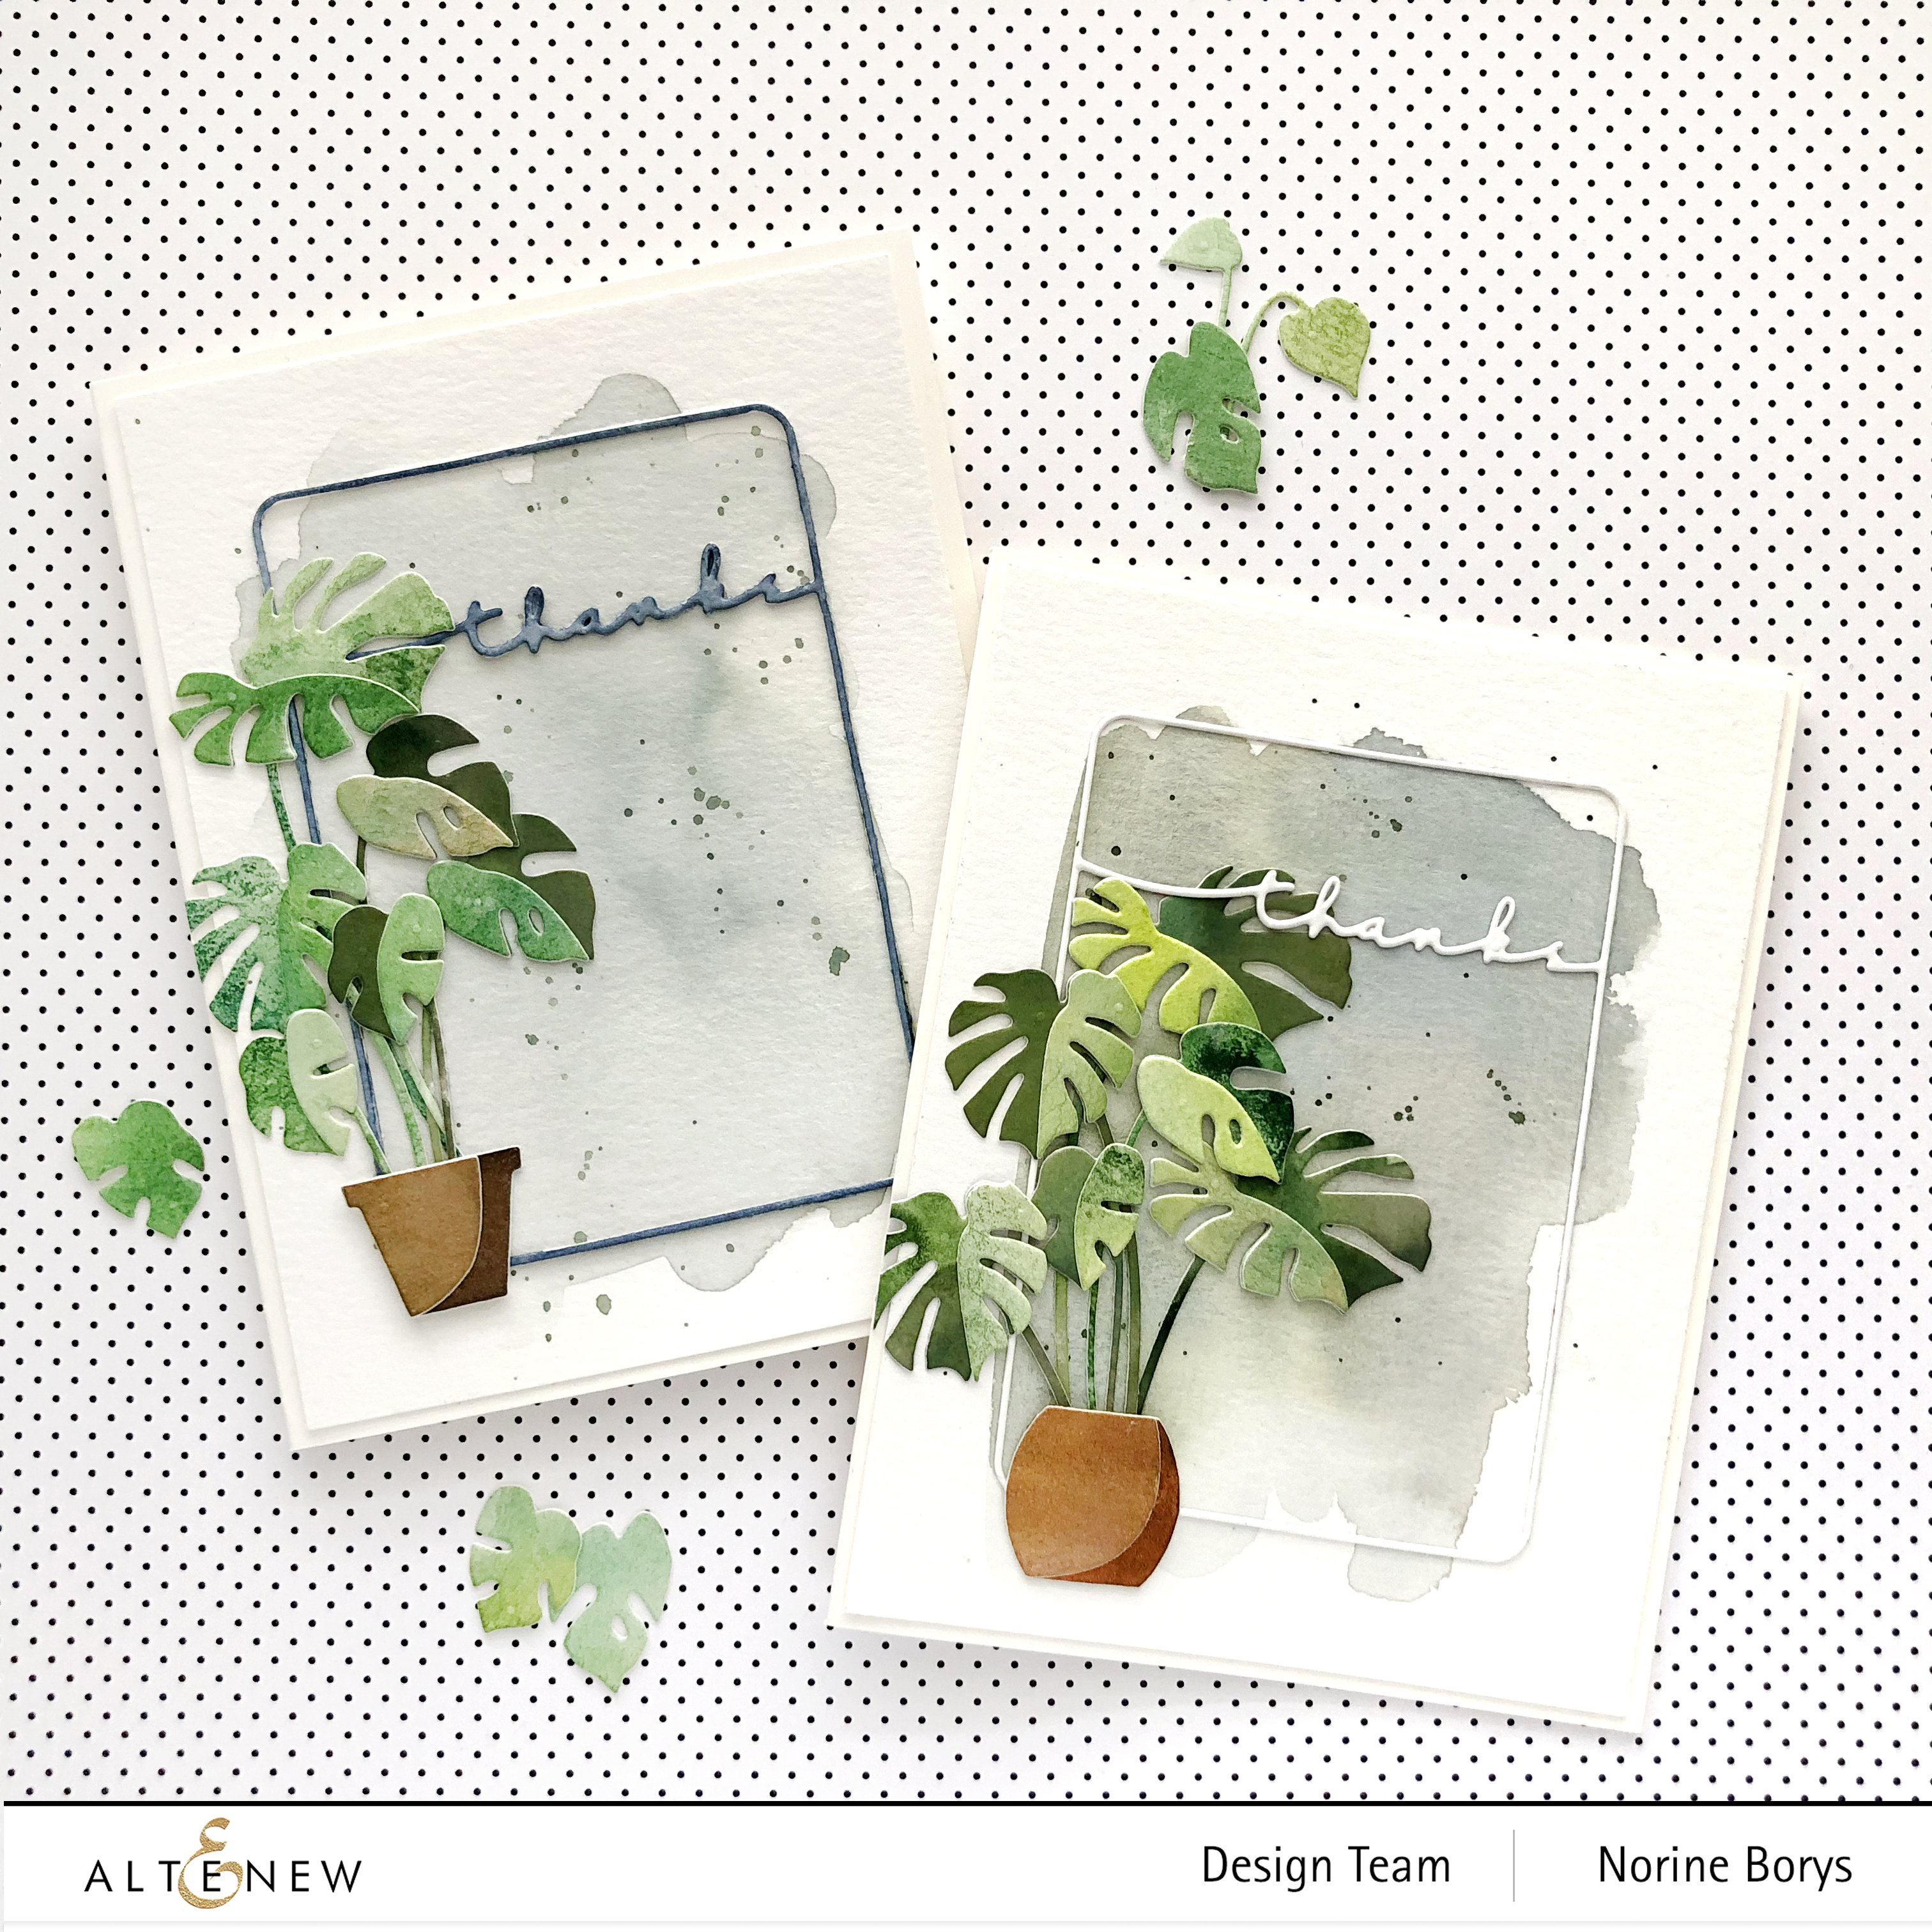
The next three cards are made with the coolest couple of stand-alone die sets in this release! The first two cards use the Monstera 3D Die Set and the second card is made using the Parlor Palm Die Set.
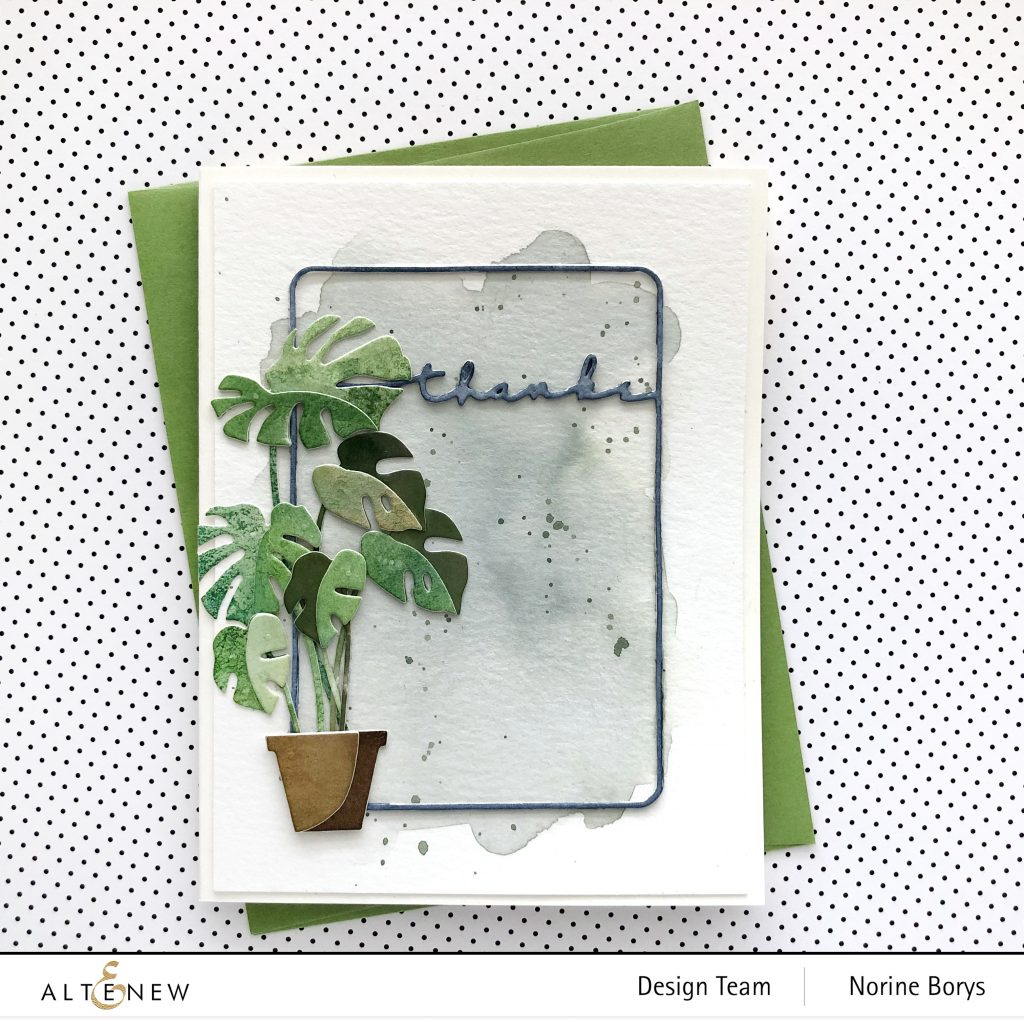
I began by painting a piece of watercolor paper with all different shades of greens, varying the intensity to get both pale and dark shades. When it was dry, I die cut the various portions of the leaves with alternating colors and light and dark to define the leaf sections.

You can see the variance from bright lime/yellow green to deep blue/olive greens. I did the same with the pot dies, cutting them from watercolor paper painted in shades of reds and browns.

The pieces all go together so easily and intuitively and look so awesome and authentic. I am in love with these sets!
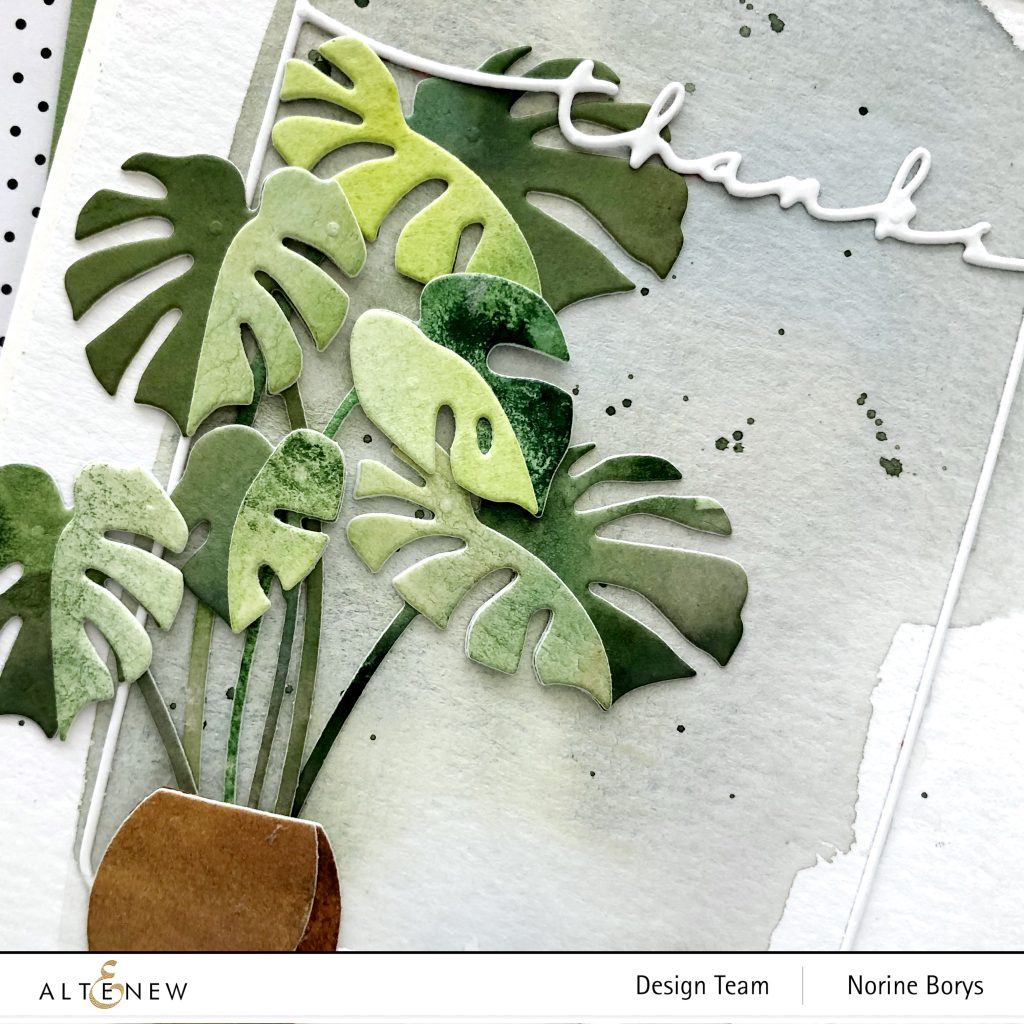
For these two cards, I used the Framed Thanks Die, and die cut one from white cardstock and the other from watercolor paper that I then painted blue. I also painted the center of the card panel with “dirty” mixes of the colors leftover in the lid of my paint palette, steering towards the muddy blues and greens. When they were dry, I speckled them with more watercolor paint, then adhered all the layers to the card panel and a card base.
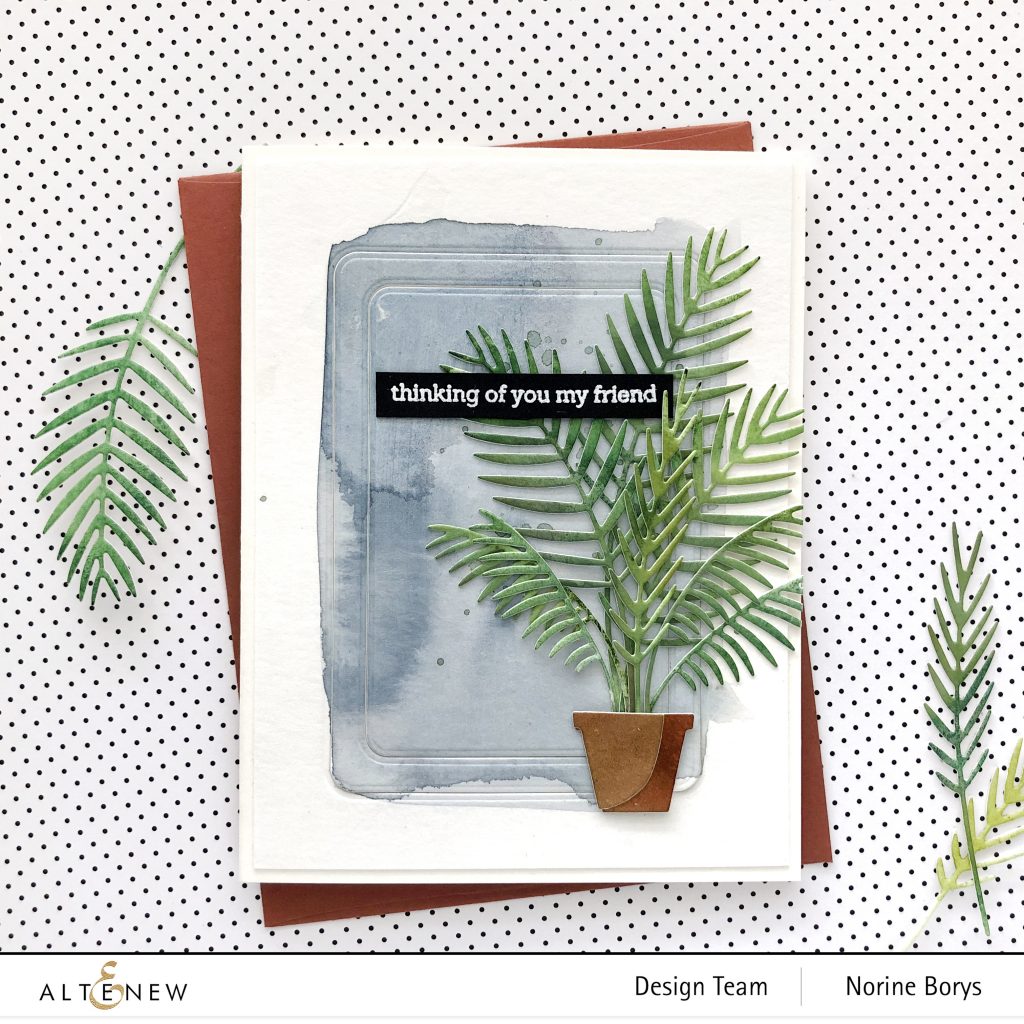
The last card is made using the Parlor Palm Die Set and one of the sentiments from the Hello and Hugs Stamp Set.
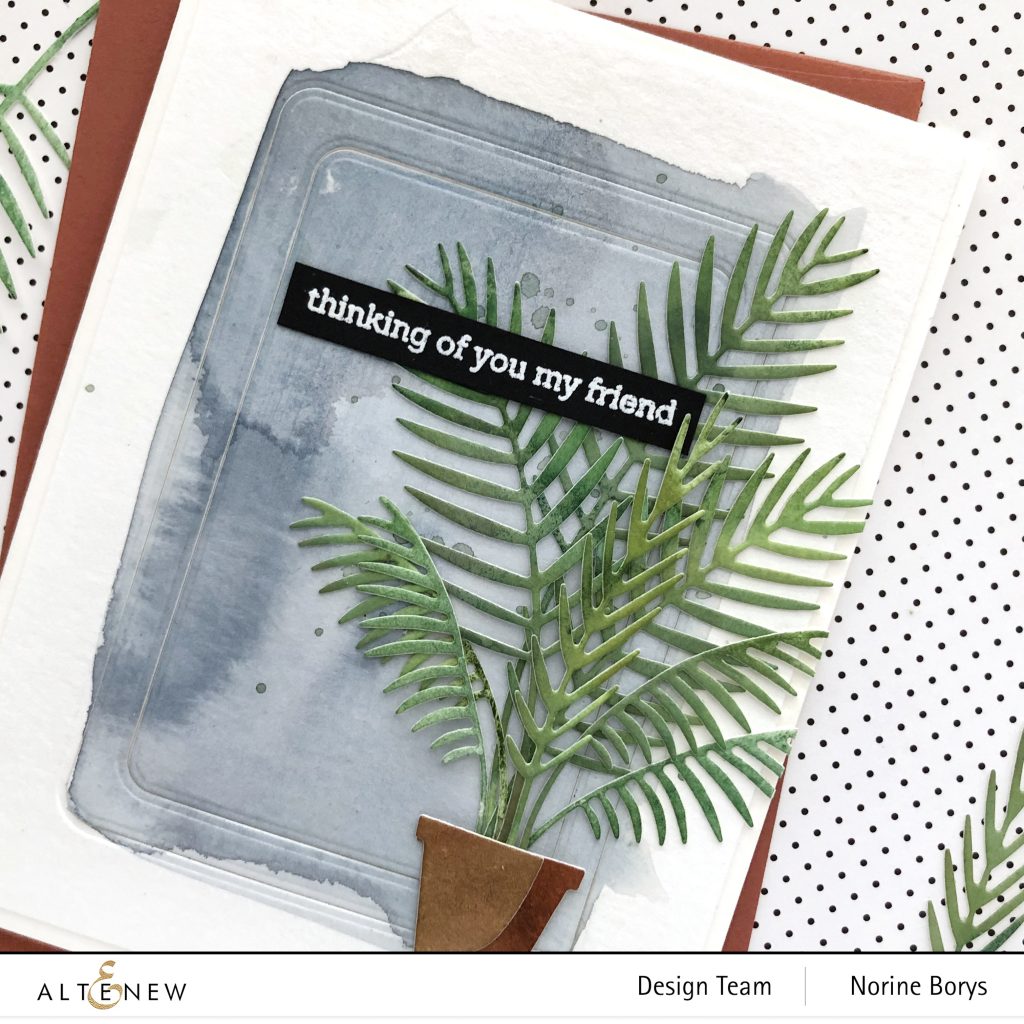
Once again, the leaves are die cut from green painted watercolor paper and assembled in a pot die cut from brown painted watercolor paper. For the background, I painted another piece of watercolor paper with more intense shades of paint and let it dry before speckling with more paint.
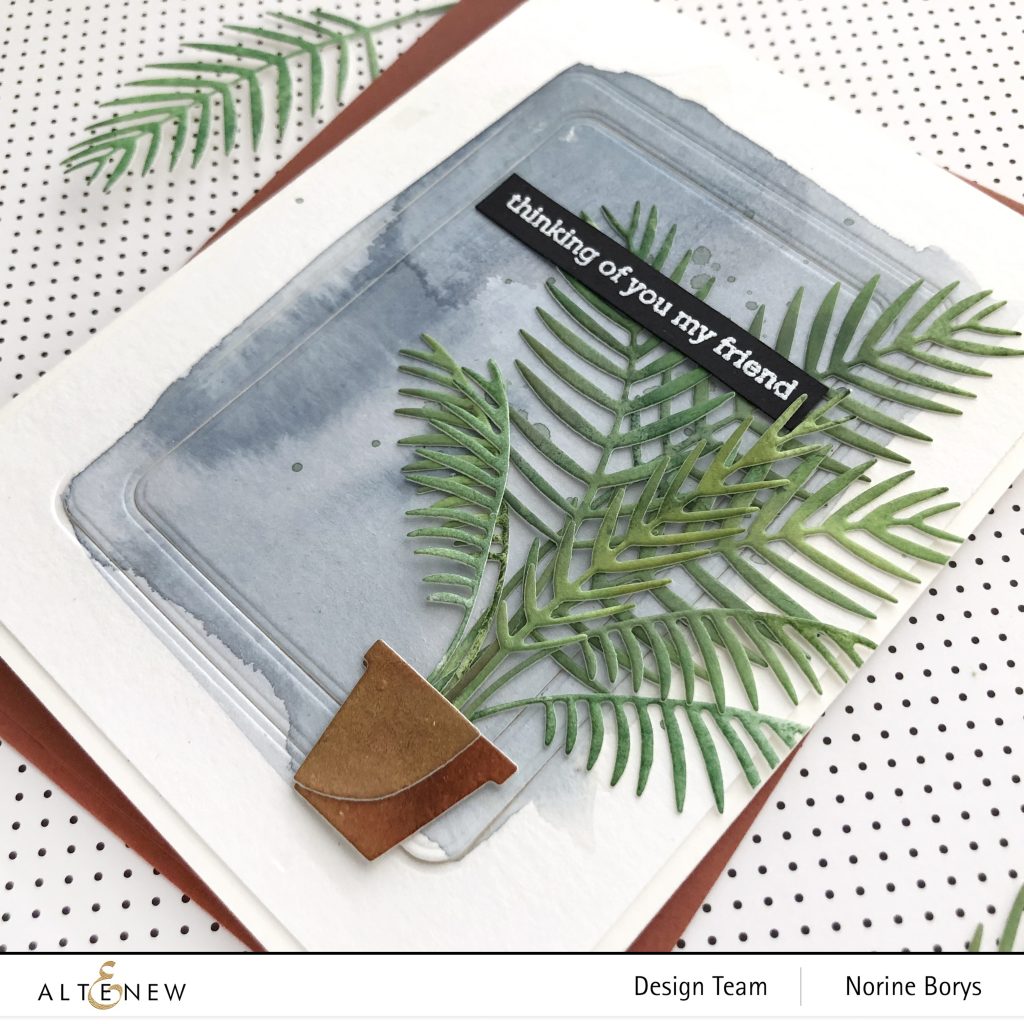
This time, on the painted background panel, I taped two of the Rounded Rectangle Dies to the watercolor paper and ran them through my Gemini machine with the intention of embossing them. Welp, I need to consult my manual because they cut through the paper. Not my original intent, but whatever, we can work with this! I taped them on the back to hold them together and carried on.
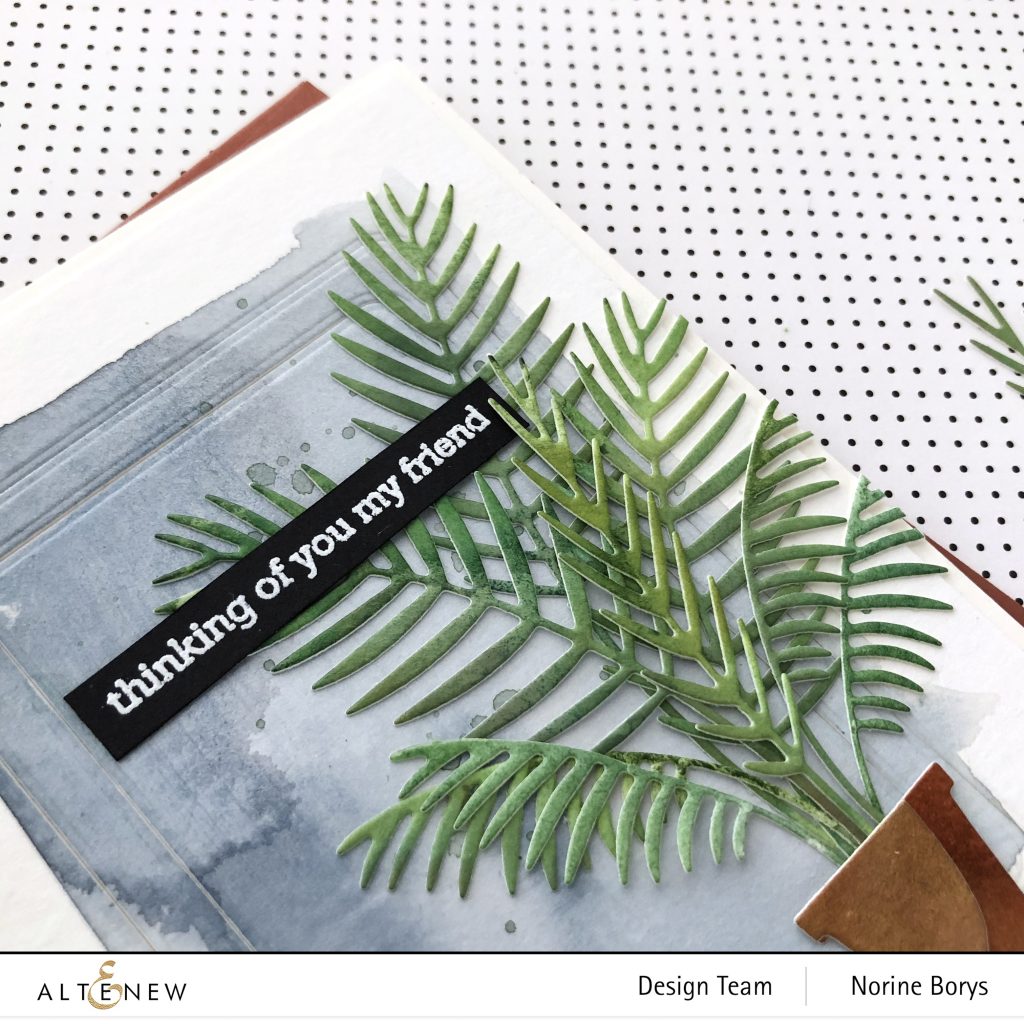
I stamped the sentiment from the Hello and Hugs stamp set onto black cardstock with embossing ink and heated with white embossing powder, then trimmed the sentiment strip and adhered it to the layers of palm fronds and background paper. Super quick and simple to do!
That’s it for me, but there’s more to see at Emily’s blog! As with every Altenew Blog Hop there are prizes! To celebrate this release, Altenew is giving away a $50 gift certificate to 6 lucky winners! Please leave a comment on the Altenew Card Blog and/or Altenew Scrapbook Blog by Jan 30, 2020 for a chance to win. We’ll also draw a winner to receive a $20 gift certificate from the comments left on each designer’s blog on the blog hop list below. All winners will be announced on the Altenew blogs on Feb 2, 2020. Below is the complete list of blogs in the hop.
Thanks so much for stopping here today and enjoy the rest of the hop!