Hey, hi! I’m so excited to share with you today, some of the projects I created recently using the Love Letters Collection products, being released at The Greetery this Friday, Jan 17. As you will see today and tomorrow (Day 2 of the reveal) I couldn’t get stopped! Each of the elements, stamps and dies alike, are just so great, and inspired so many beautiful ideas!

For me, the theme of today’s projects is postal. I have long loved handwritten letters, antique postage stamps and the markings on envelopes! Today’s reveal includes all of that in stamps and dies, plus a lovely simple floral set with some Valentine hearts and sentiments as well as a red rubber plaid background stamp.

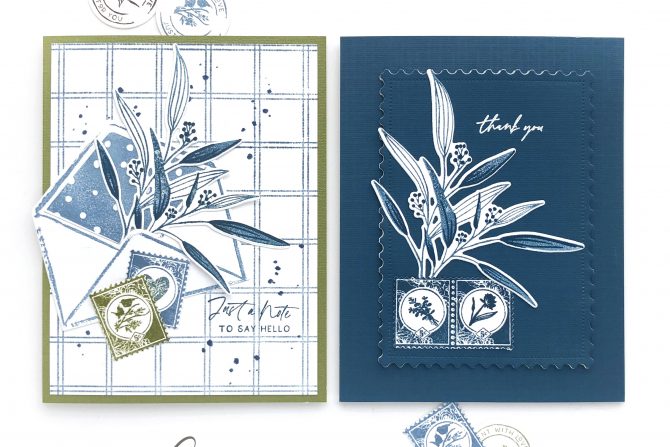
For my first card, I stamped a card panel with the Windowpane Plaid background stamp with Stampin Up Night of Navy blue ink. Using the same ink, I stamped an envelope (with a polka dot liner), a sprig from the Signed & Sealed With a Kiss stamp set, and a couple of postage stamps.

The fun thing about the postage stamp is the choice of 6 different sweet and romantic little emblems to stamp inside the postage stamp center.

The coordinating die for the envelope cuts a line between the outside of the envelope and the liner so you can easily tuck in any element you’d like! (You KNOW you’ll be seeing this little envelope in regular rotation!) I stamped a sentiment from the Signed & Sealed stamp set in the same Night of Navy ink. To complete the card, I used a matching waterbased marker to add “speckles” to the card panel, then layered the envelope with the sprig and postage stamps and adhered everything to a green cardstock card base.

I had a little love affair going on with the Night of Navy color so I found some coordinating, almost-navy colored cardstock in my stash and cut an A2 sized panel from it. I used the smaller of two postal frame dies to cut out the center, then die cut it 3 more times from white cardstock to stack layers together. There’s just something so crisp and nautical about a navy/white combination!

I stamped a sentiment from the Pretty Postmarks stamp set and heat embossed with white embossing powder. Then I stamped another of the layered leafy branch with Night of Navy blue ink and die cut it with the coordinating die.

The Postal Frames die set includes a die for cutting a set of 4 postage stamps. To ensure that I was stamping all the stamps in the right position for die cutting, I did that step first, then leaving the die cut temporarily taped into the opening it was cut from, I stamped the postage stamp 4 times and got their placement right because I could see where the holes and edges were and then added a variety of the center images to each stamp.

I assembled and adhered each of the components of this card and liked the elegant simplicity so much that I left off any extra embellishing.

Moving along, I stamped an assortment of the postage stamps and envelope markings onto white cardstock to create my own patterned paper. I die cut the stamped card panel with the larger of the two frame dies in the Postal Frames die set.

Next, I stamped the notecard image from the Signed and Sealed stamp and die set and added two separate sentiments from the same stamp set.

I stacked both the background card panel and the mini notecard with a layer of fun foam. Then I pulled a previously painted and die cut leaf spring from the Winter Song Collection and tucked it under the notecard before adhering everything to a kraft cardstock card base.


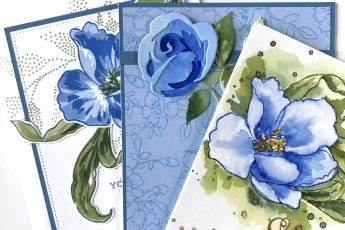
Finally, I have a sweet Hello card that is made by stamping another patterned paper background of my own design, using two of the sprig images meant for the postage stamp center. I used two slightly different shades of green ink (Stampin Up’s Old Olive and Pear Pizzazz) to distinguish between the two images.

Next, I stamped and die cut, the envelope with a checked lining, another note card with a “hello” sentiment and a single bloom from the Signed & Sealed With a Kiss stamp set.

I added another postage stamp series, stamped in the same shades of green ink, matted the card panel with pink cardstock to match the bloom, and added some coordinating enamel dots.
That’s it for me today, but there’s much more inspiration to be found at the participating blogs listed below. Be sure to check back again tomorrow for Day 2 of the reveal, for even more wonderful products and the projects made with them! Then Friday morning, Jan 17 all of the Love Letters Collection will go live in The Greetery shop.
As with each Greetery reveal, there will be a $50 GC prize awarded each reveal day, to one commenter from any of the participating blogs, including the blog at The Greetery, so tell us which product excites you most and you might be a winner!
For more Love Letter inspiration check out these blogs:
Norine Borys – You are here.
Thanks so much for stopping by and enjoy the rest of the hop!


