Hello, hi! I have a couple of cards to share, using the December Clear Stamp & Die of the Month Club kit from Spellbinders.
The December Club Kit is called Color Outside the Lines and is available through Dec 24 when you subscribe to the Clear Stamp and Die of the Month Club. This is just one of many subscription clubs that Spellbinders offers. You can check them out here.
This post contains affiliate links that are listed below. By clicking through to purchase products linked, you are helping to support this blog at no additional cost to you which allows me to continue to provide you with creative inspiration and instructive help.

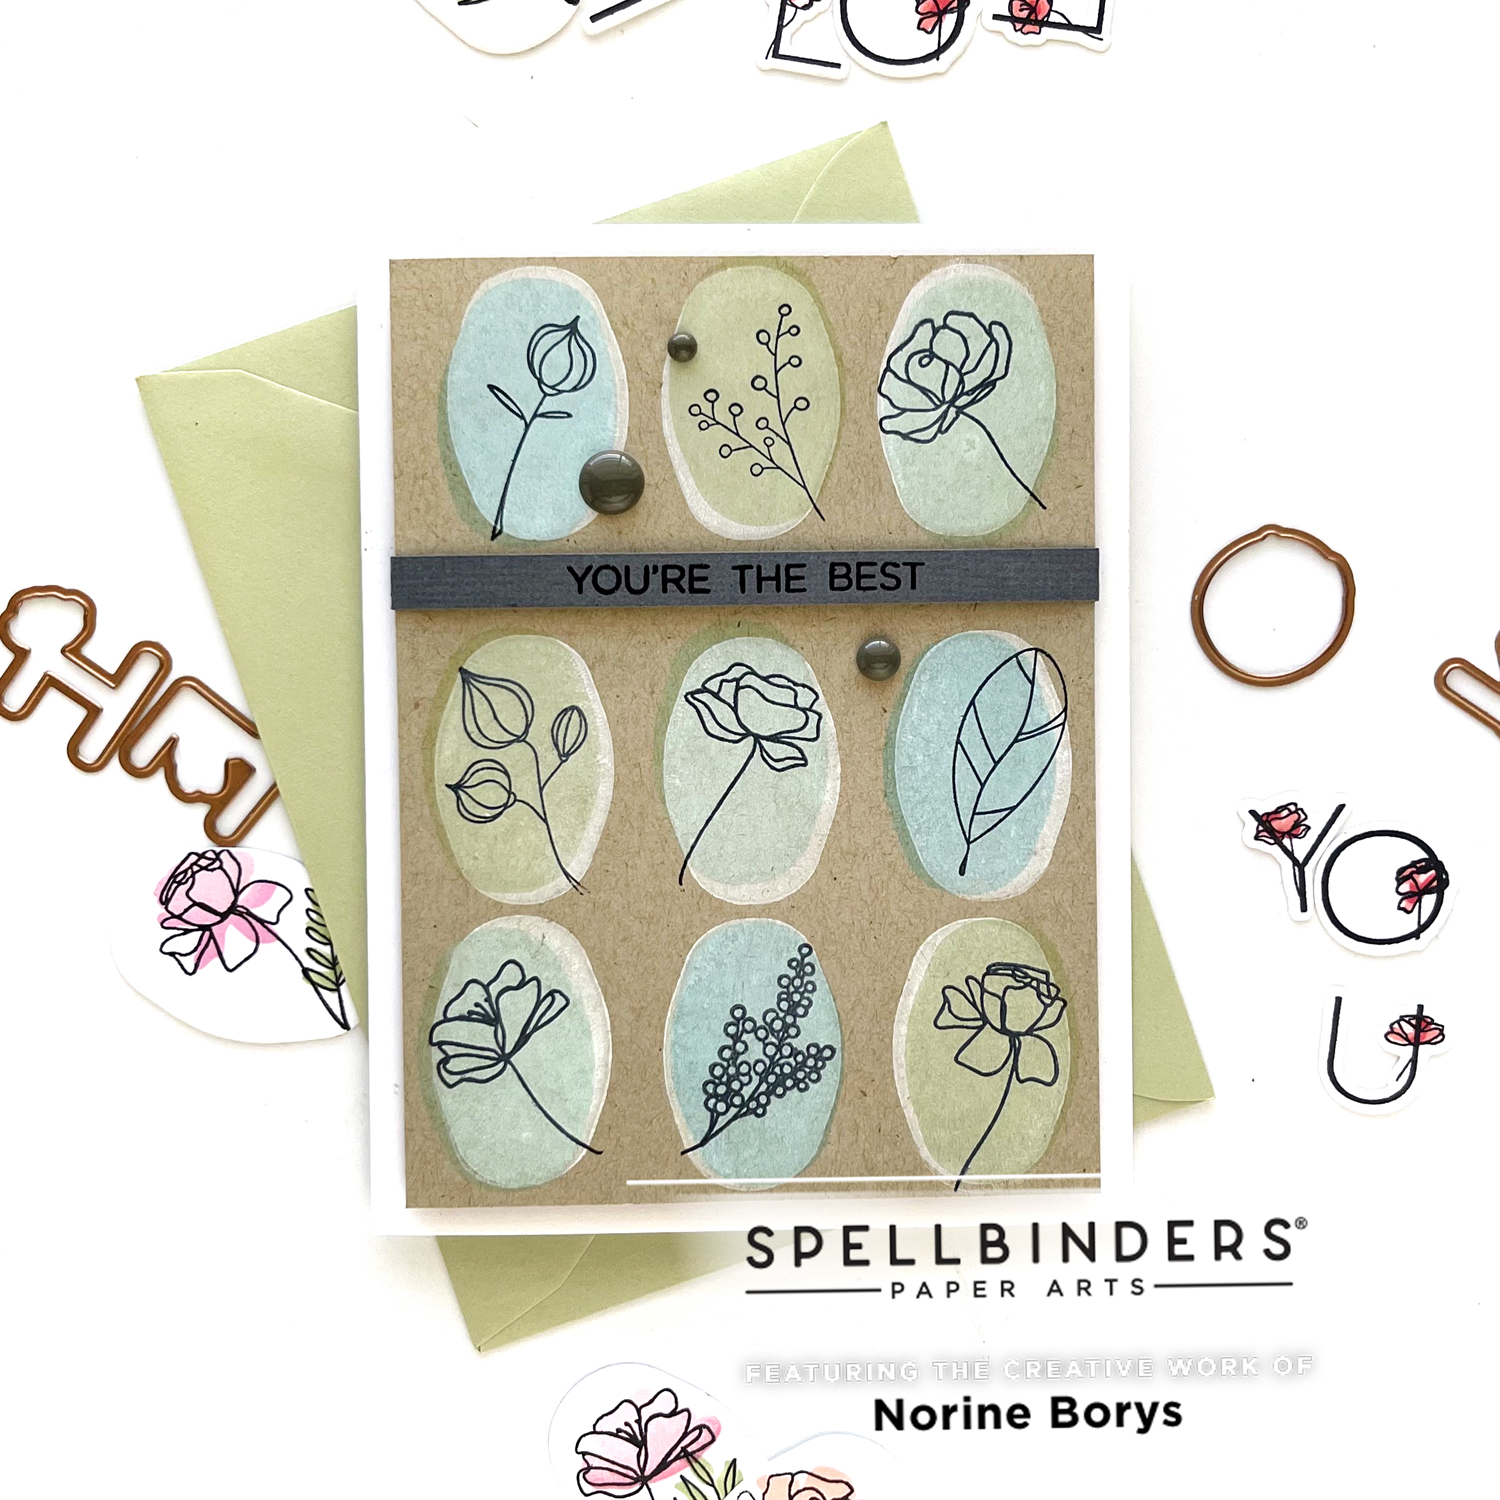
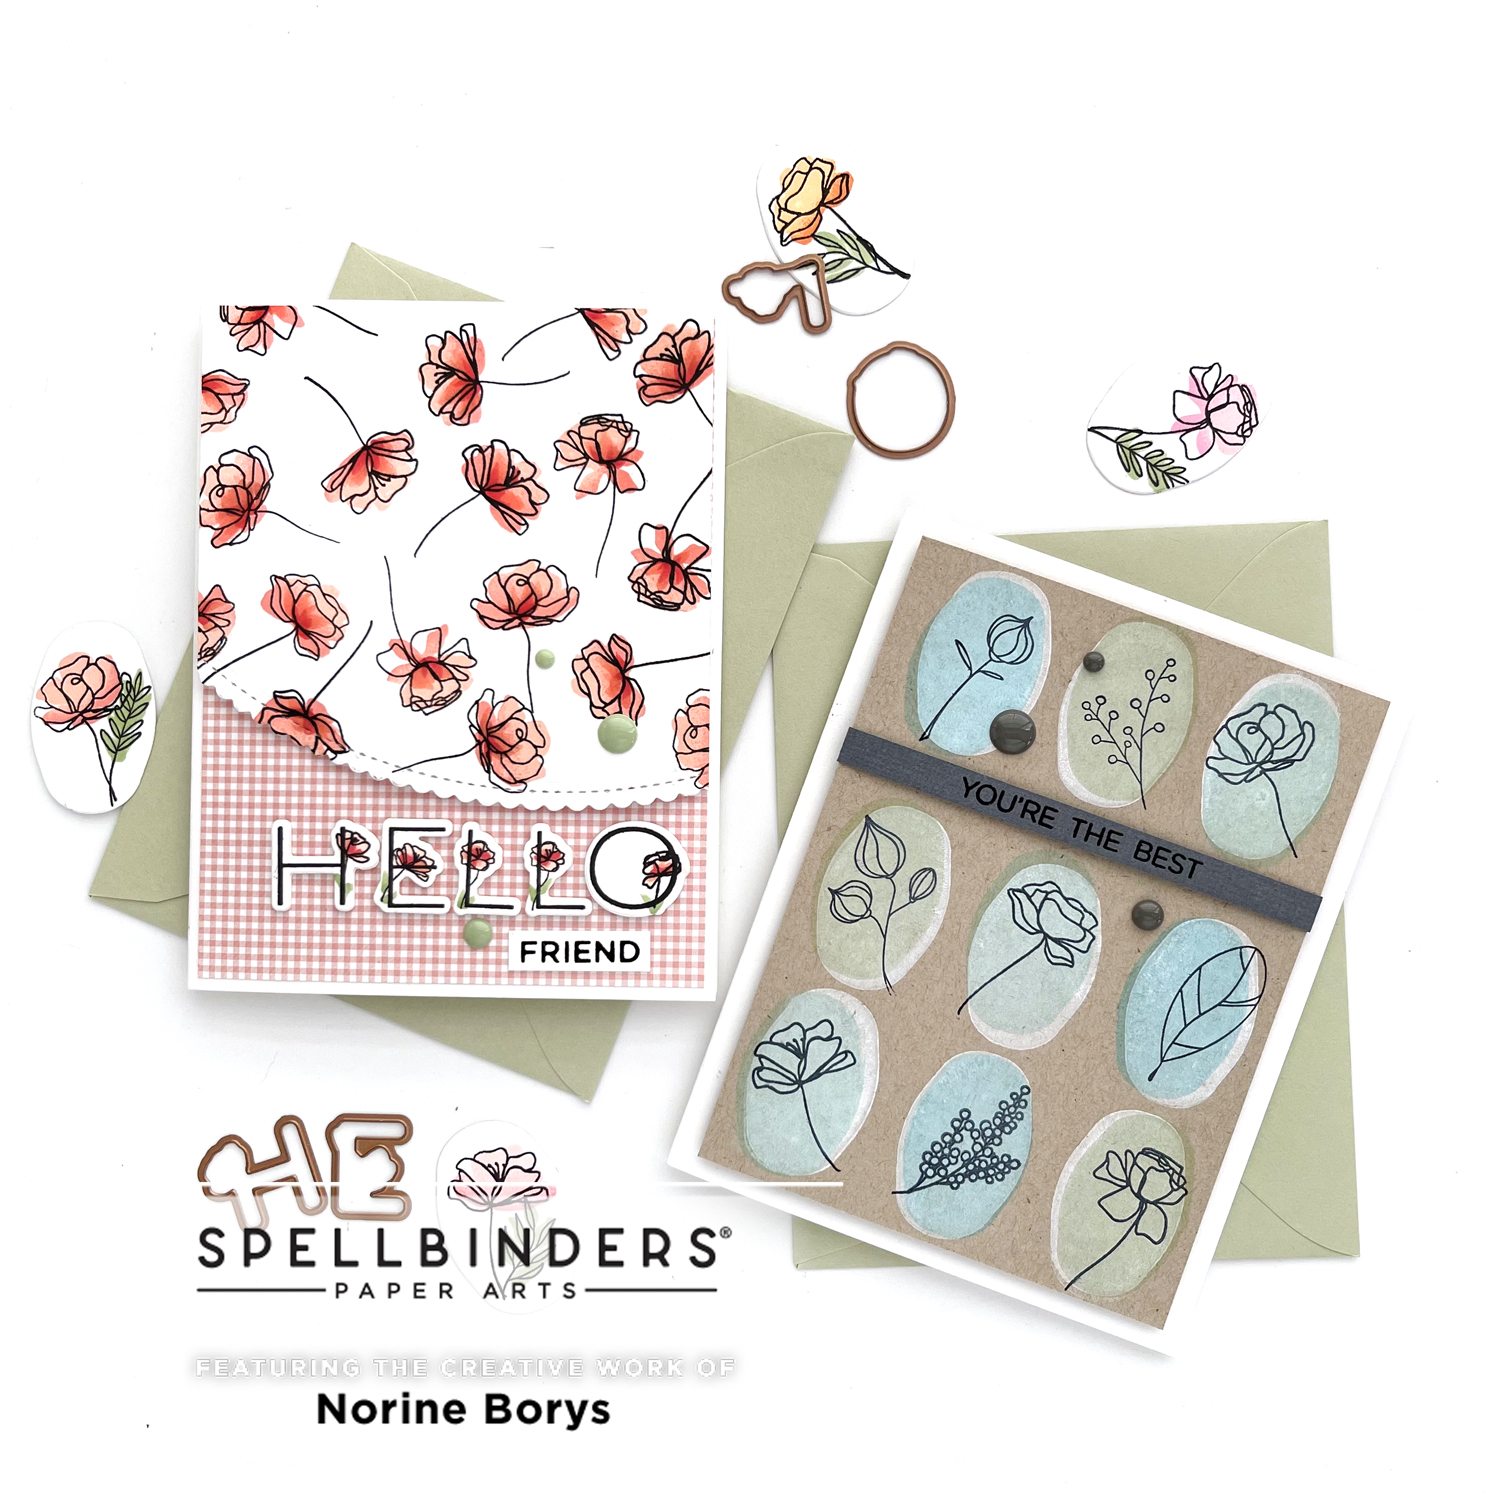
I used Umbrella Crafts Premium White Pigment Ink to stamp the large oval solid shapes, then stamped again (offset) with three different colors of blue/green inks. When stamping on kraft cardstock, an underlayer of white is necessary to let the colors (especially pastels) show up and not be absorbed into the dark colored cardstock.
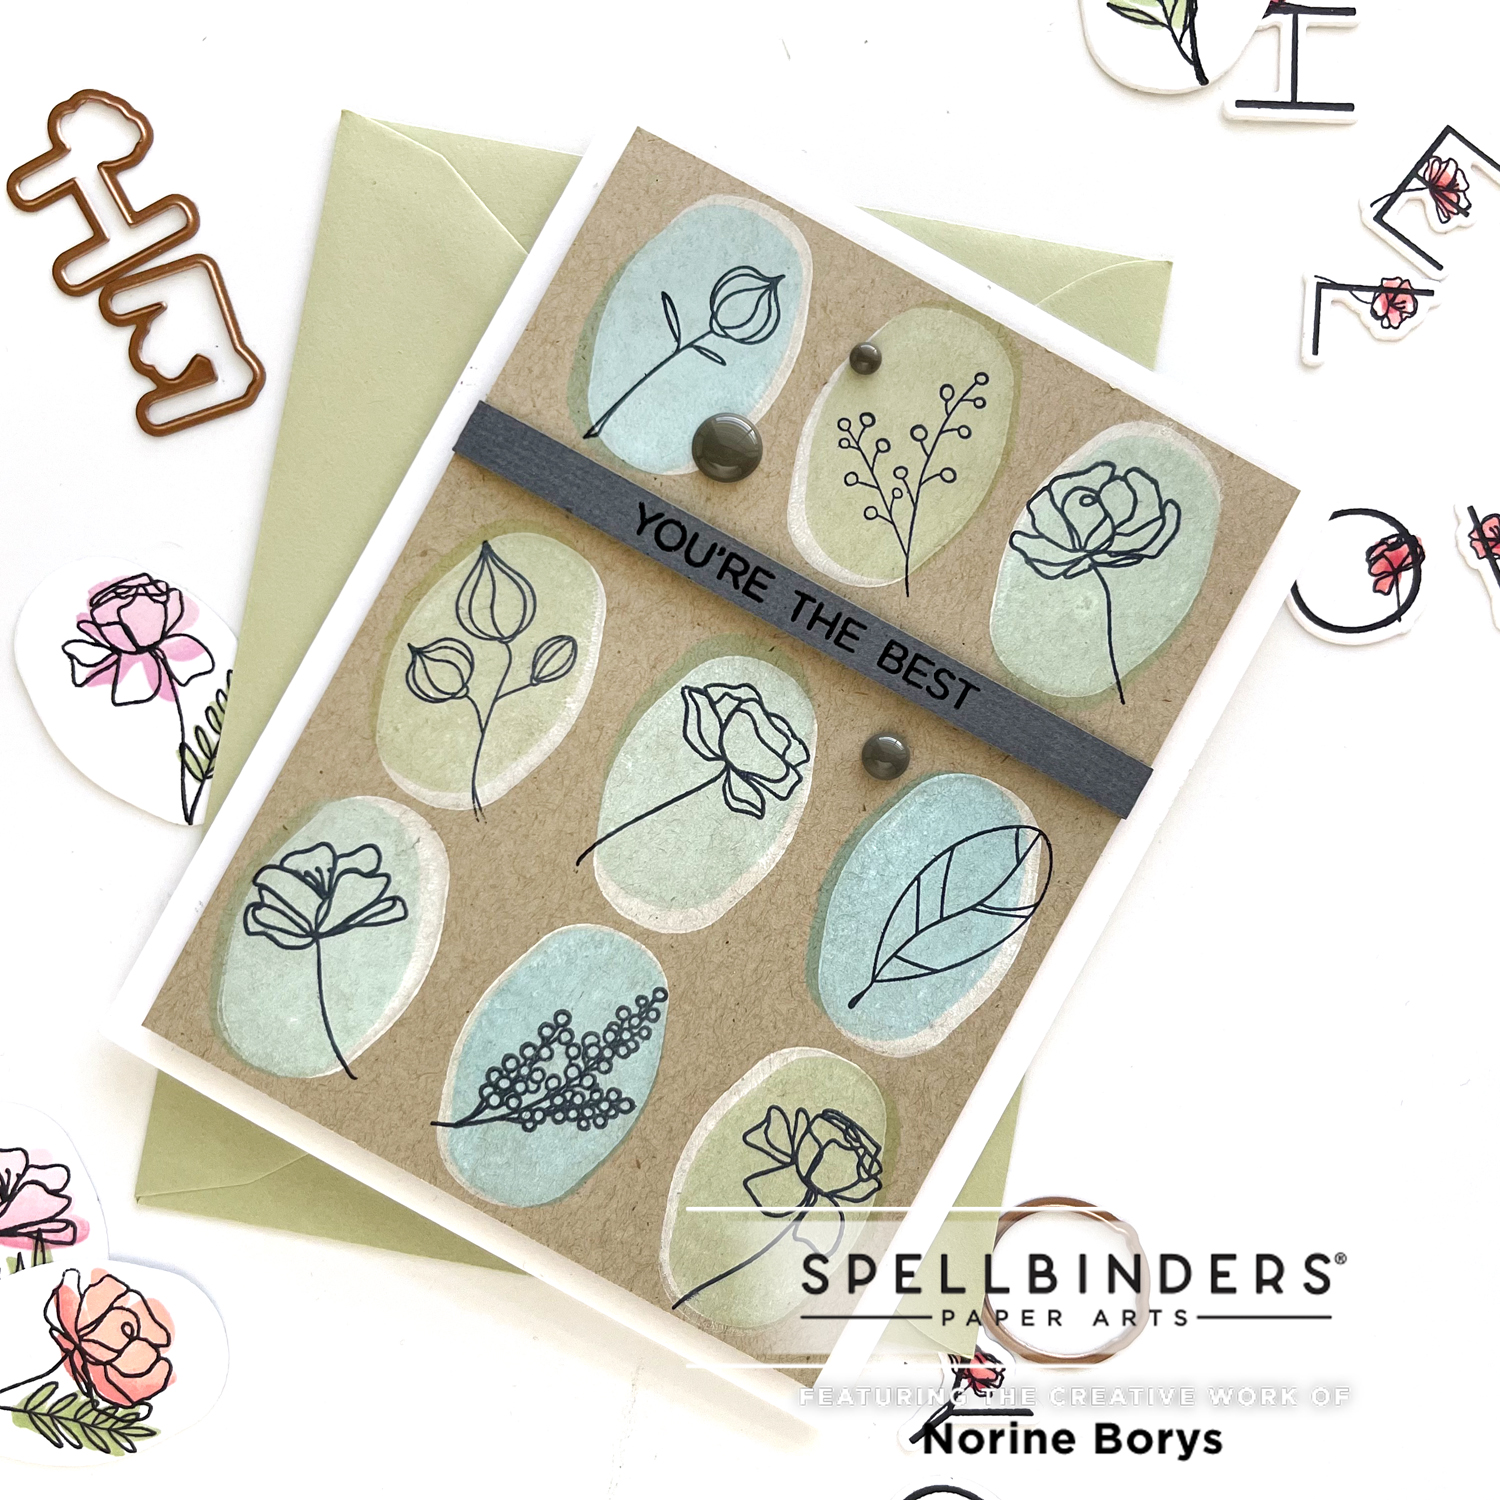
I set the ink layers between stamping the white and the colors with a heat tool and again after adding black outline image details in each oval shape. The stemmed flowers are all from the December stamp and die set, but i went into my stash and found some older Spellbinders sets that provided other simple botanical images that coordinate nicely with the roses. I used small stamp images from the Build A Sentiment, Home For Christmas Sentiments, Bold Beautiful and Flowers Swirls stamp sets.
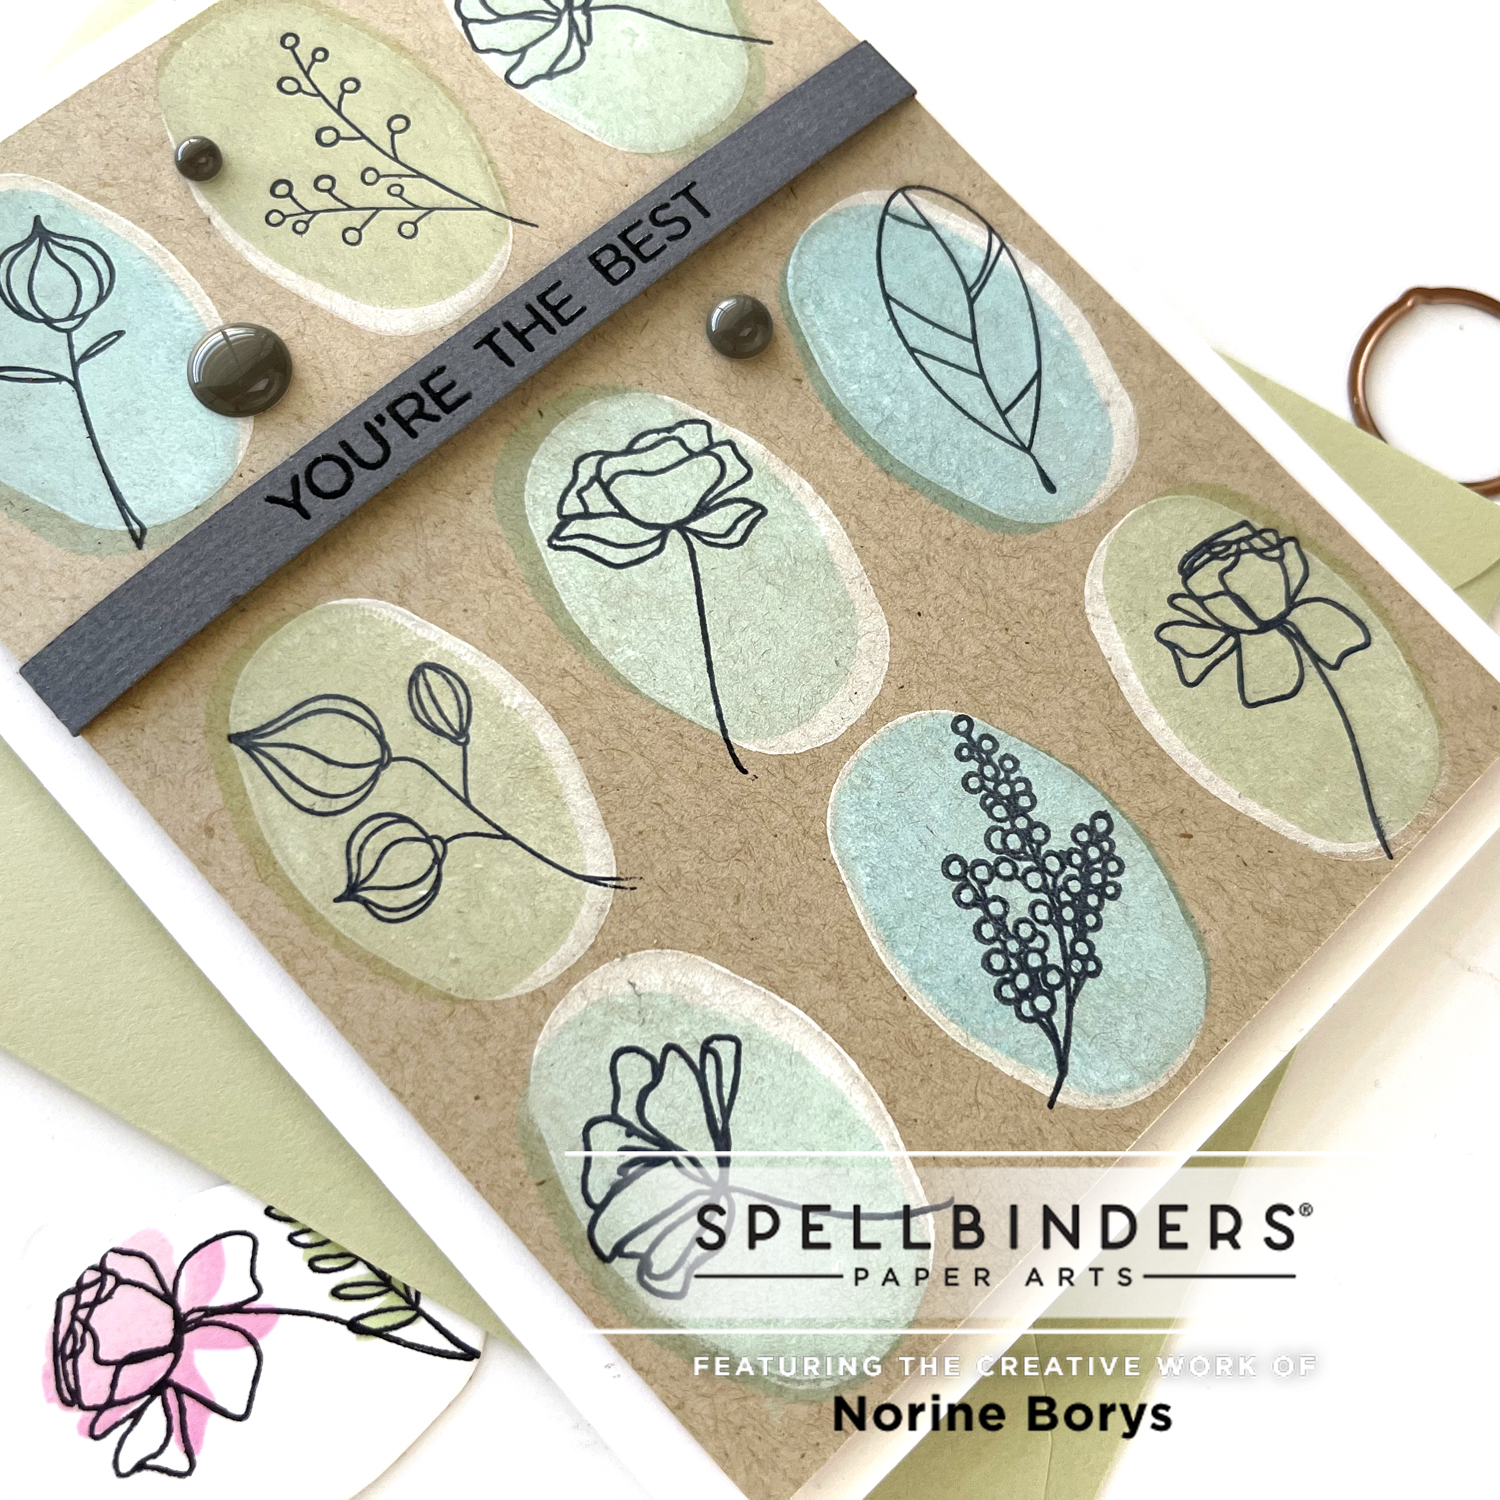
I combined three words in the Build A Sentiment stamp set to create the greeting, which I stamped and heat embossed on grey cardstock. I wrapped the greeting strip around the sides of the card panel, adhered all the layers to a folded card base and finished the card with a few dark gray enamel dots.
The three colored inks used over top of the white ovals include Frayed Leaf, Sea Breeze and Mountain Mist.
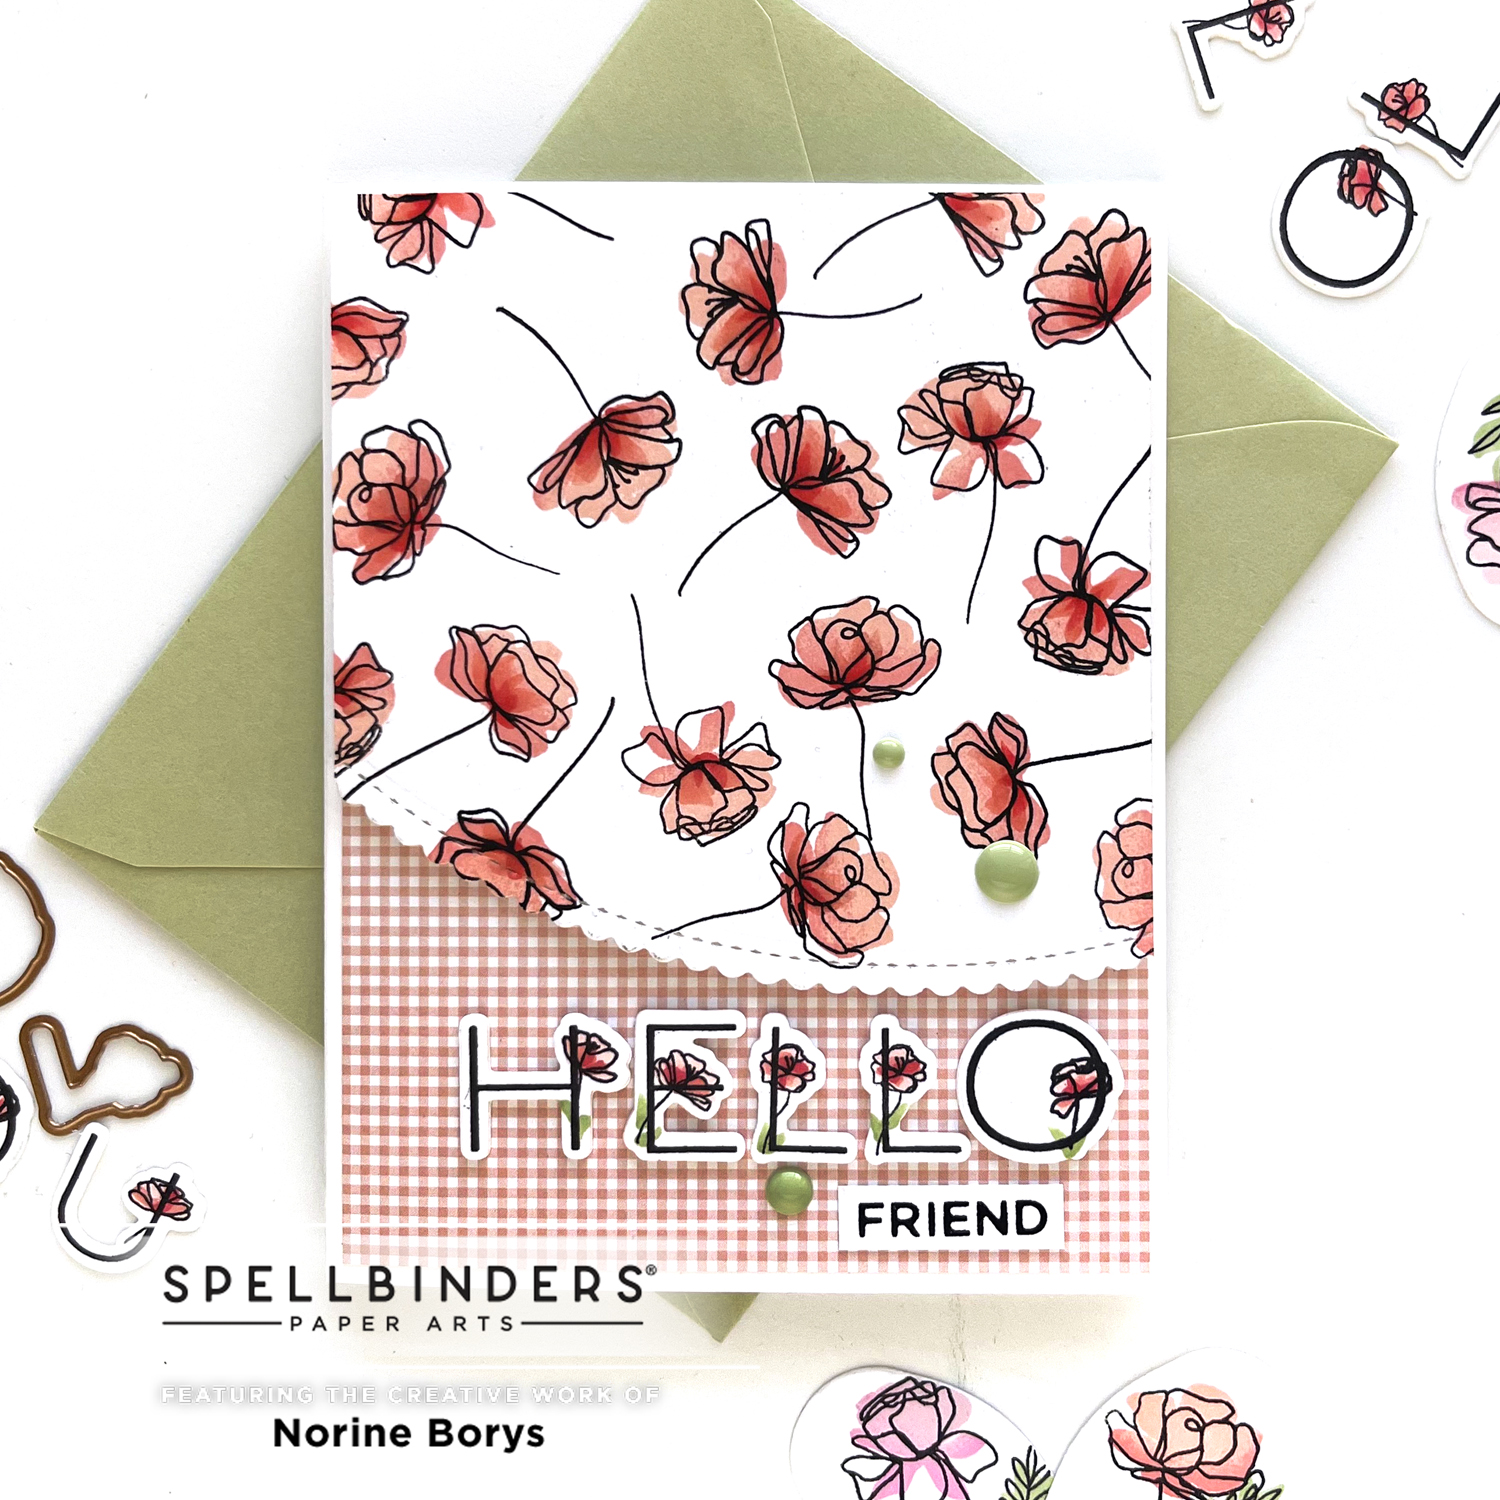
For my second card, I created my own “patterned paper” by stamping the four stemmed flowers to fill in the background of a card panel. I additionally offset-stamped the filler shapes with Altenew Pink Pearl ink to color the blooms.
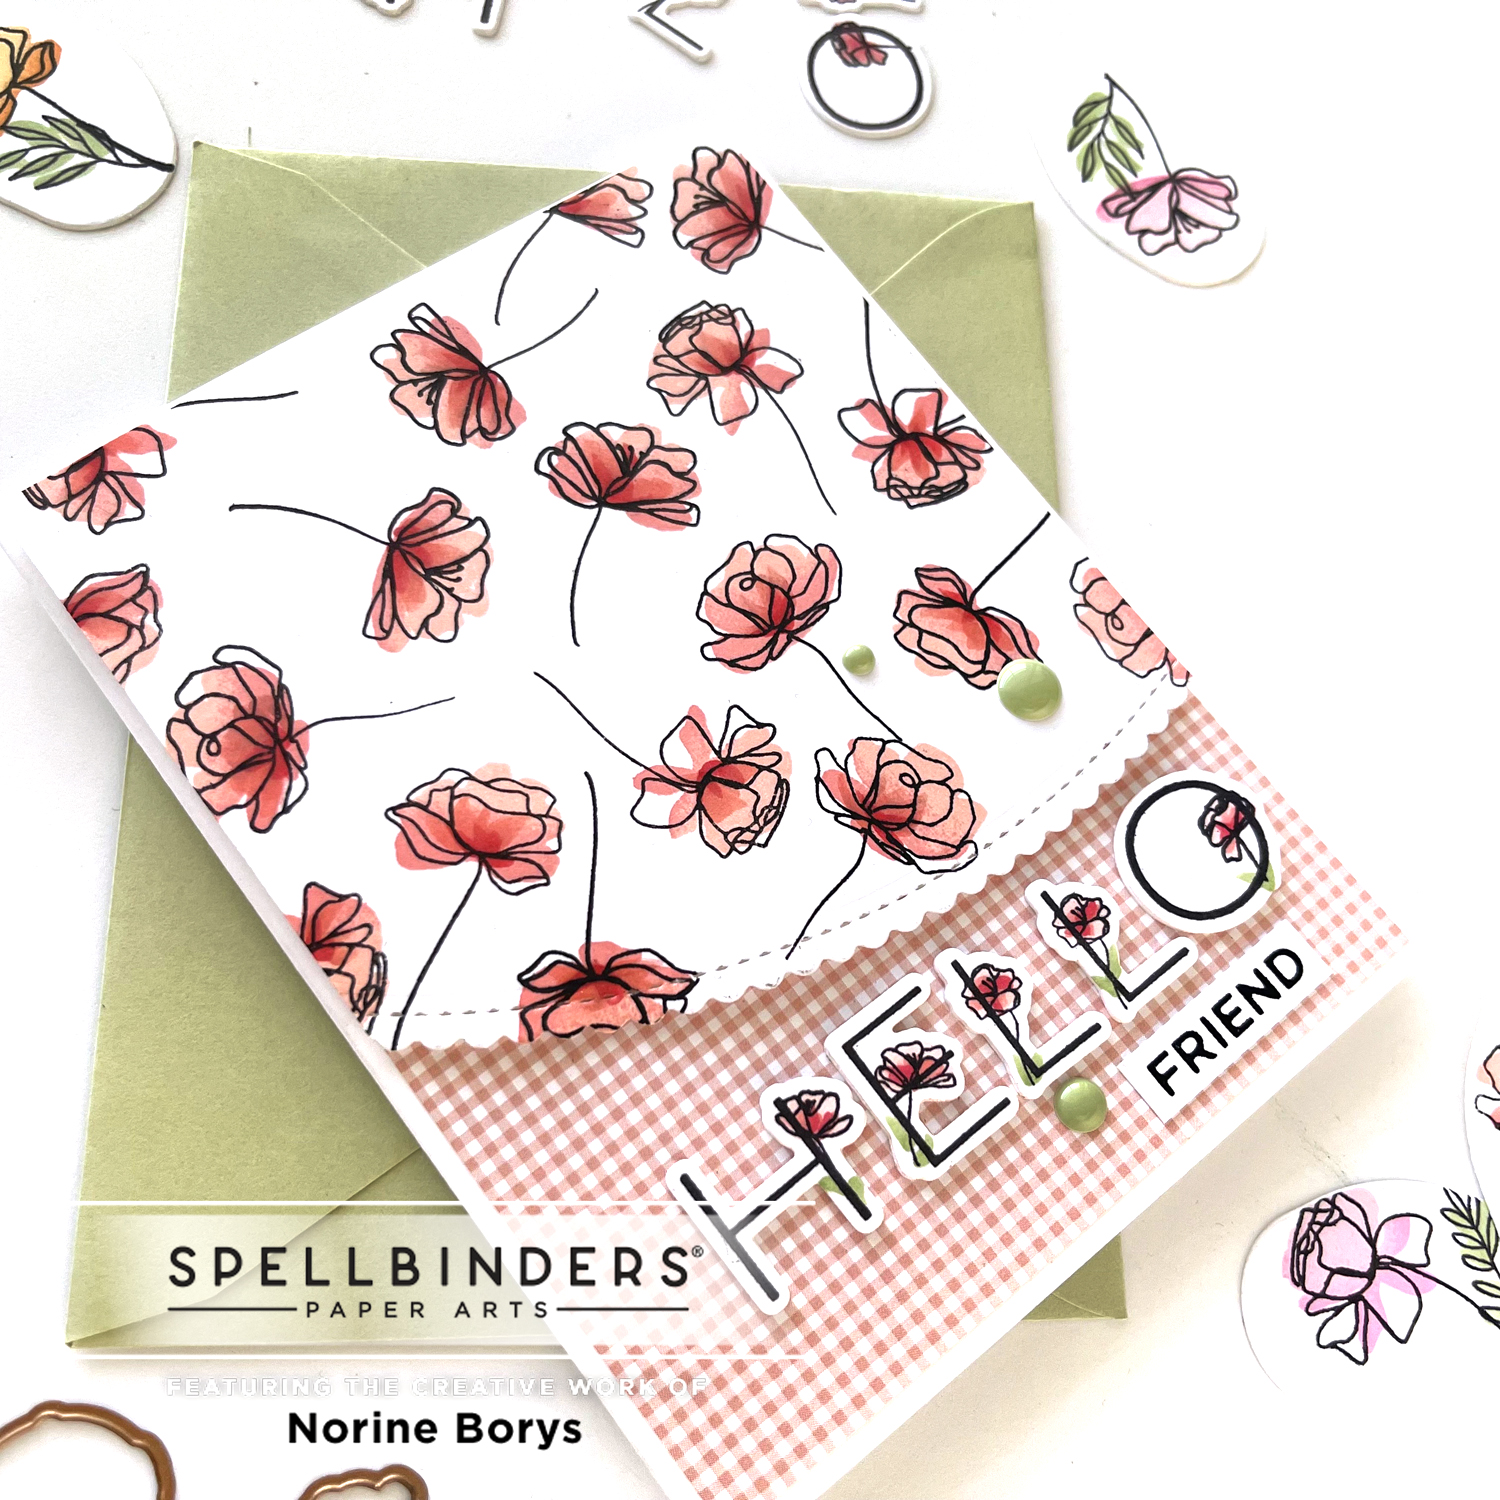
To add some interest to the solid color stamps, I added some shading with a Copic marker in a slightly darker shade than the Pink Pearl ink.
Next, I die cut, then stamped the “HELLO” greeting, coloring the flowers with Copic markers again, and adding the suggestion of greenery and leaves with a green copic marker.
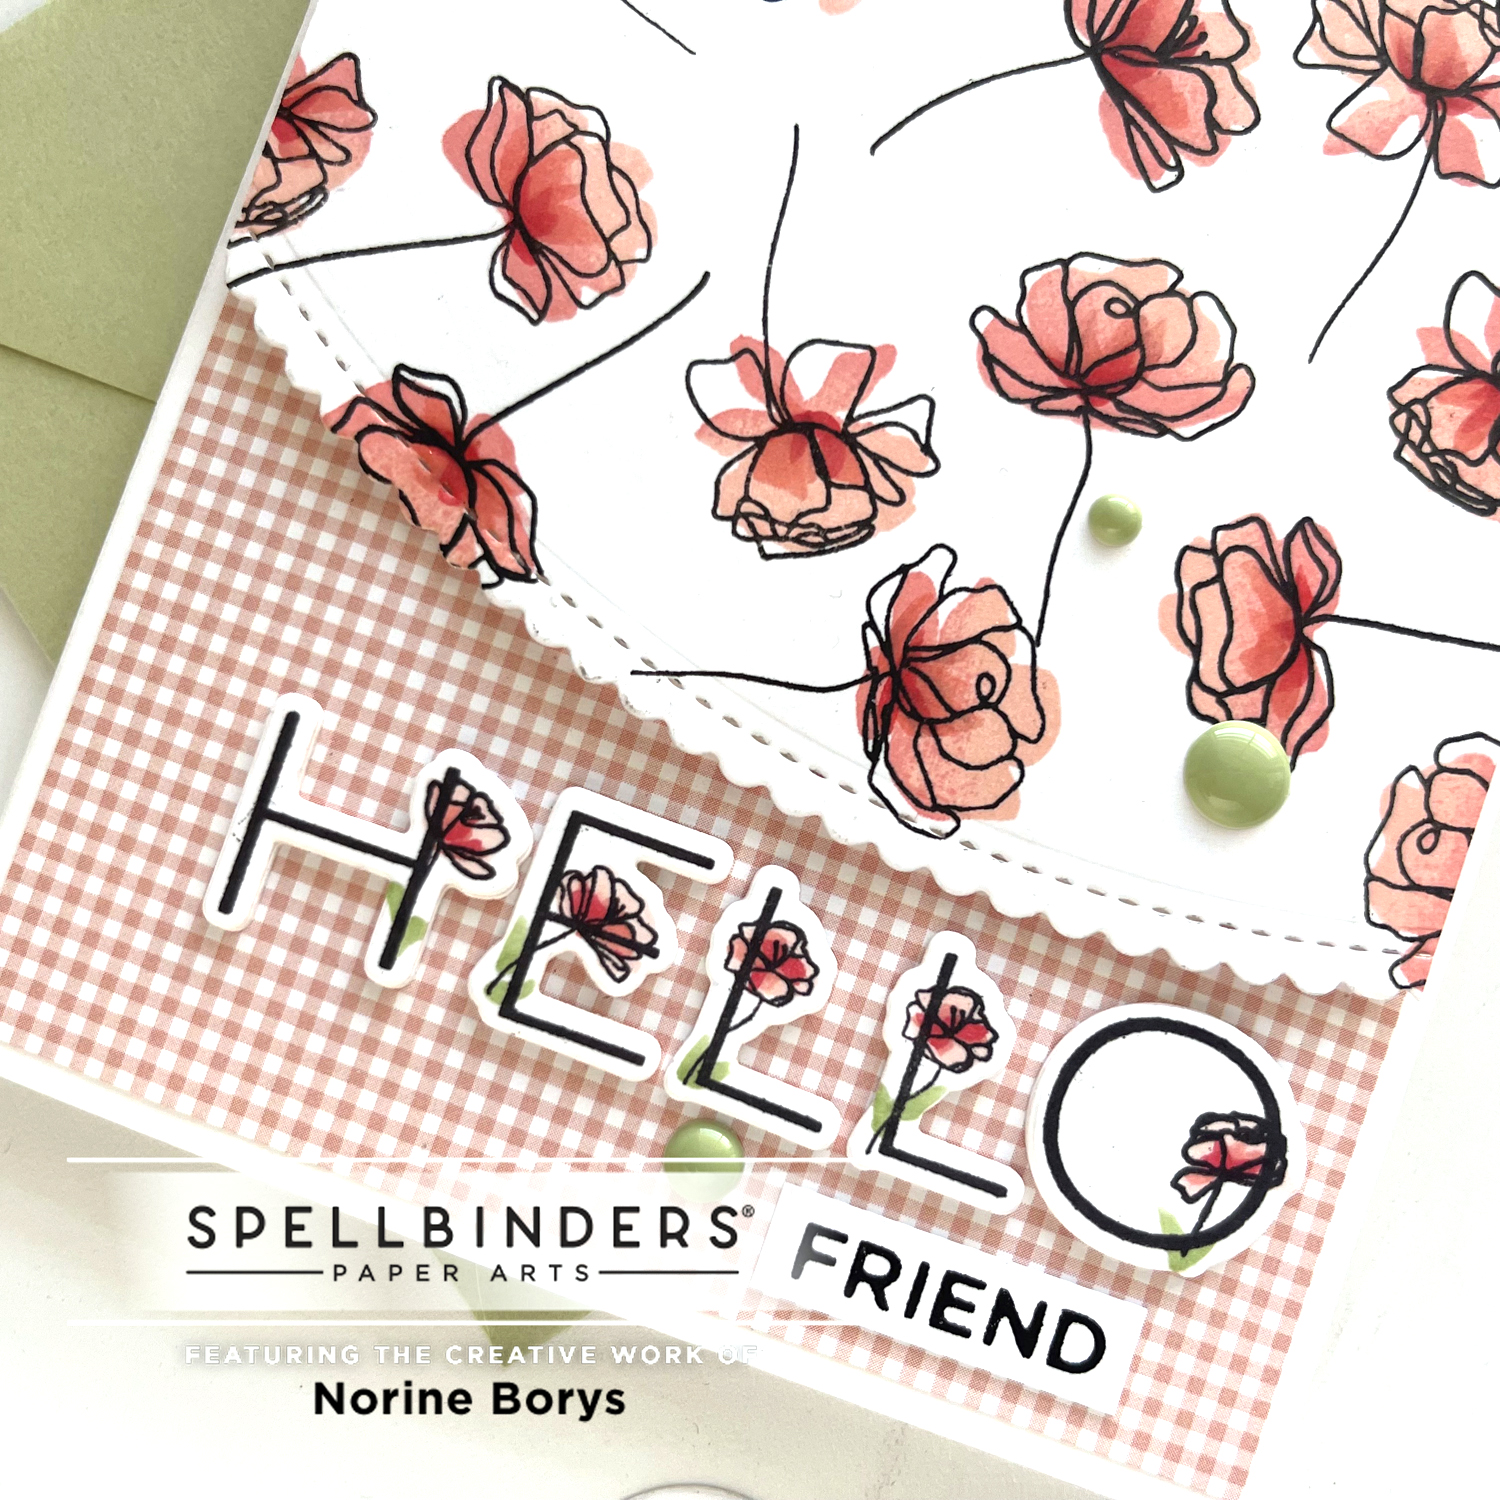
I used Spellbinder’s black Glimmer Foil and the Glimmer Everyday Sentiments II set to create the “friend” strip. The stitched scallop die cut top panel is popped up with foam tape and the “hello” letters with extra die cut cardstock layers.
If you’re interested in any of the supplies mentioned you can purchase them by clicking on the links below. Thank you for stopping by and have a wonderful day!
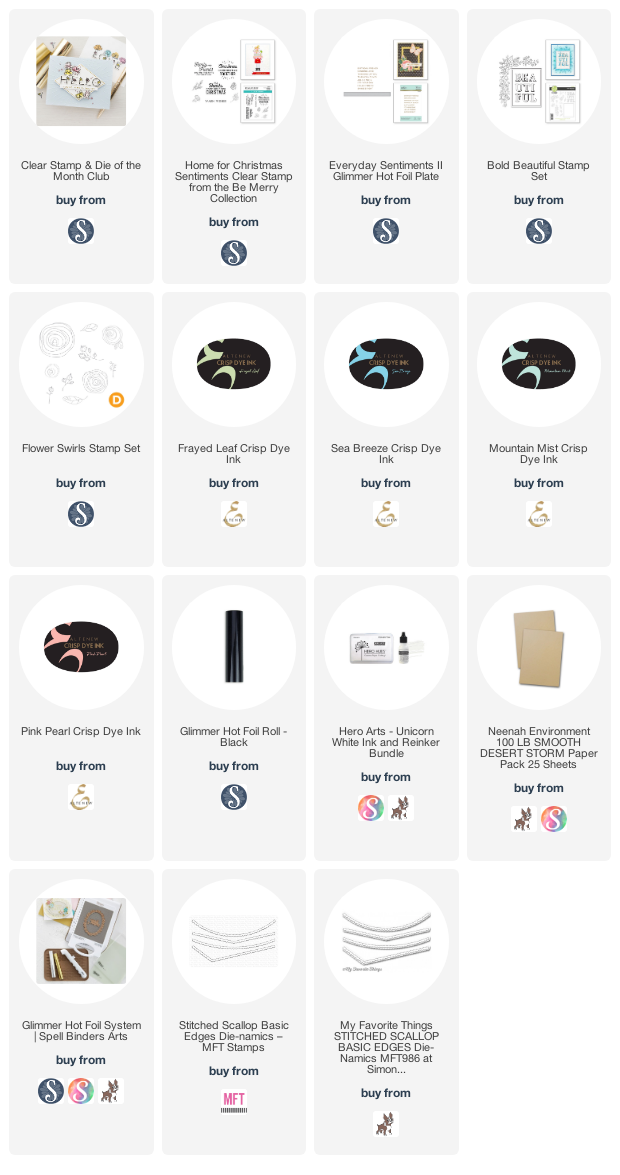
SUPPLIES USED: