Hi, hello! I’m back today with a couple of cards that didn’t get finished or posted during the Handmade Holiday release over at Simon Says Stamp, but better late and all that, right? So here they are today!
This post contains affiliate links that are listed below. By clicking through to purchase products linked, you are helping to support this blog at no additional cost to you which allows me to continue to provide you with creative inspiration and instructive help.
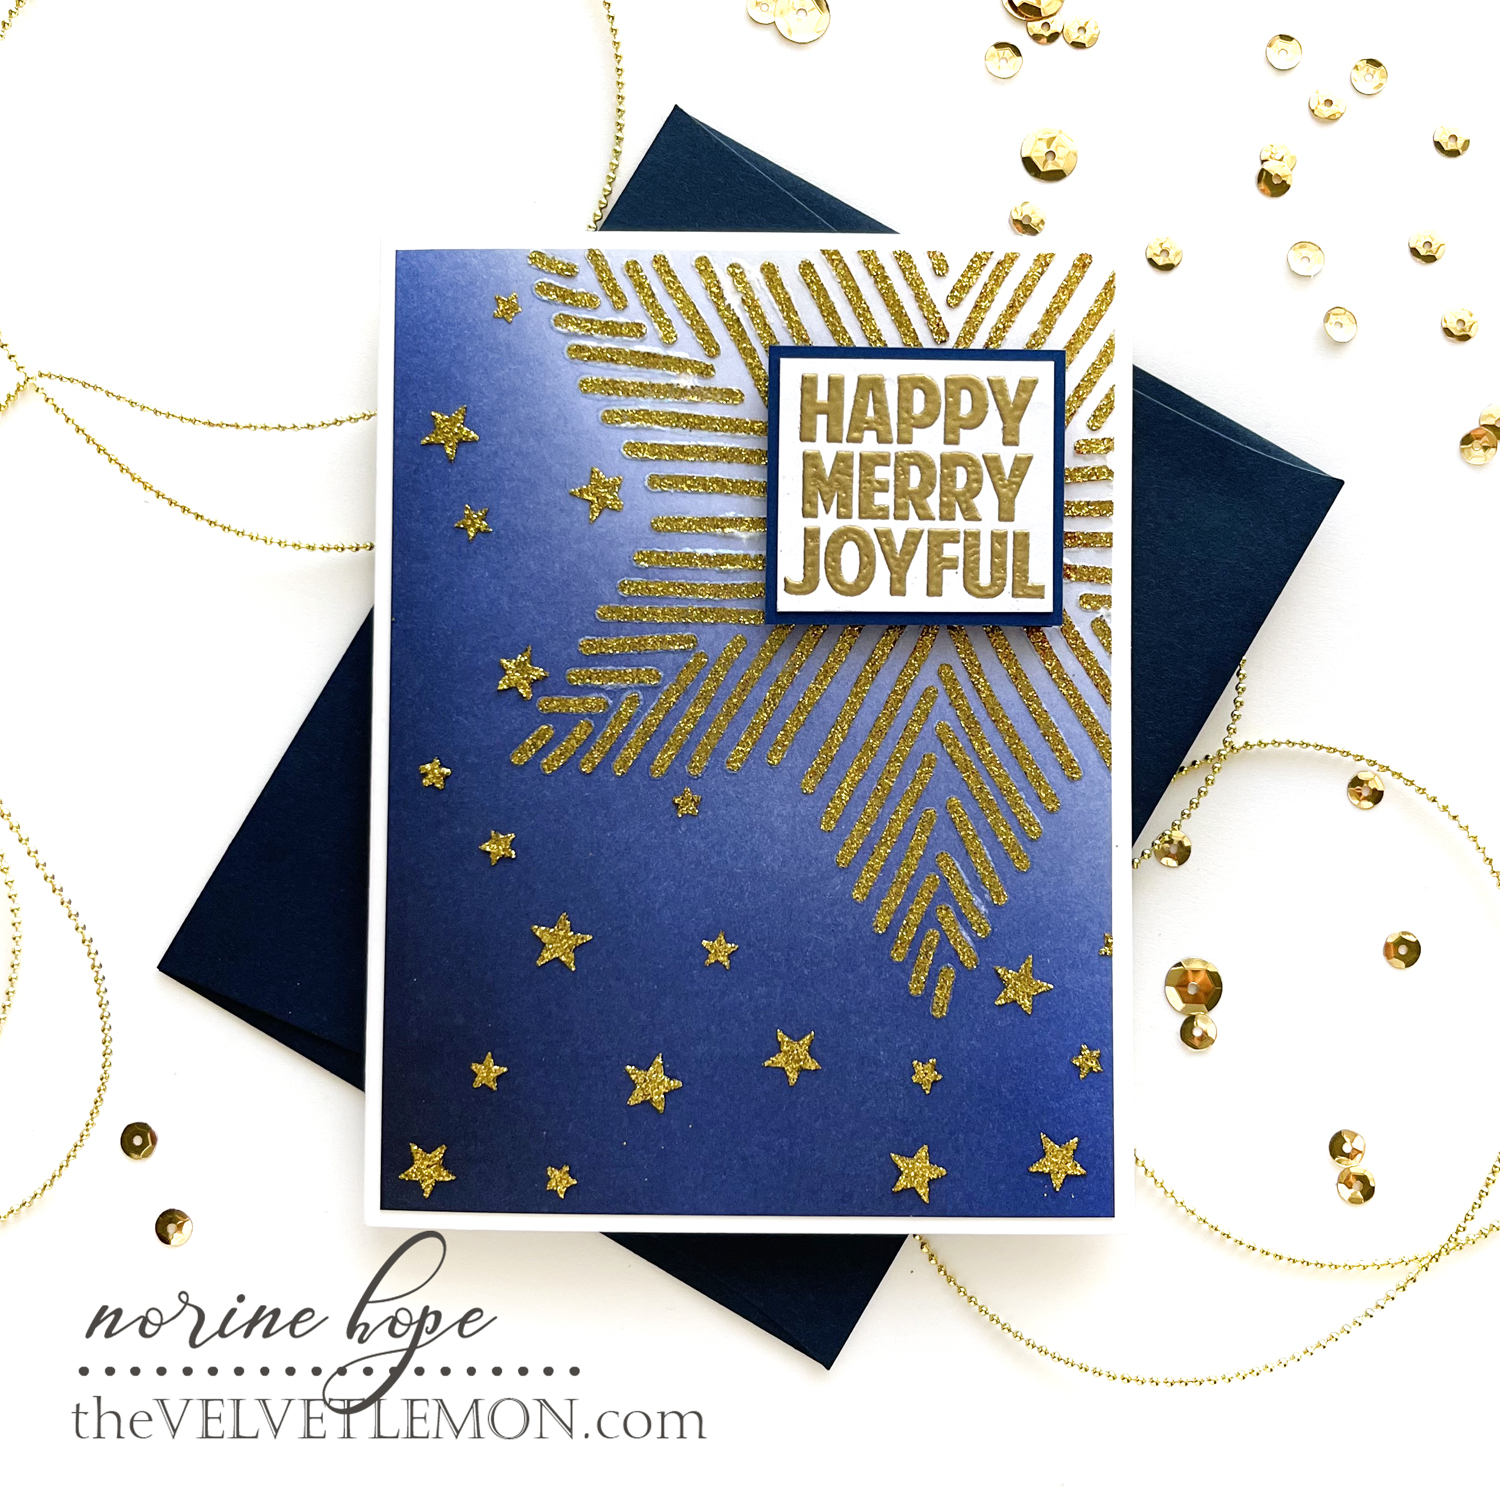
My first card today uses the Rustic Snowflake stencil and the Fading Stars stencil (from a previous release) along with the Rainbow Mini Glitter Gel (in gold) and the XL Christmas Greetings stamp set, with gold heat embossing.
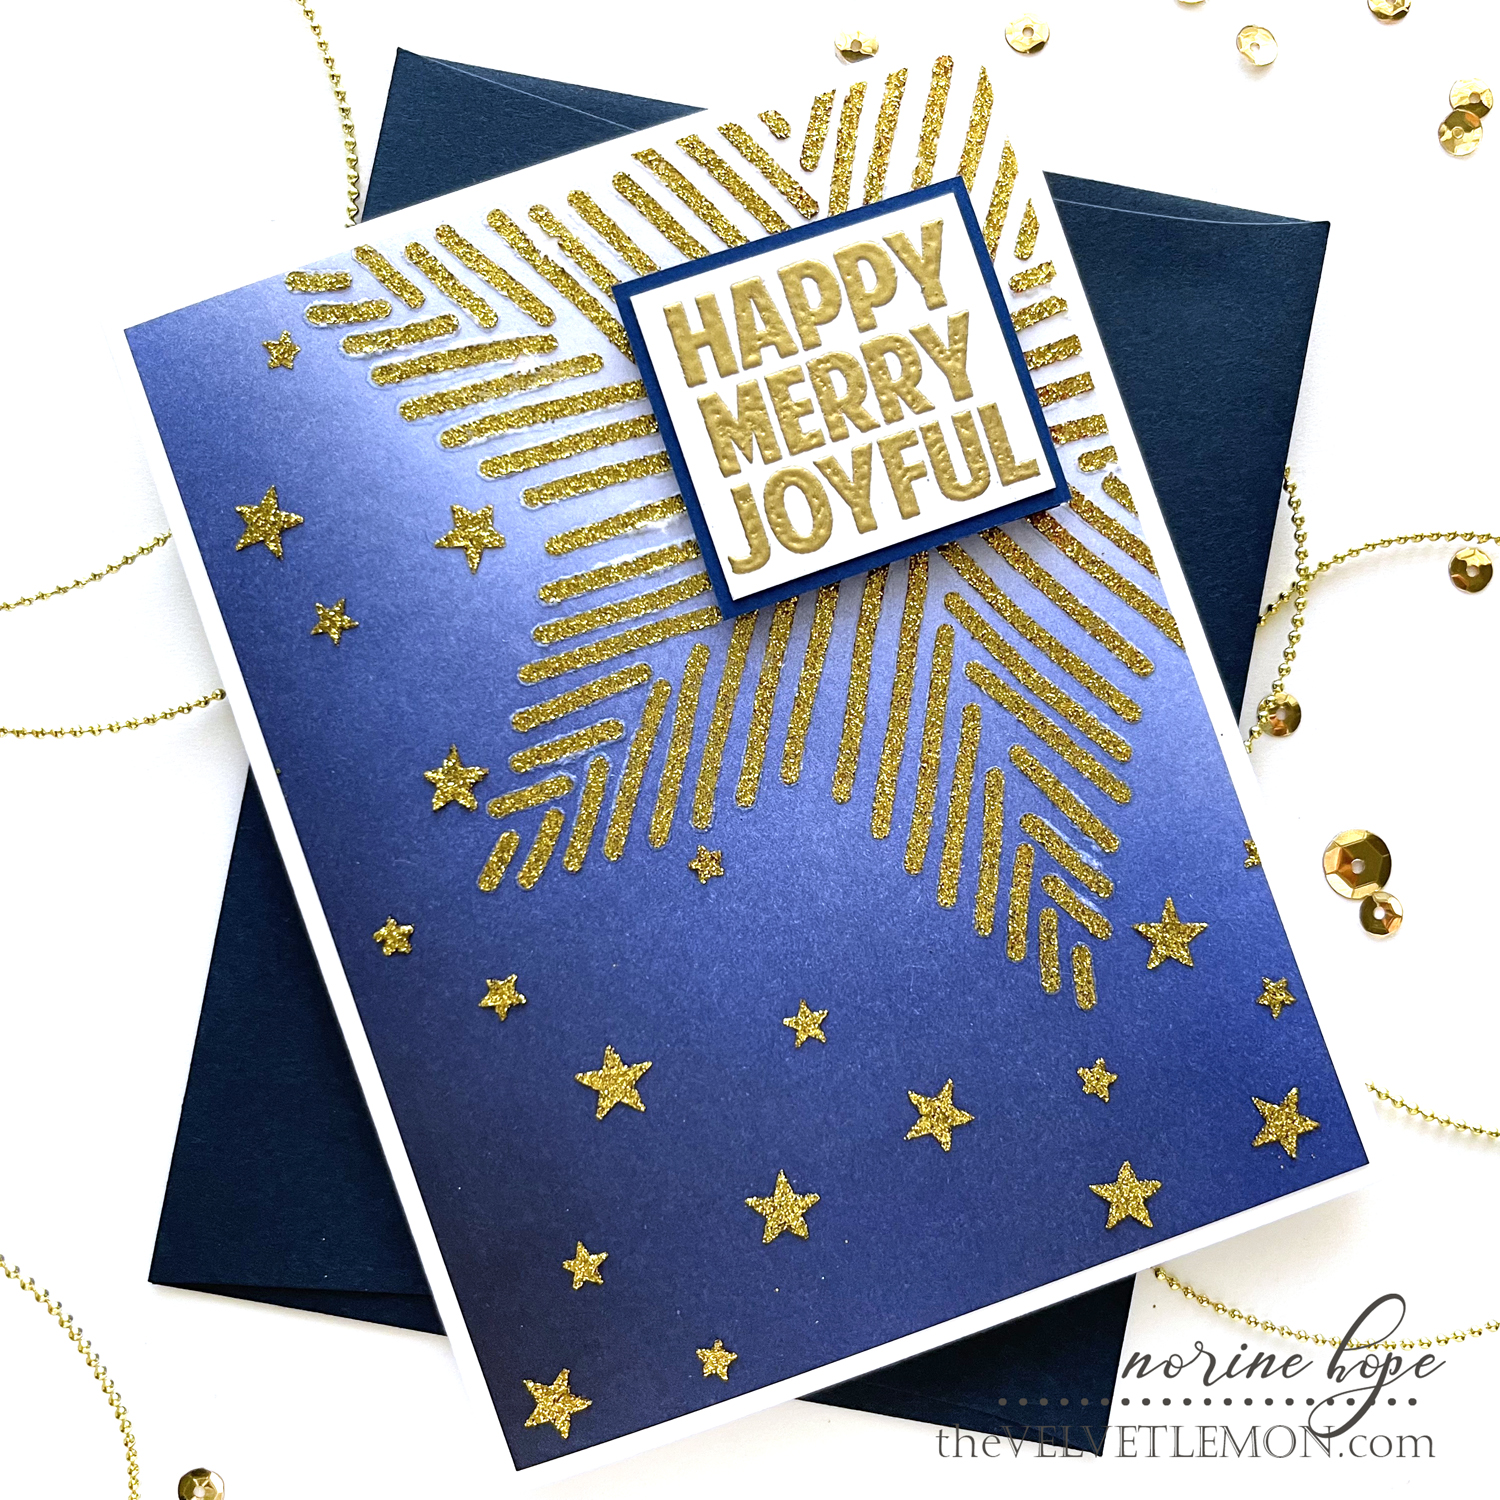
I started by ink blending with Altenew Desert Night and Azurite, heavily in the bottom left corner and fading away into the upper right. Then I used the Rustic Snowflake and a palette knife to smear the Gold Glitz Gel on the inked card panel. I love how quickly it dries. By the time I’d washed the snowflake/star stencil the gel had dried I could use the Fading Stars stencil to add small stars in a totally random pattern.
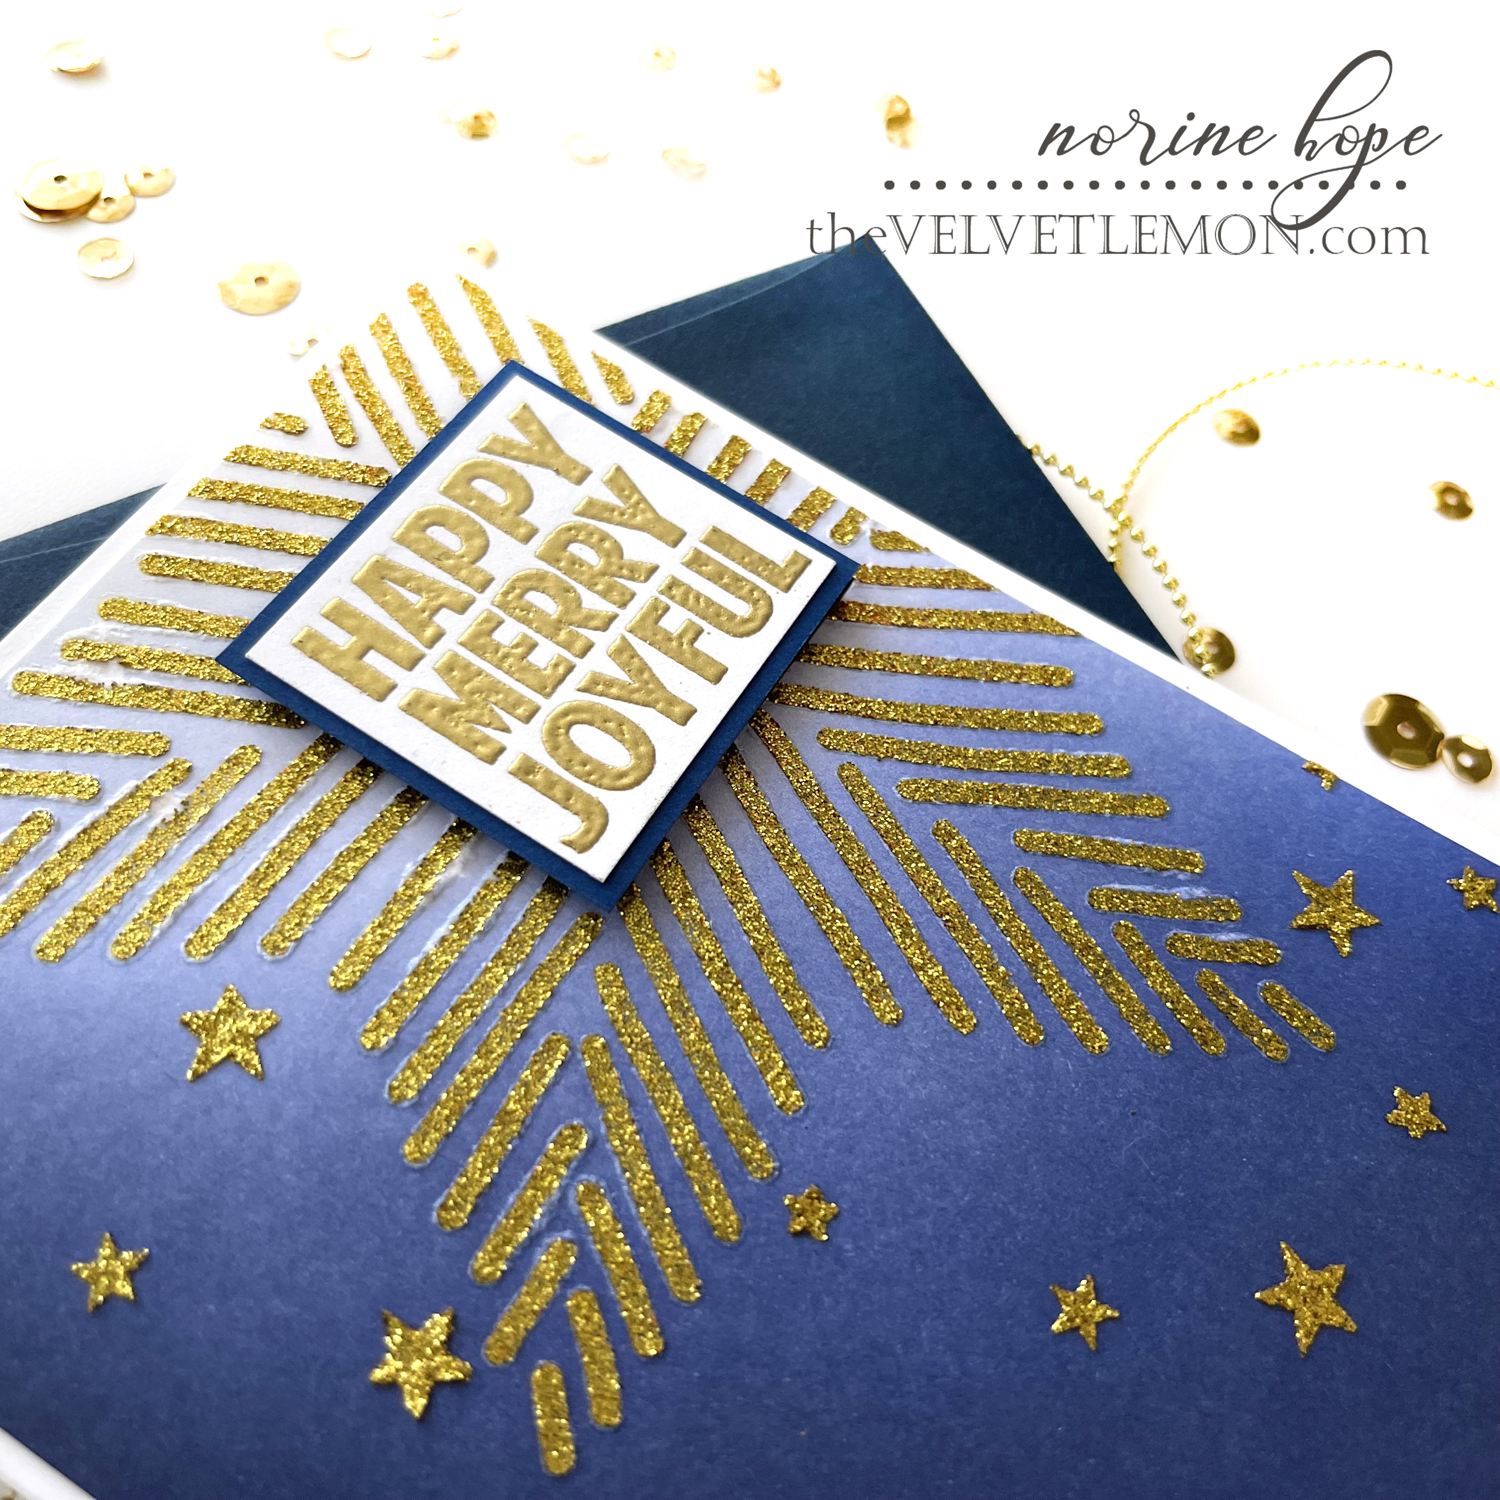
I stamped the “happy merry joyful” sentiment with Versamark embossing ink and heat set with gold embossing powder. There is a matching die set for this stamp set, but I chose to trim the greeting to a simple square with a blue cardstock mat. And with all those lovely sparkly stars scattered everywhere, no extra embellishment was necessary.

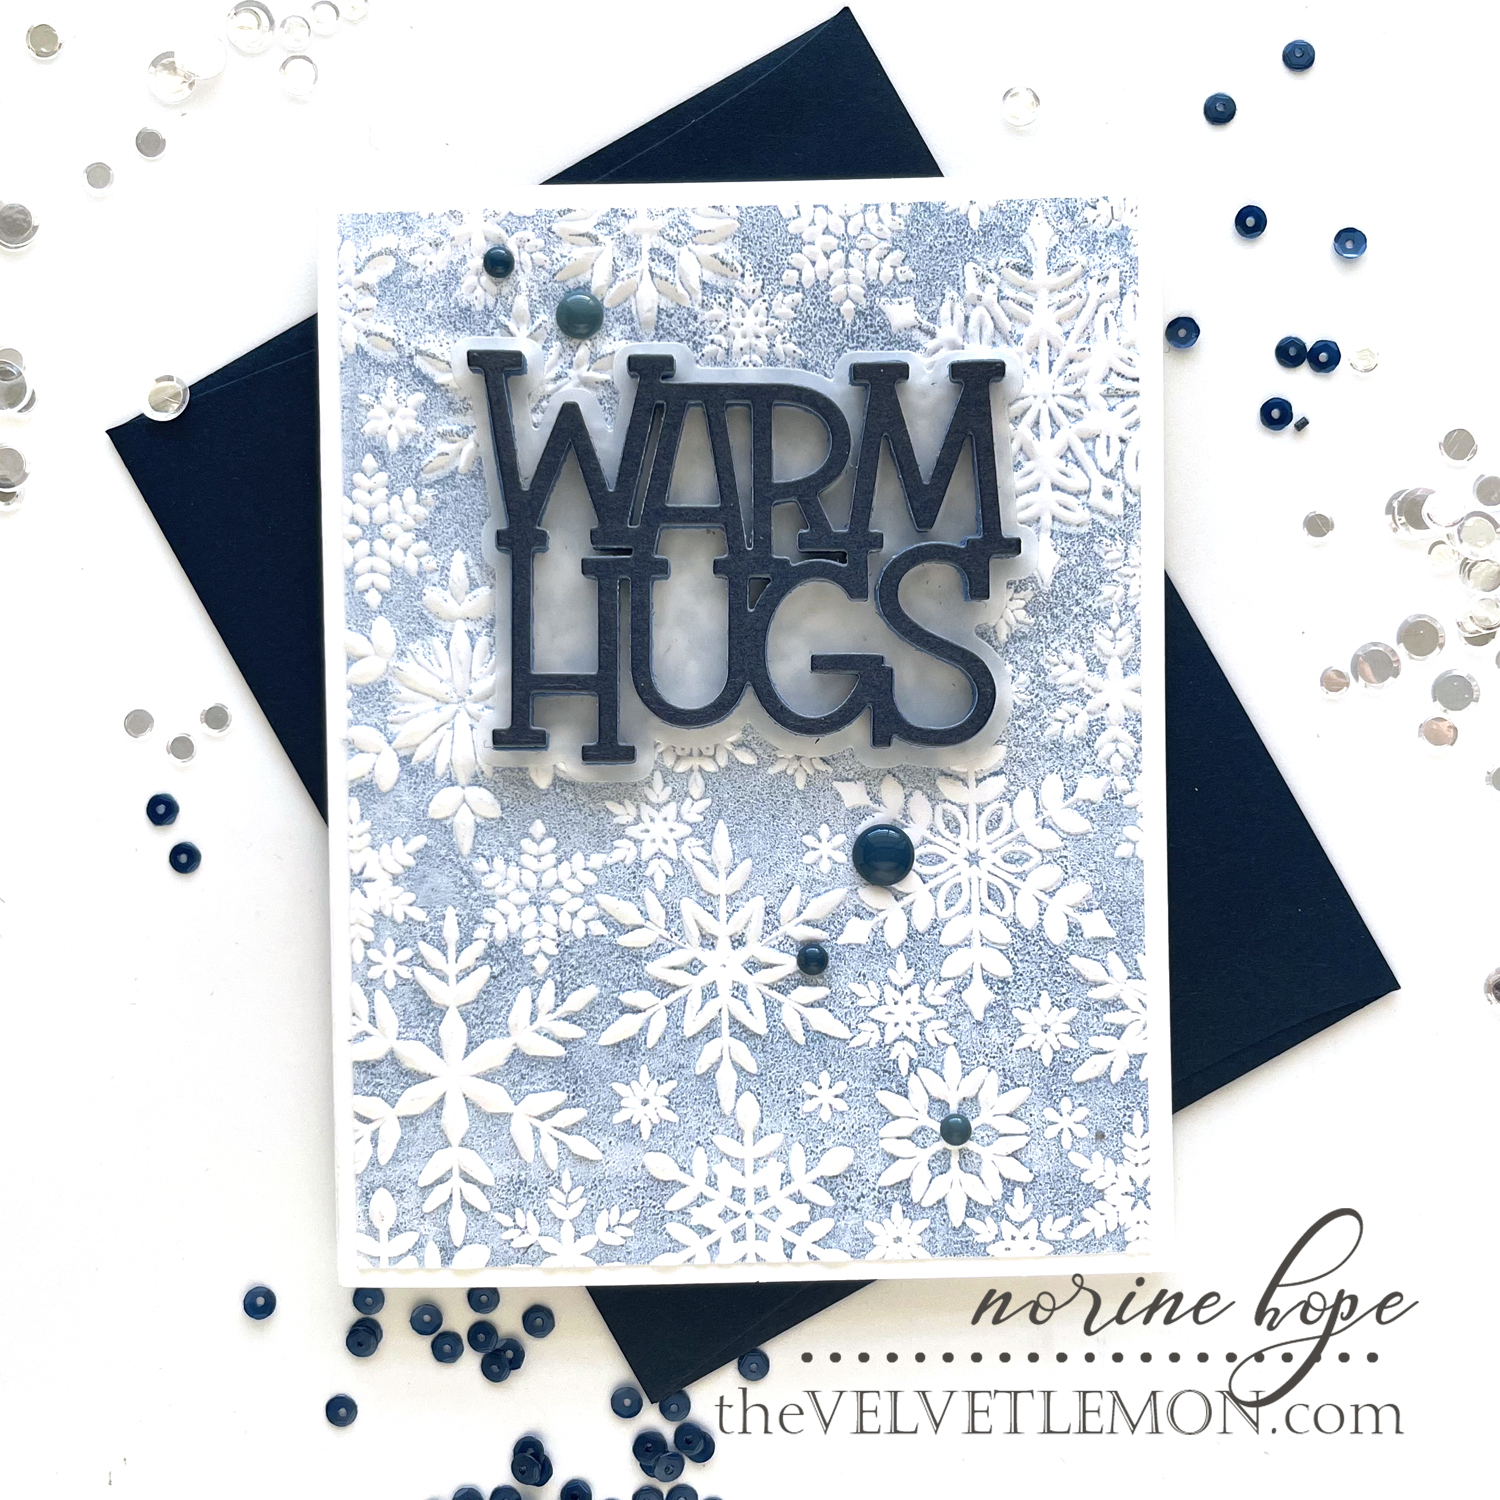
My second card uses the Snowflakes Visions embossing folder from the Handmade Holidays release, along with the previously released Warm Hugs die set.
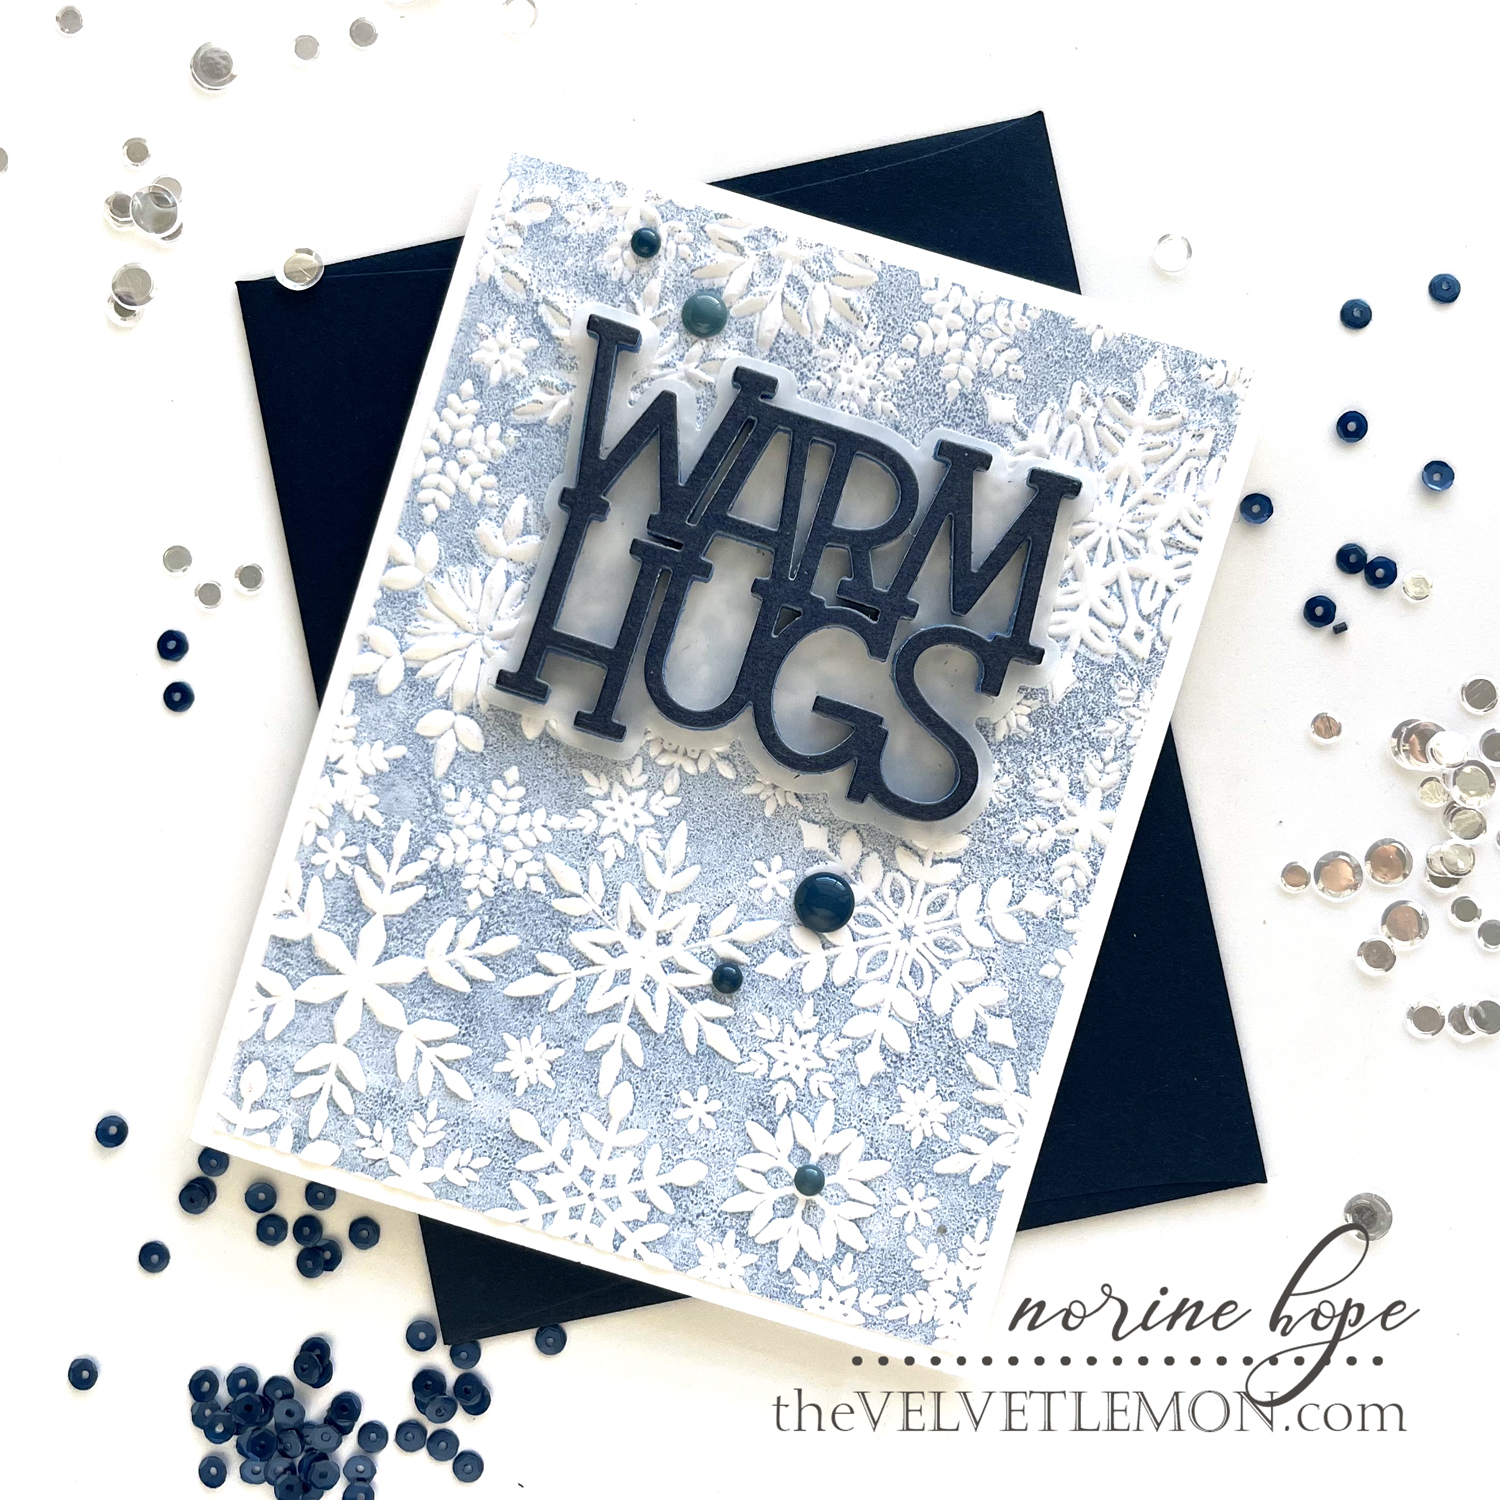
I used Altenew Cloudy Sky ink to ink up the flat side of the embossing folder, then ran it through the Platinum 6 die cutting machine with Neenah Solar White cardstock. That method makes the background colored and preserves the raised embossed areas white.
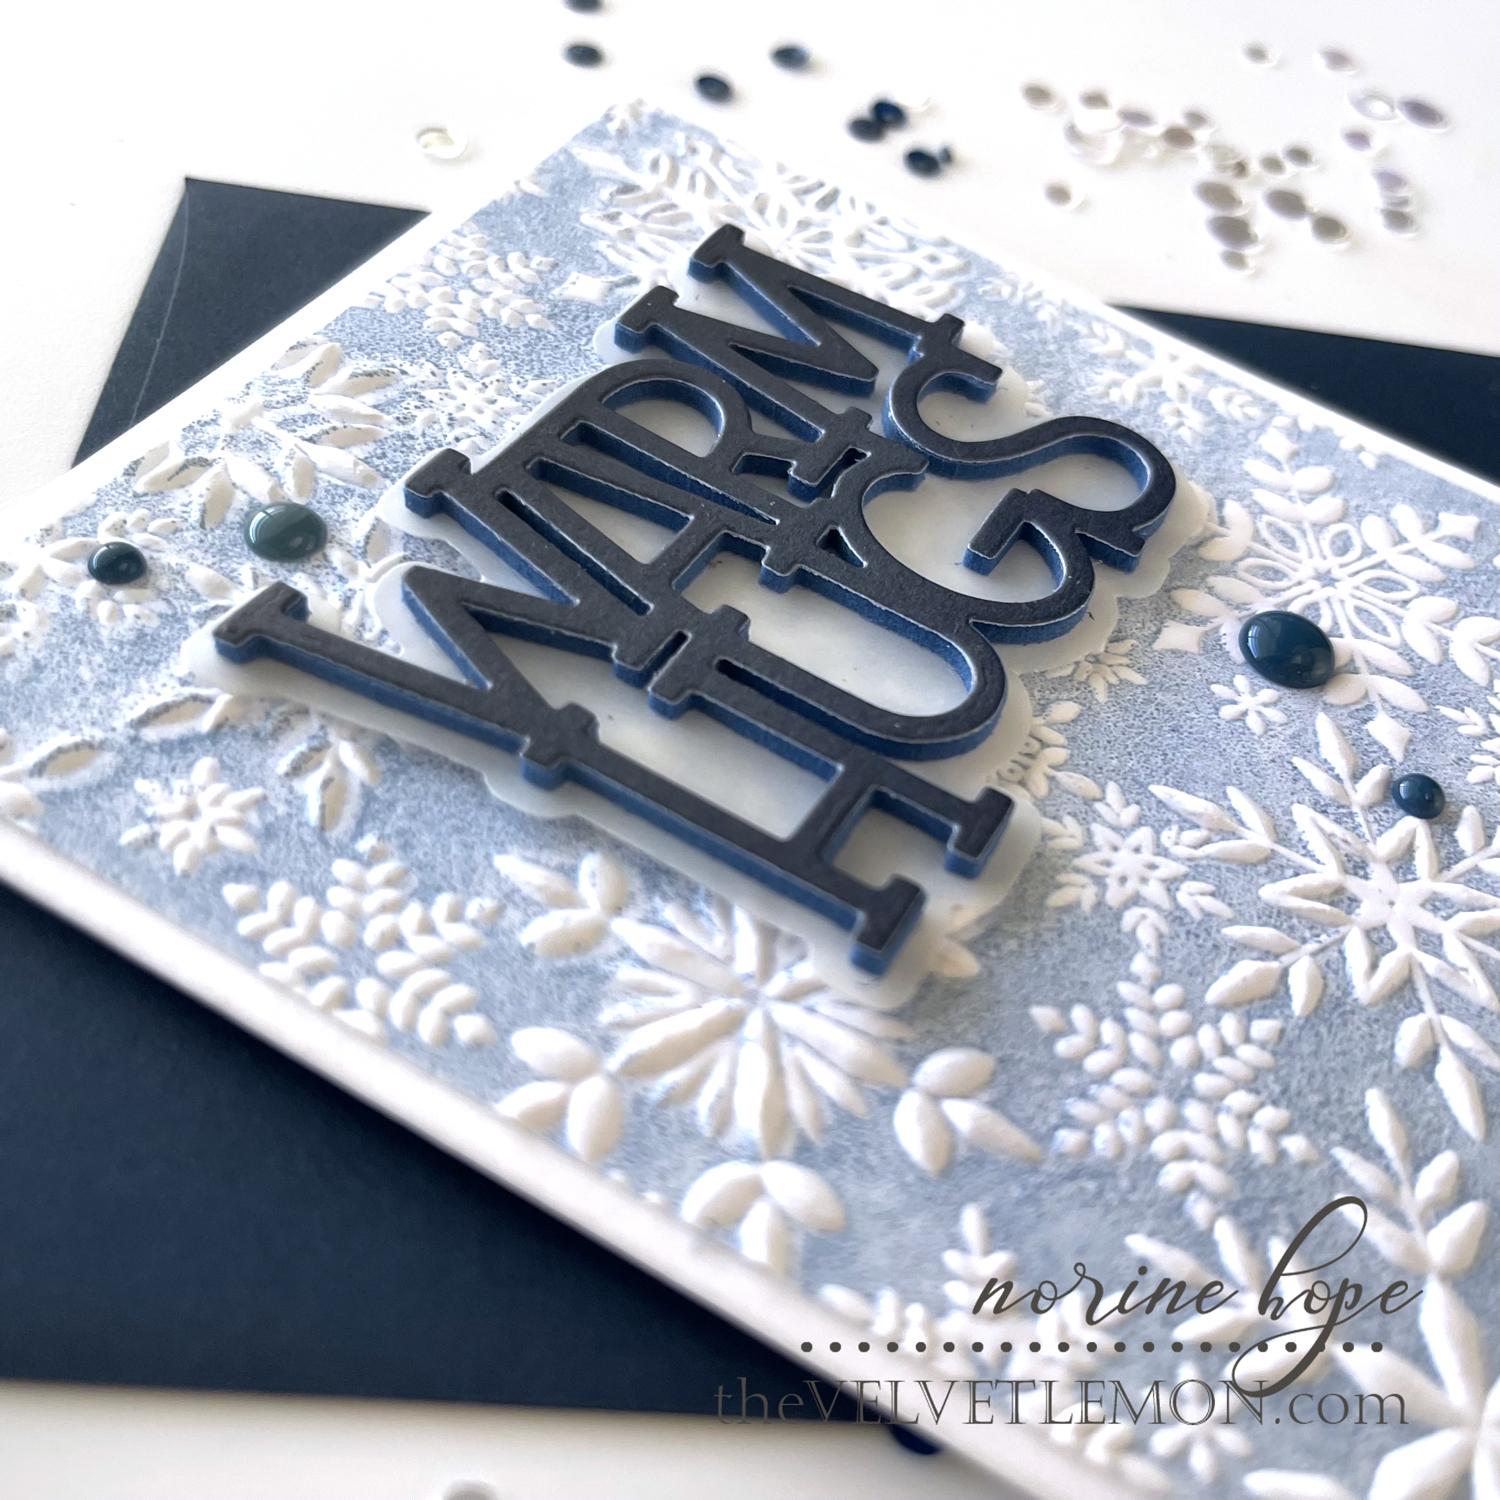
I die cut and sandwiched a layer of navy cardstock, another layer of dark blue craft foam, a layer of vellum cut with the silhouette die, then three more layers of the word die from scrap cardstock to stack beneath the vellum so that it doesn’t sit directly on the embossed card panel but creates more shadow by sitting up off the textured background.
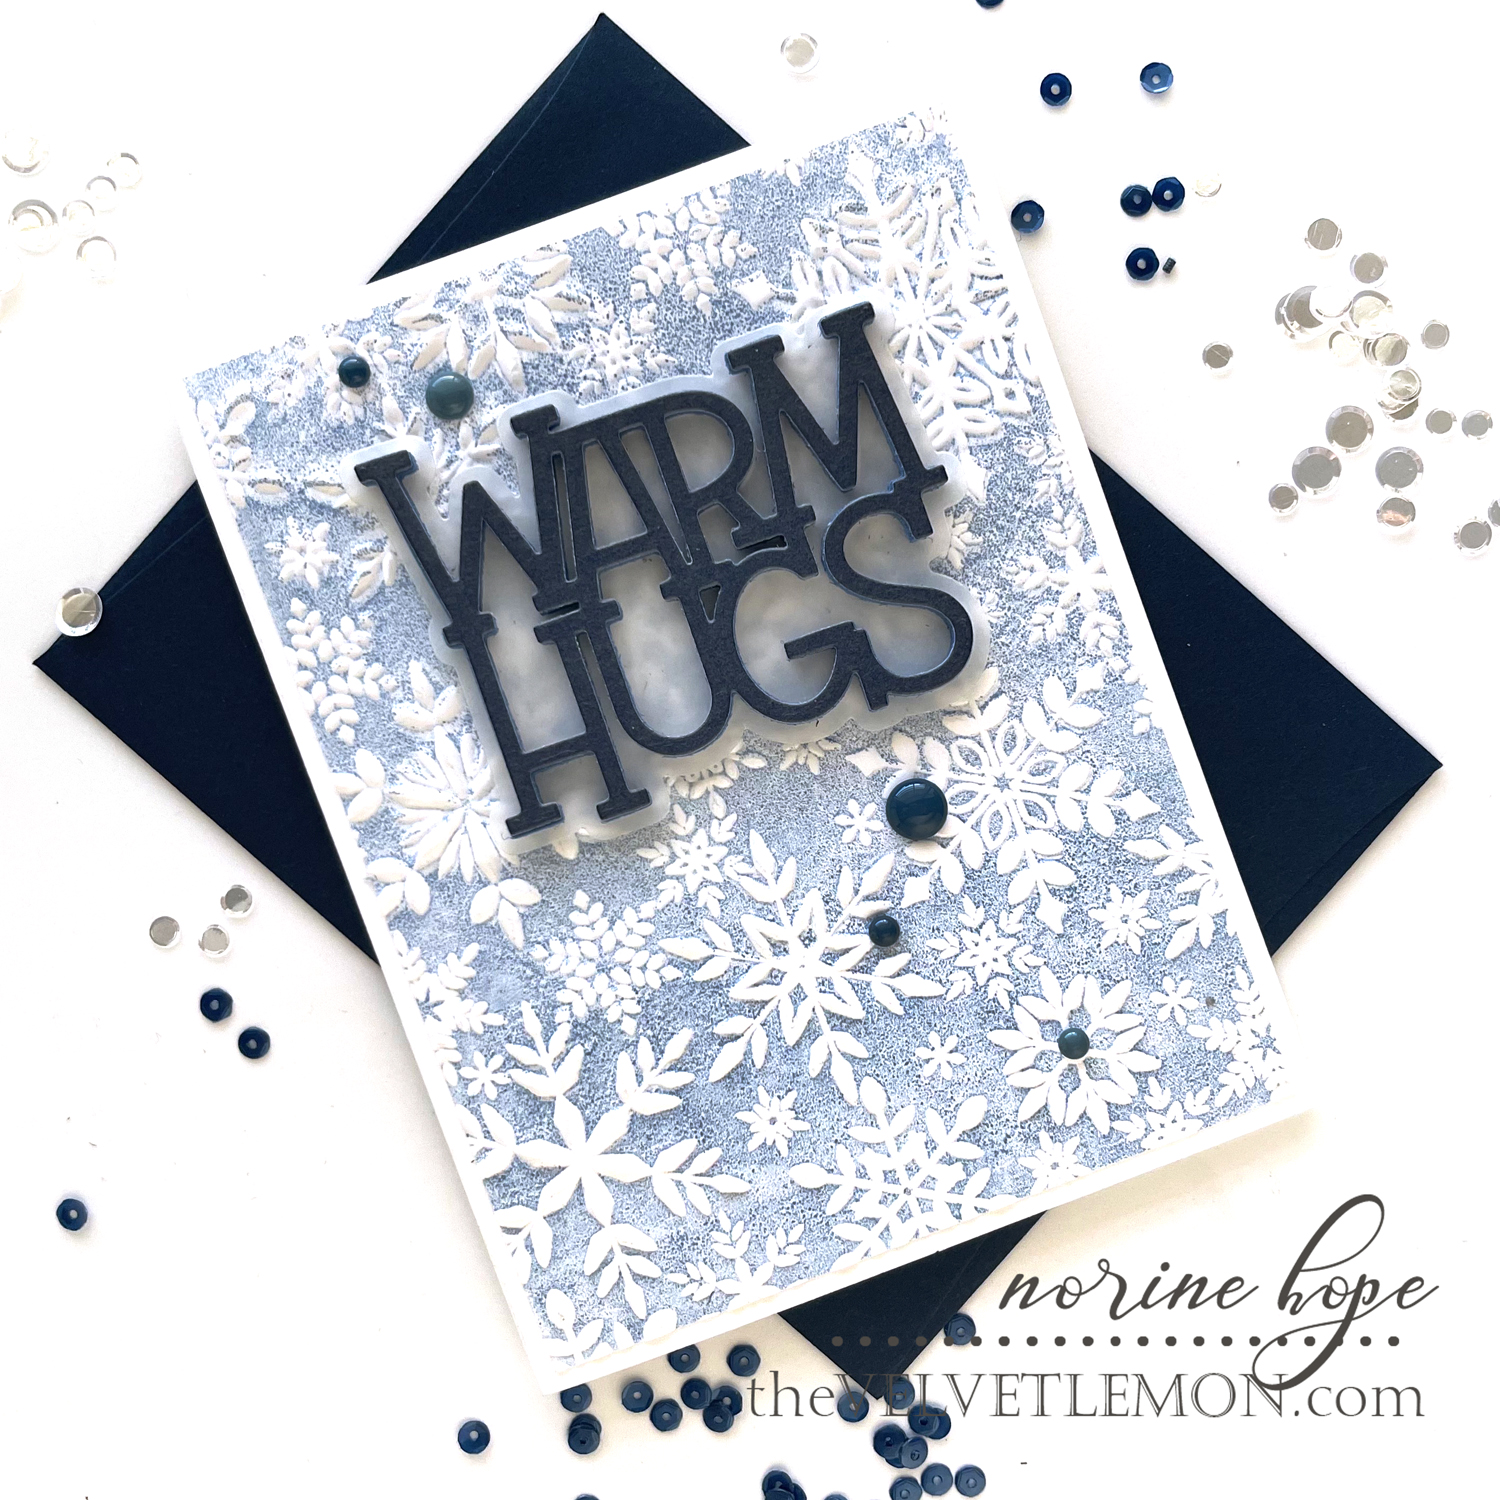
Finally, I added a few navy enamel dots to complete the card. I love the ease and simplicity of the embossing technique and the contrast between the snowflakes and the warm sentiment!
If you’re interested in any of the supplies I’ve used, just click on the links below for your shopping convenience. Thank you for stopping by and have a wonderful day!
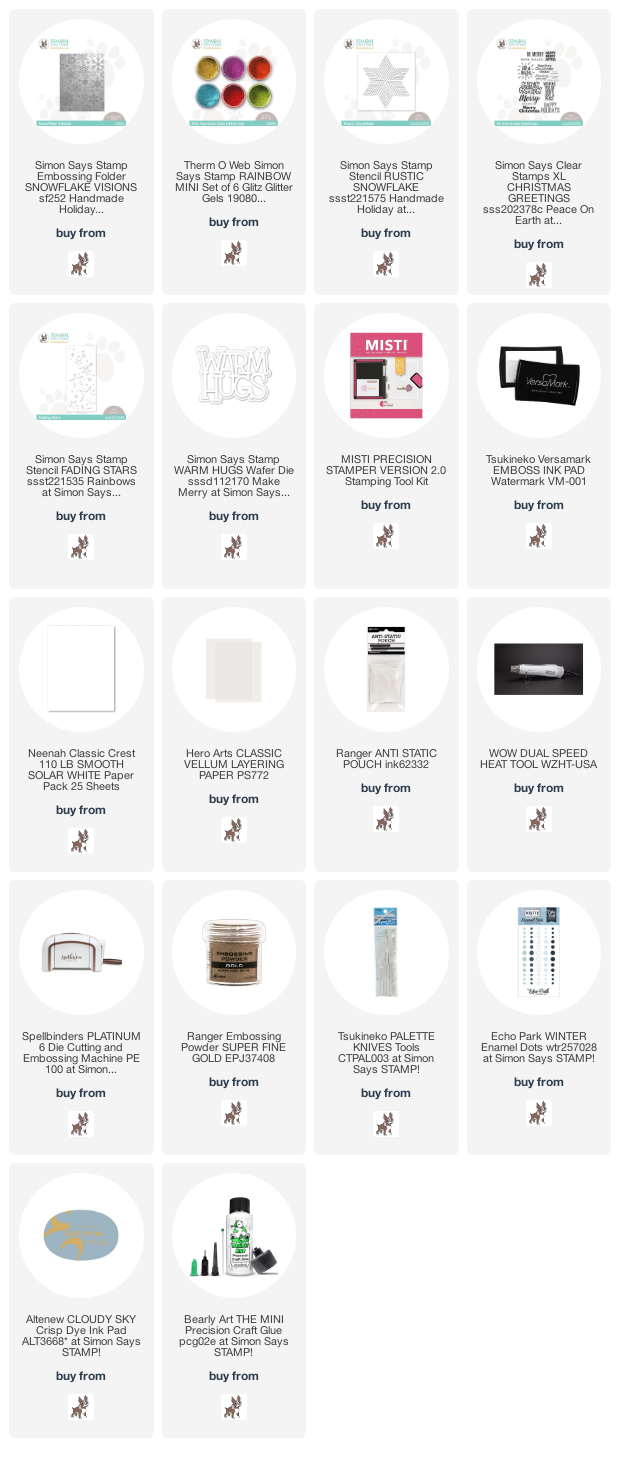
SUPPLIES USED: