Hey, hello! I’m just popping in quickly today to share a few more cards that I made with the April Pinkfresh release. I was so gungho with all the beautiful products they sent me, that even after the release blog hop, I couldn’t stop making!

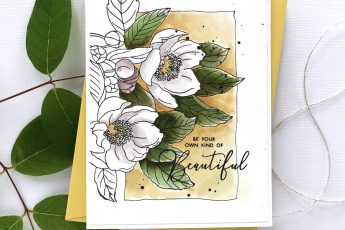
To begin, I die cut the Beautiful Blooms from Neenah Solar White cardstock, but before removing it from the die, I covered the back with Press & Seal to keep all the pieces in place. Then I used Altenew Artist Markers to color in each portion. I die cut another fresh white cardstock die cut and removed the colored pieces from the original die cut and inserted them into the clean white die cut. I adhered the “cleaned up” die cut to a grey card panel and stamped and silver heat embossed a sentiment from an older Pinkfresh stamp set – Aviary. I added the card panel to a white card base, and added some silver enamel dots to finish.


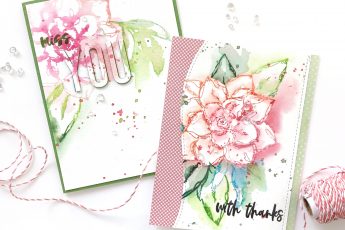
Next, using the outline of the pieces I had colored for the card above, I completed the coloring on the outline. (I did die cut another bloom design just for the two flowers in the center to cover the messy coloring I had done with the first layer.)

I stamped a sentiment from the Blooming Bouquet stamp set, onto vellum paper and heat embossed with silver. I used a waffle patterned embossing folder to create some subtle texture for the card front and adhered the colored die cut overtop that. And always, there will be enamel dots to finish.


Lastly, I used a Beautiful Blooms die cut to generally indicate where I should apply watercolor paint to a piece of watercolor paper. Once it was dry, I used gray ink to stamp the sentiment (from the Blooming Bouquet stamp set), and adhered another white cardstock die cut overtop the color.

There are yet more projects coming from the April release, so check back soon and often to see those! Thank you for stopping by and have a wonderful day!