Hello, hi! I still have a couple more cards to share with you, that showcase products from the recent Hello Gorgeous release from Simon Says Stamp! These two cards are quick, simple and easy and are a great way to whip up a last minute card!
This post contains affiliate links that are listed below. By clicking through to purchase products linked, you are helping to support this blog at no additional cost to you which allows me to continue to provide you with creative inspiration and instructive help.
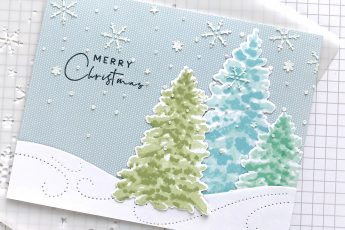
I was messing around with the 6″x 6″ Dimensional Quilt background stamp on watercolor paper and ended up with enough nice design to use on TWO cards! Hows that for a bonus!?
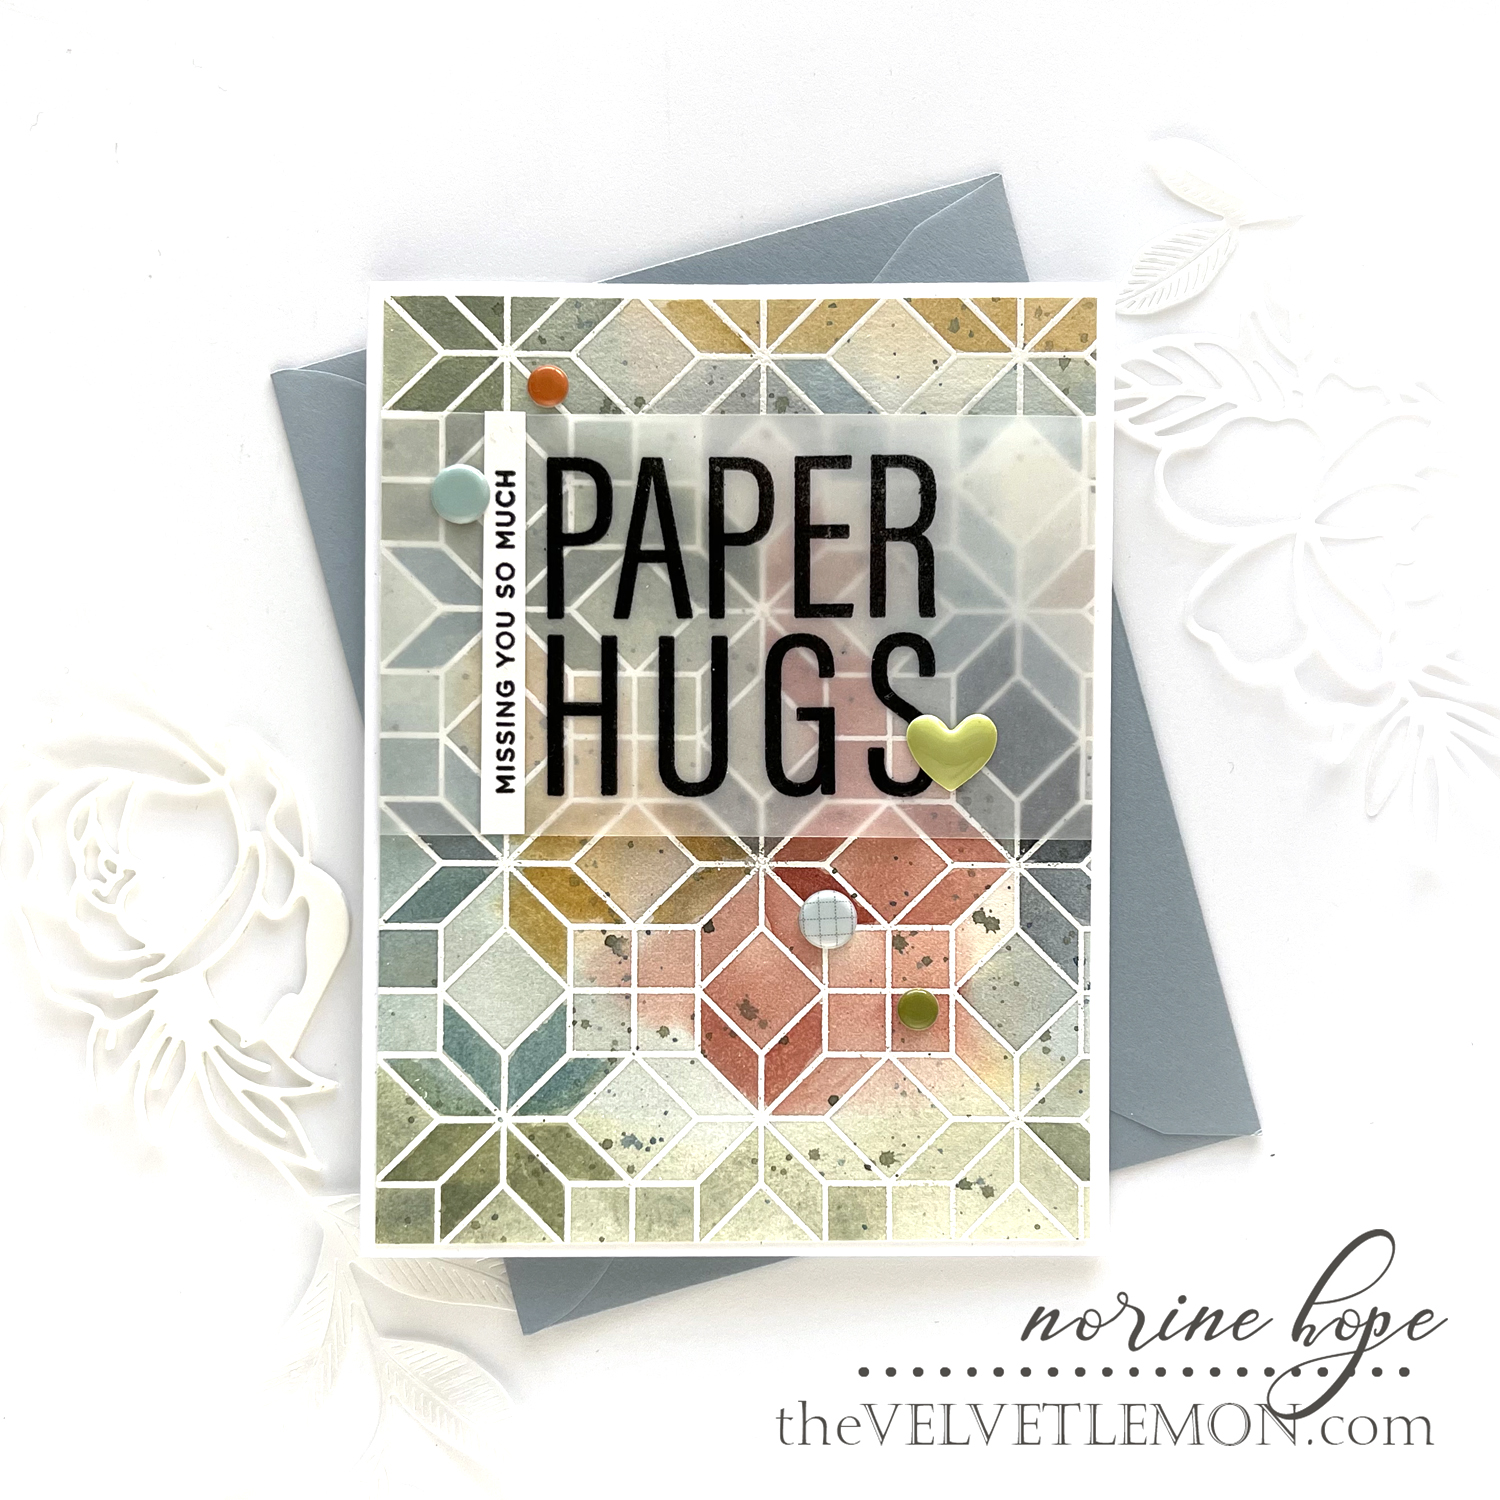
To begin, I stamped the entire background design onto a piece of watercolor paper, with embossing ink and heat set with white embossing powder. Clear embossing powder words as well, but white embossing powder gives a crisper, cleaner result.
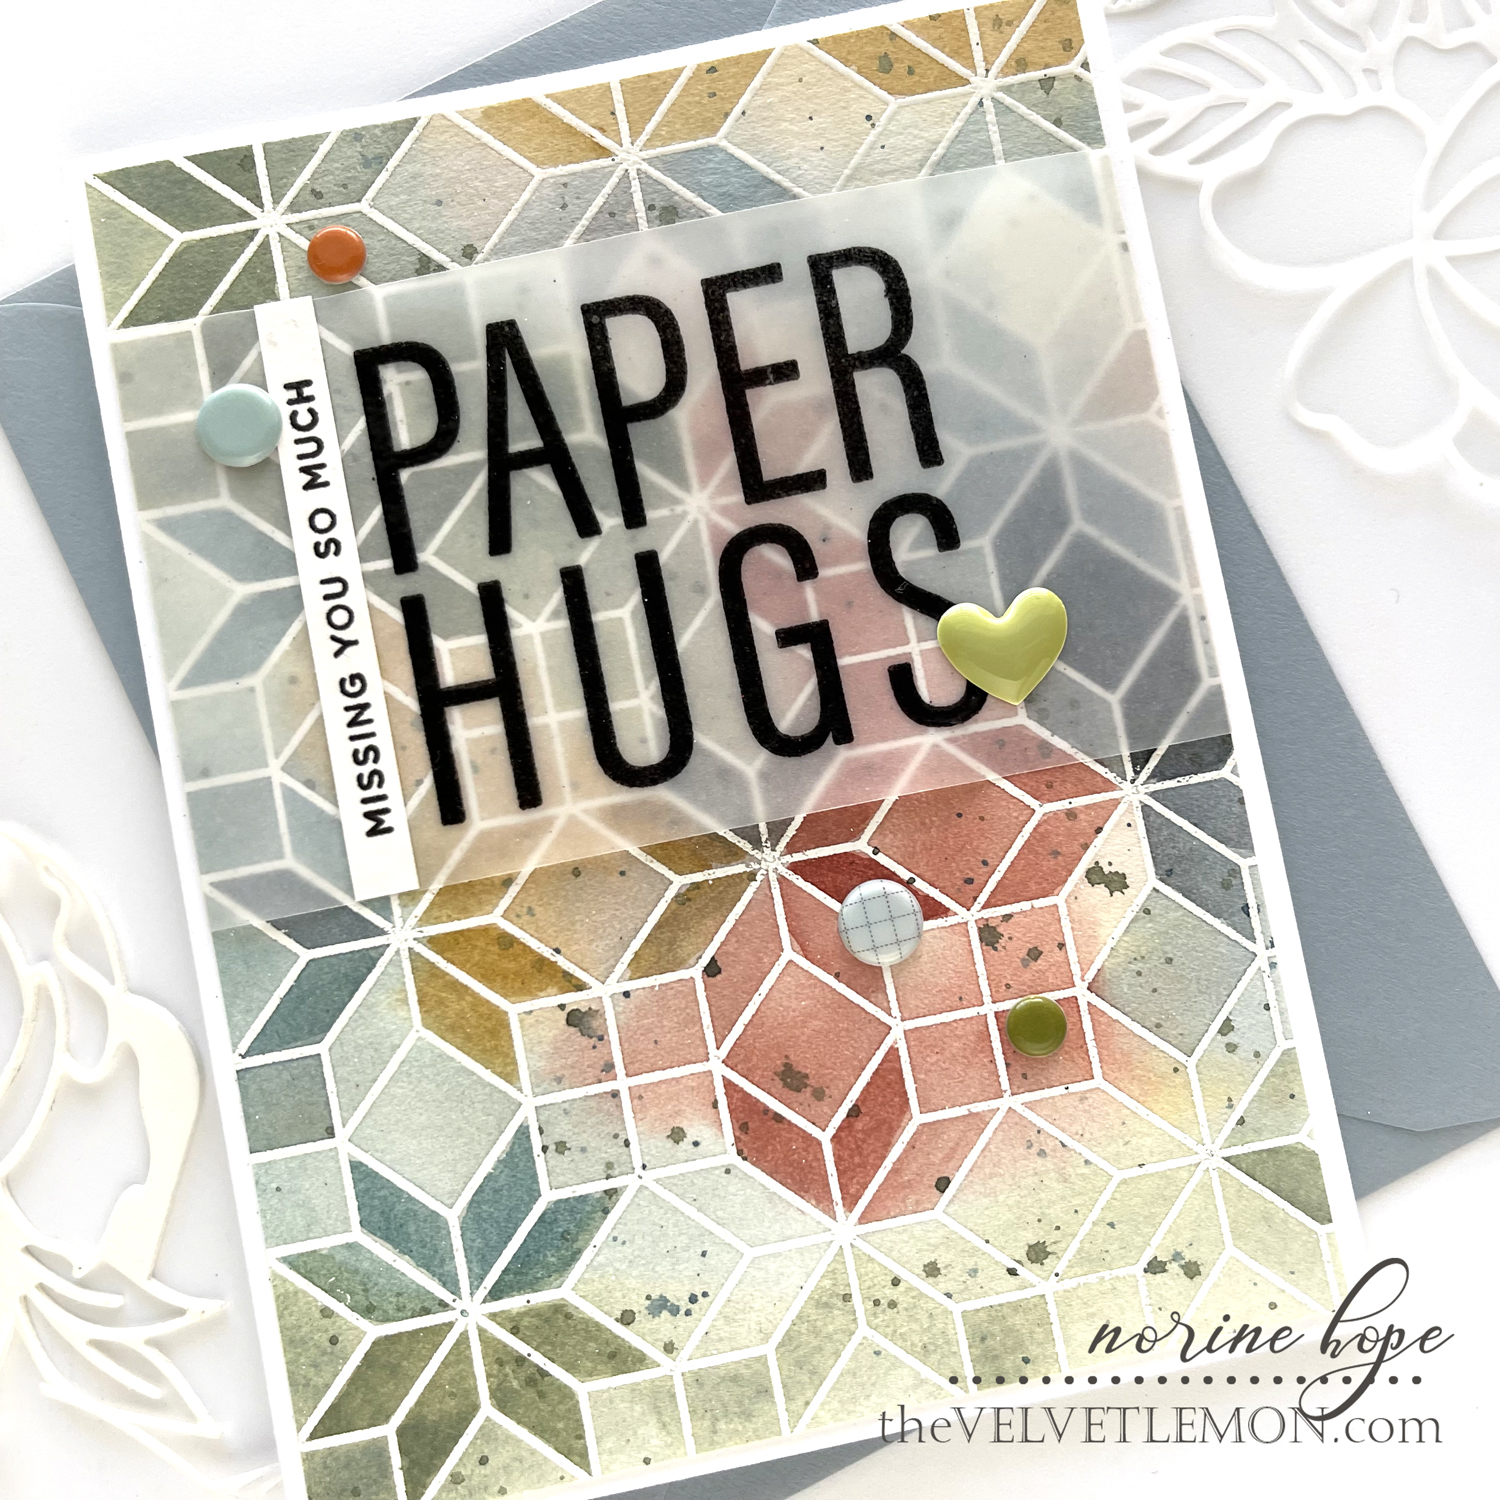
I then smooshed several colors of Ranger Distress ink pads onto an acrylic pad and spritzed with lots of water to make puddles of color. I laid the heat embossed watercolor paper face down onto the puddles of color and turned it over to let it dry. It took a few repeat inkings to get color on the whole panel. The ink colors I used are Fired Brick, Peeled Paint, Wild Honey, Stormy Sky, Chipped Sapphire and Salty Ocean.
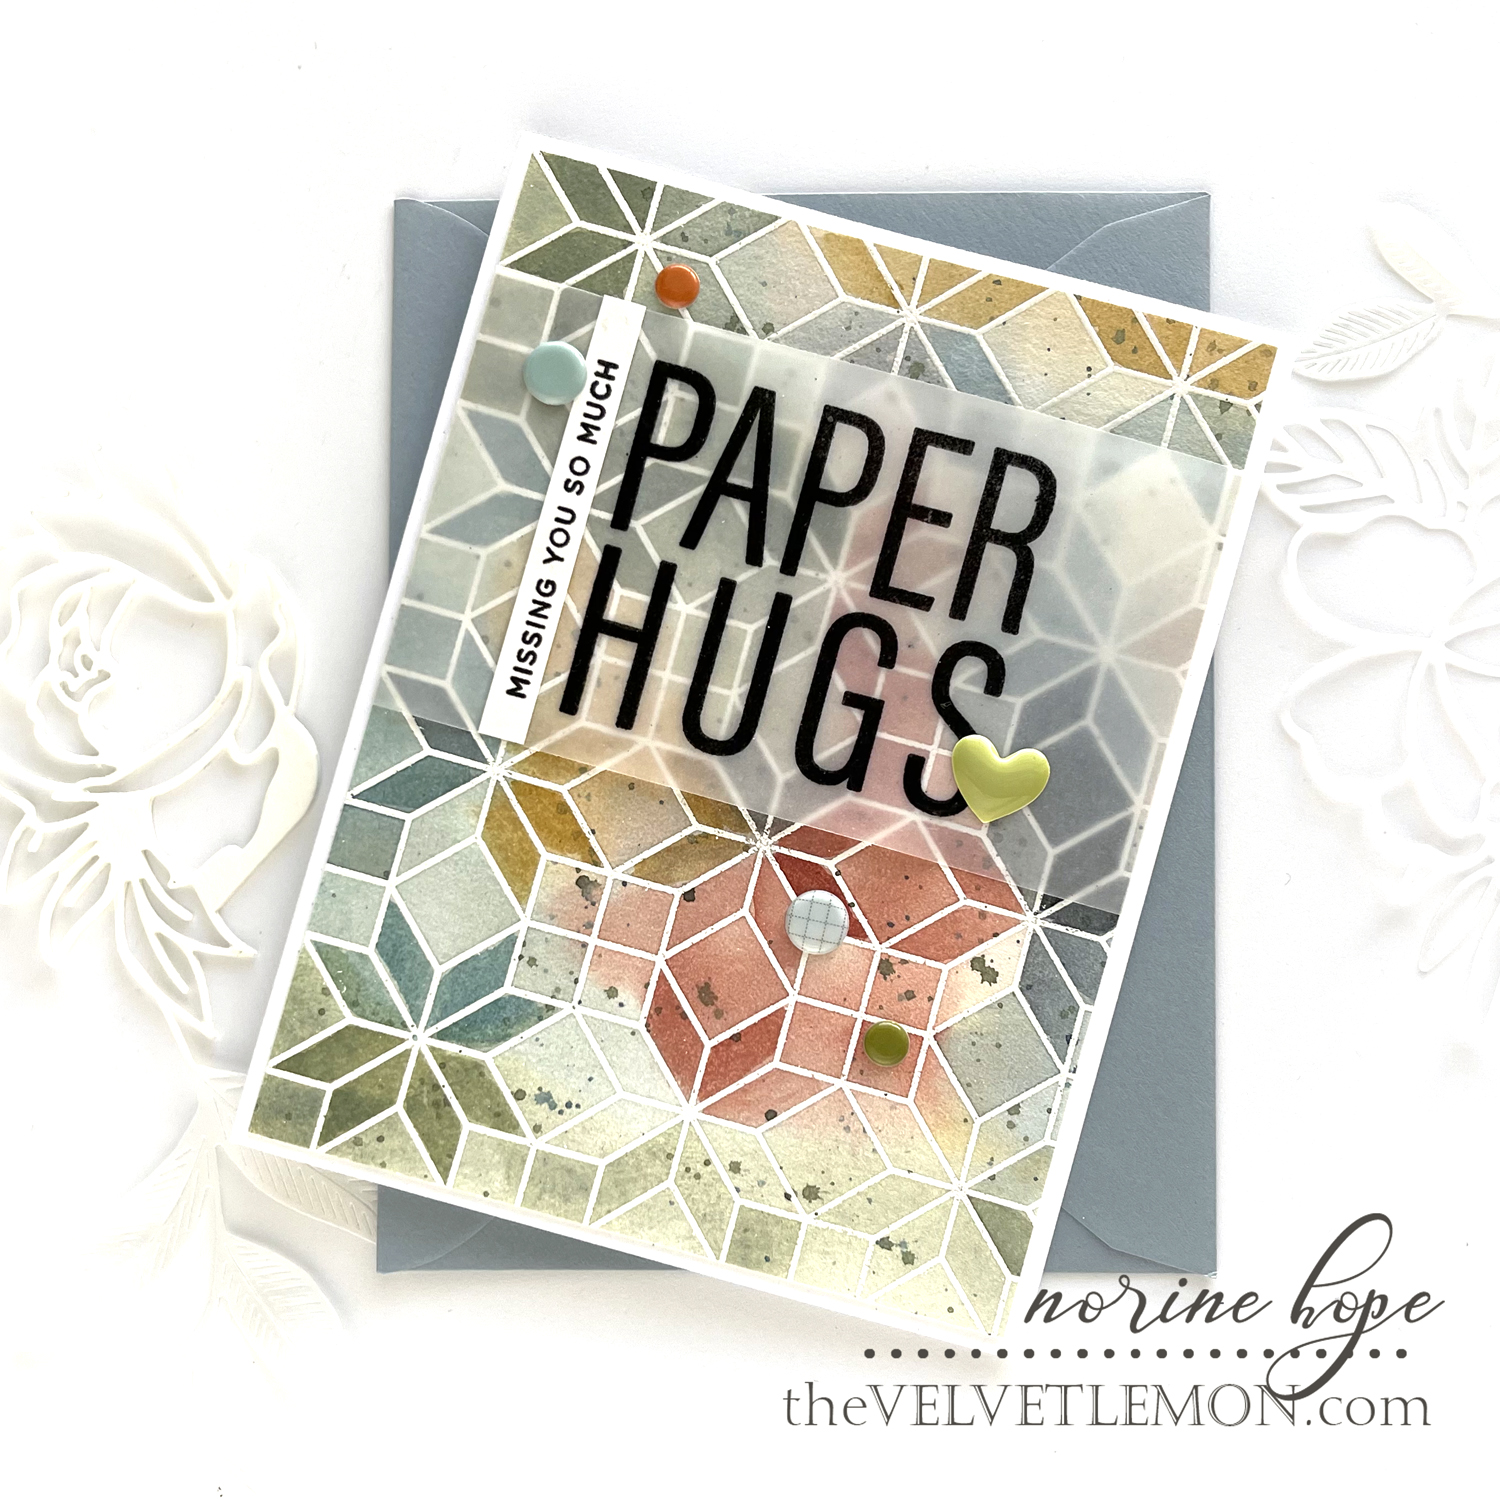
Once that layer was dry I made more of the same color puddles and painted random shapes to deepen the shades of color beneath. I finished with speckling using the left over inks.
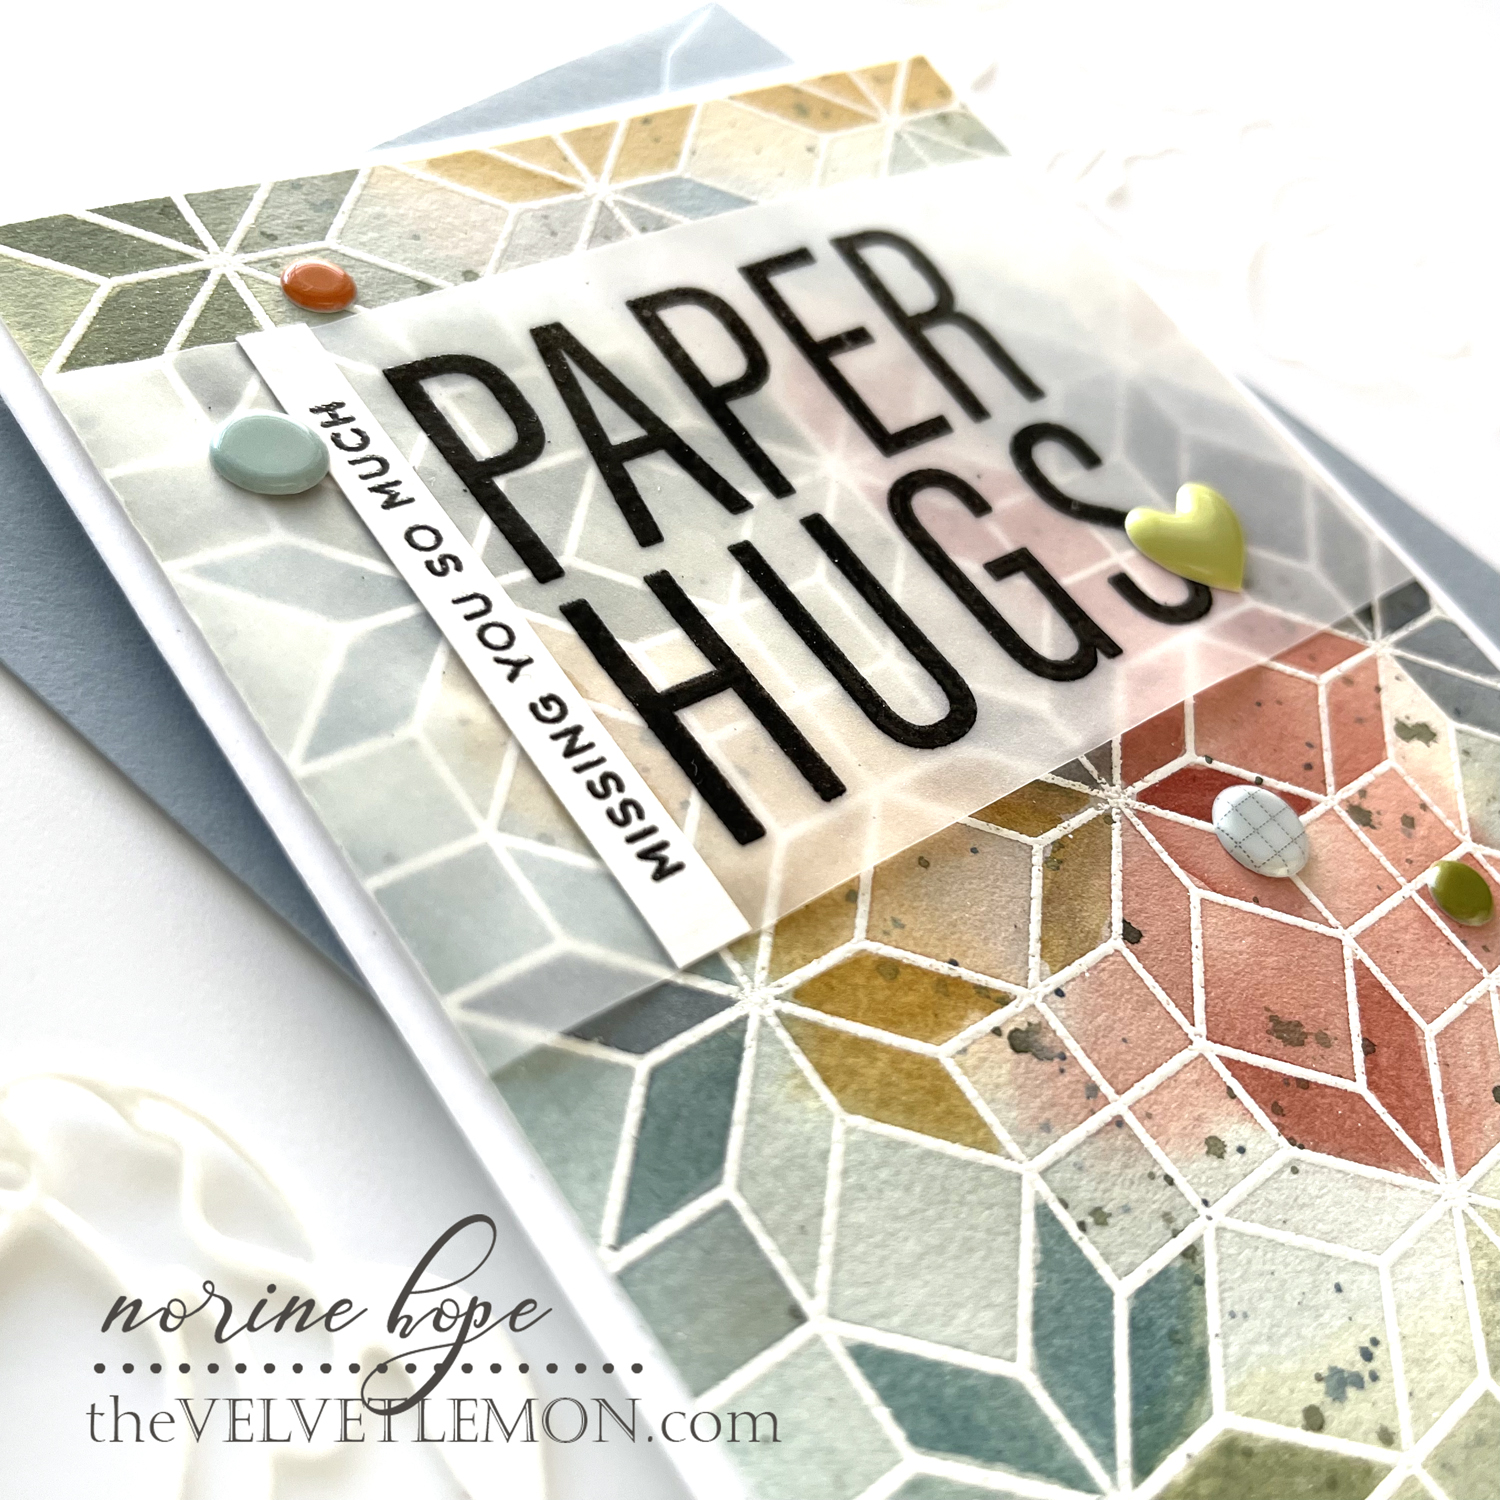
Next, I stamped a greeting from the Spring in my Step greetings stamp set and heat set with black embossing powder. I loved the background so much that I didn’t want to cover any more of it than was absolutely necessary, so I stamped on vellum and wrapped the edges around the card panel.
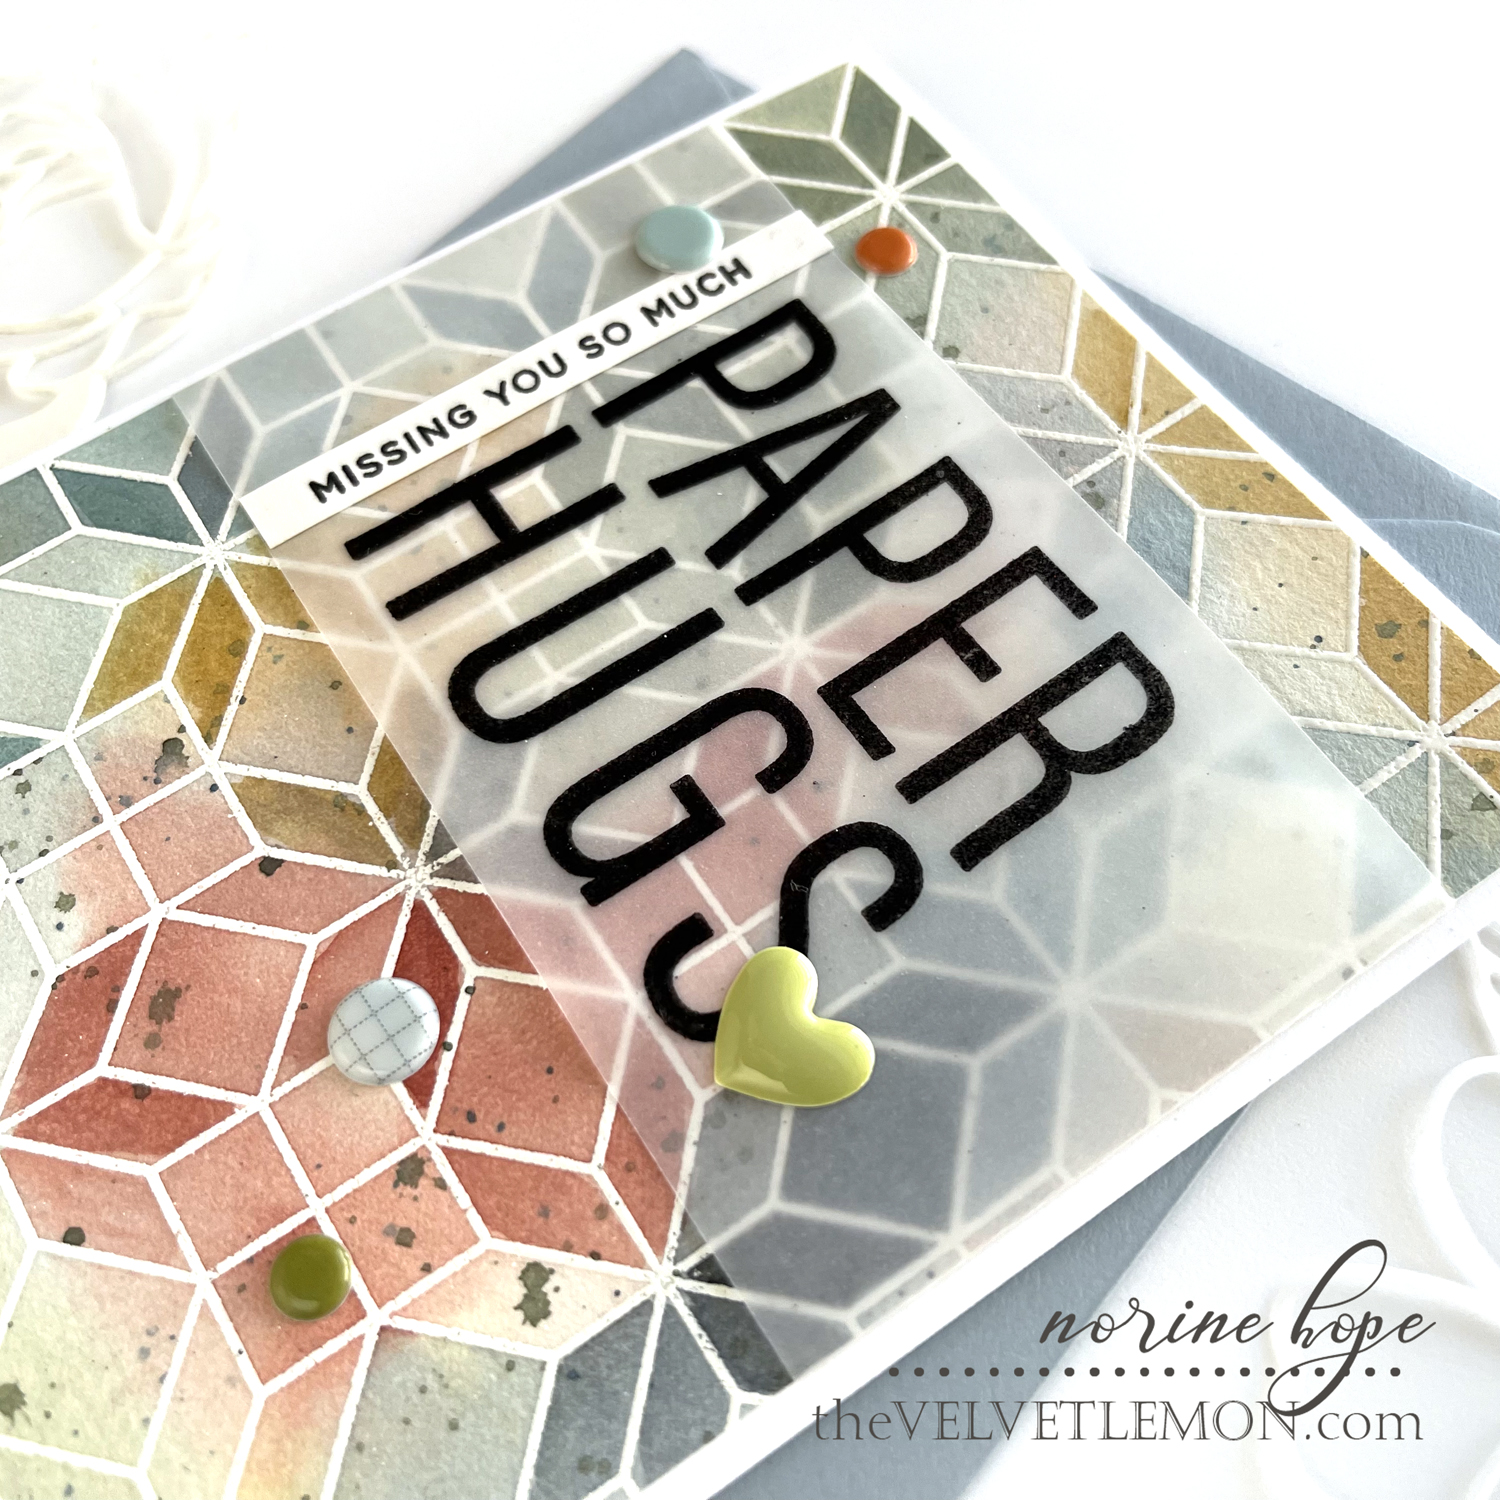
I added a horizontal sentiment strip, also from the Spring in my Step stamp set, and adhered it to the width of the vellum paper. Finally, some (very old) enamel shapes from my stash complete the card.
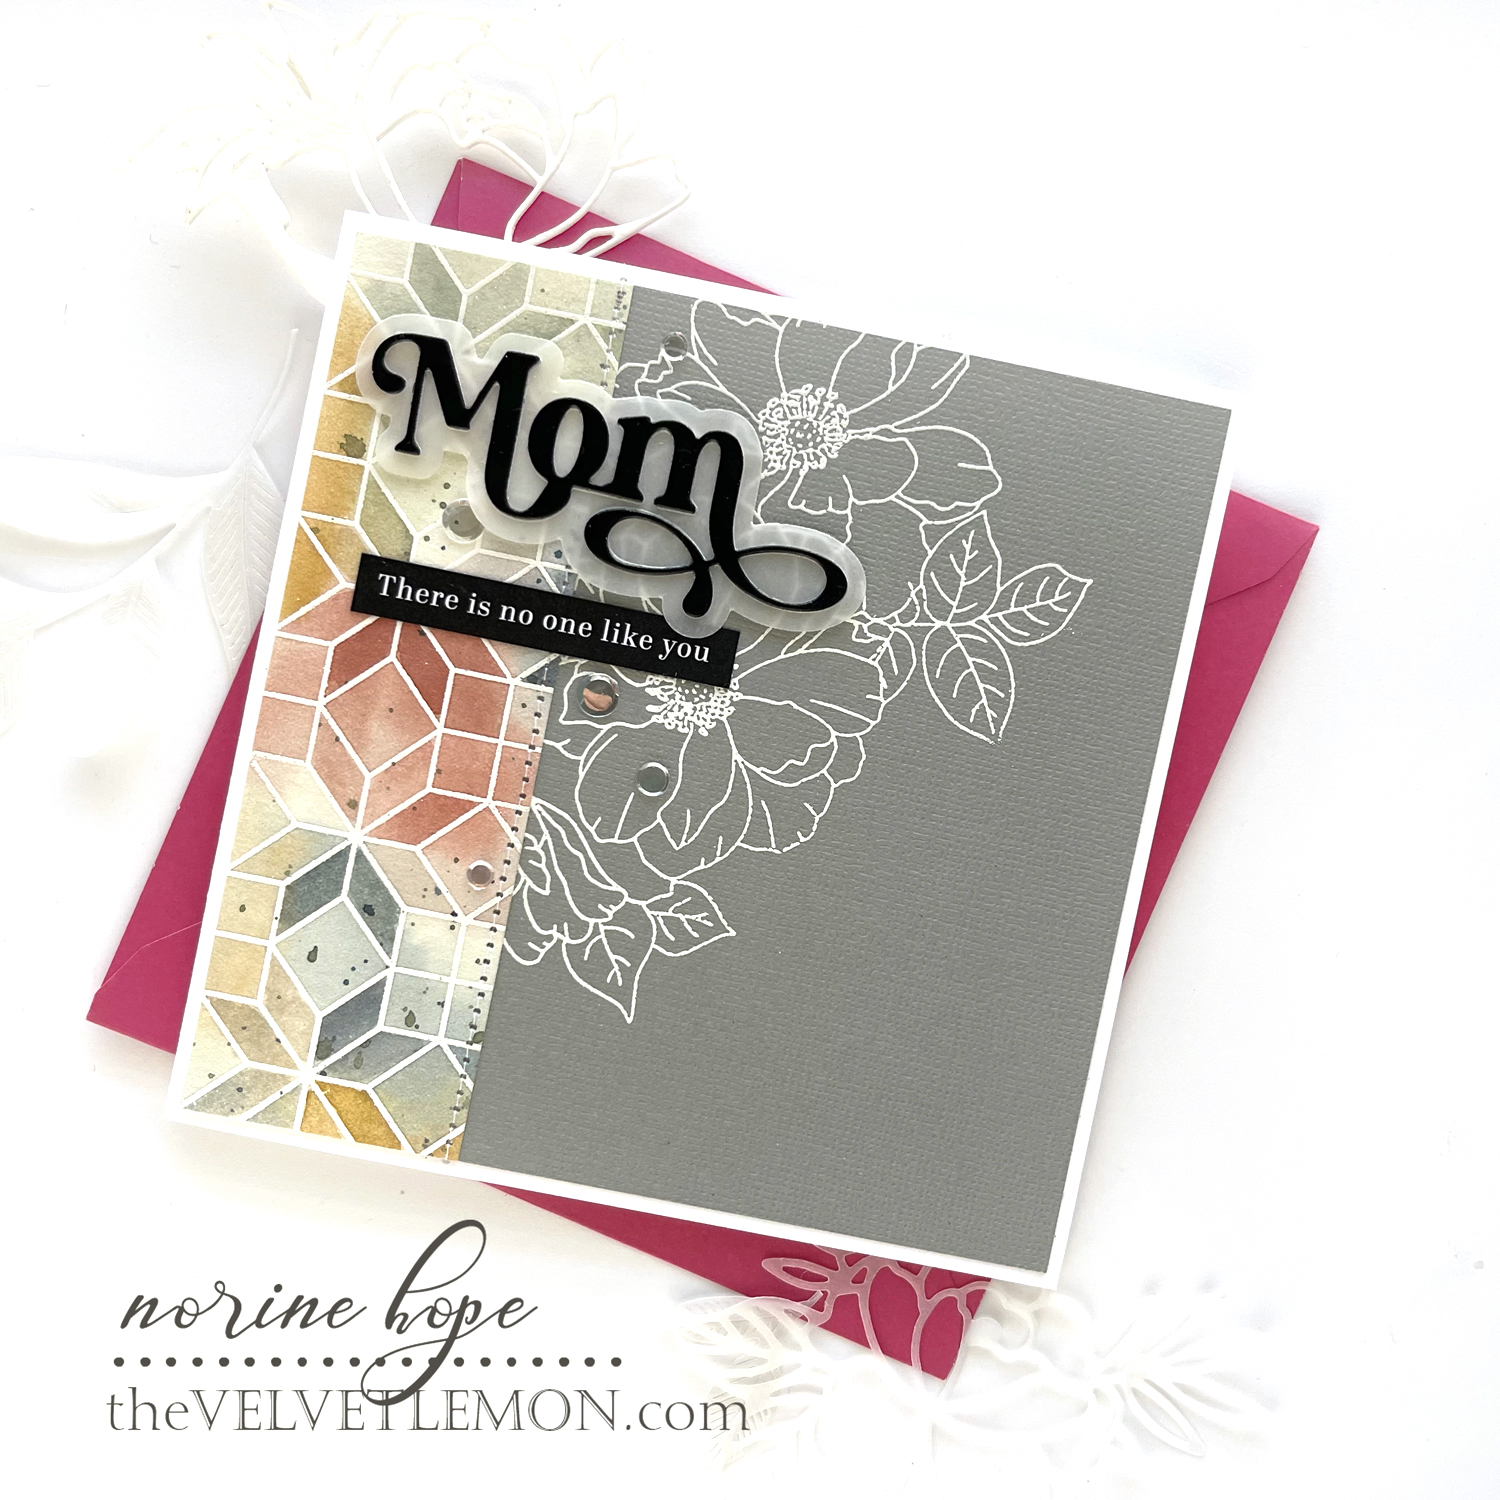
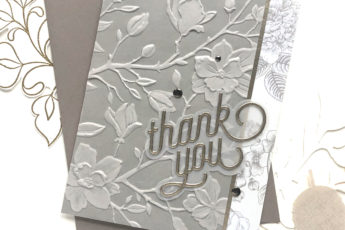
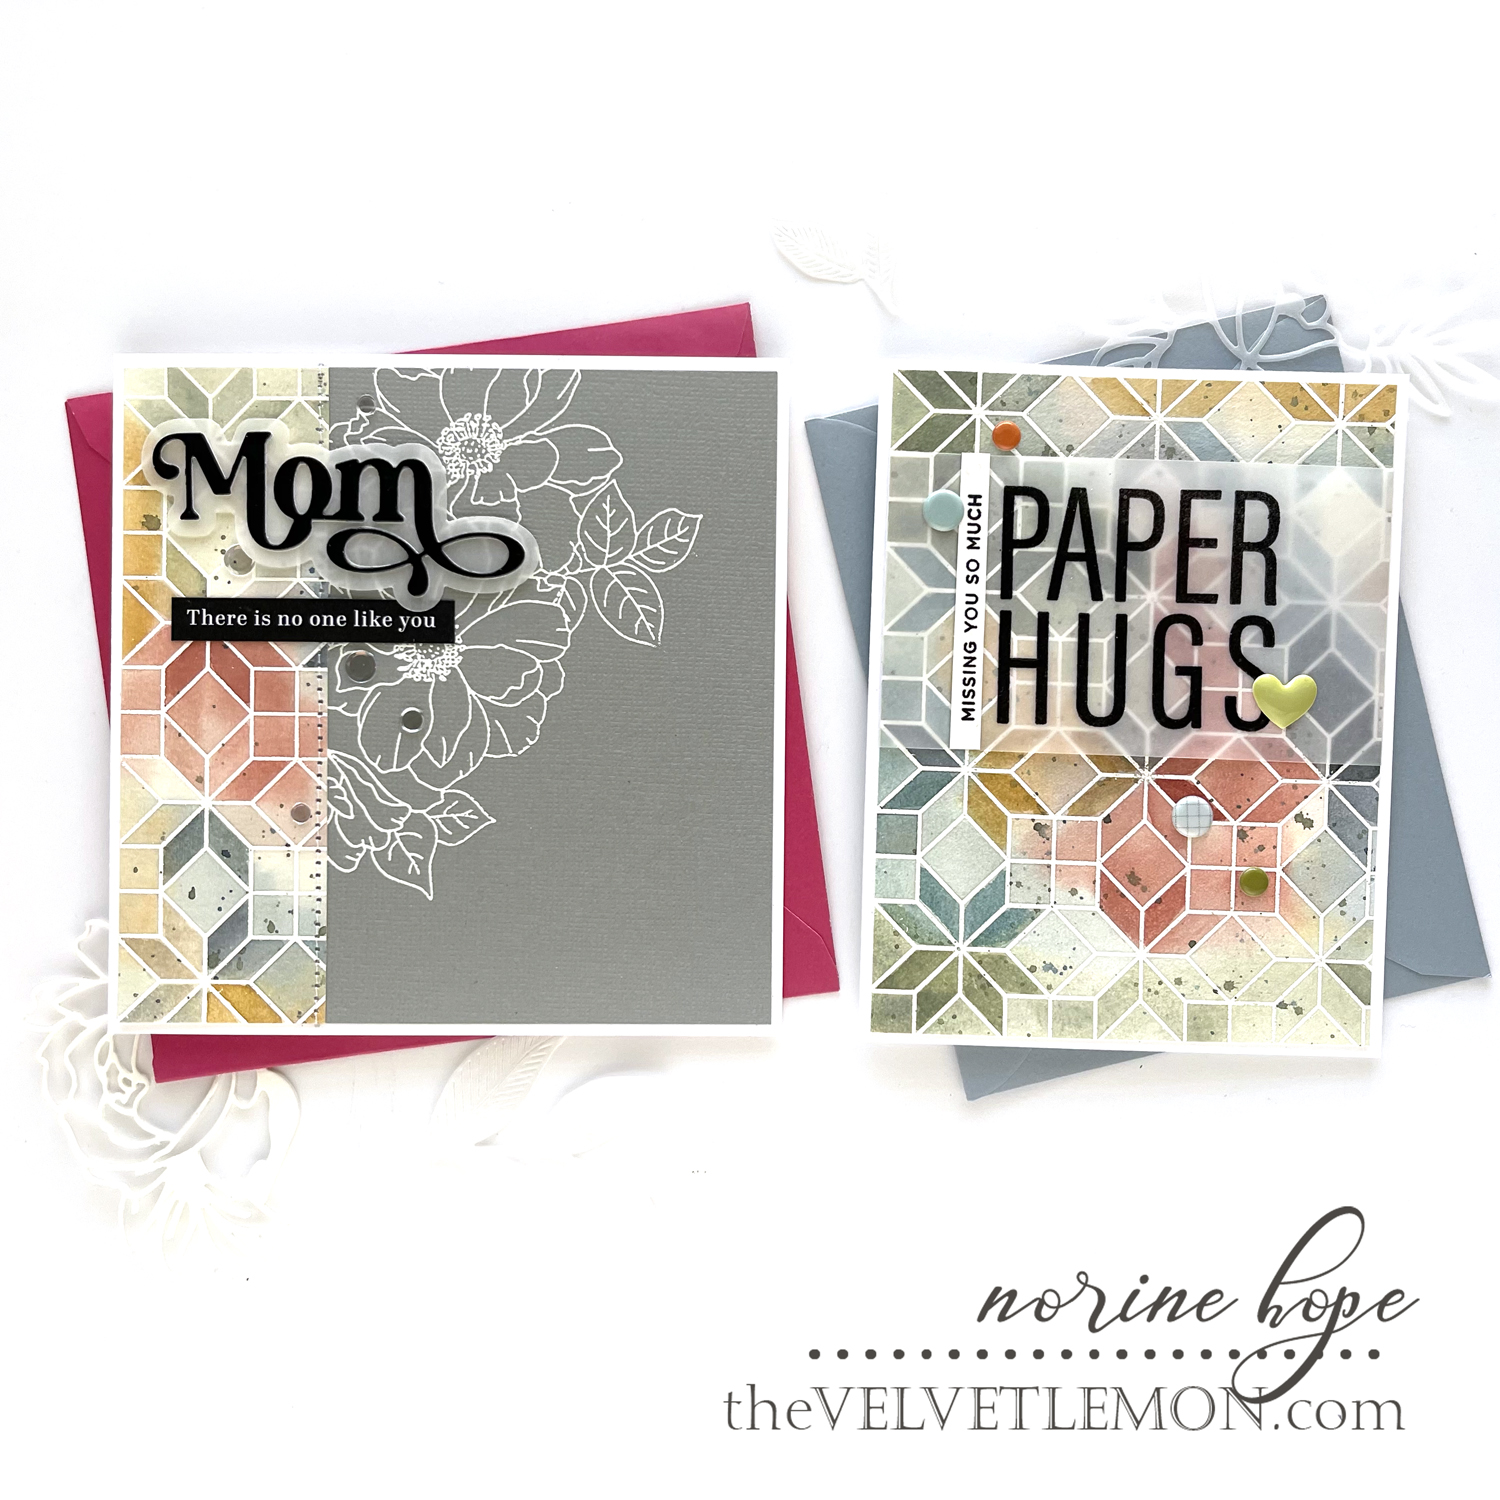
The leftover strip from the previous card was too pretty to toss, so I paired it with some solid, textured cardstock to match.
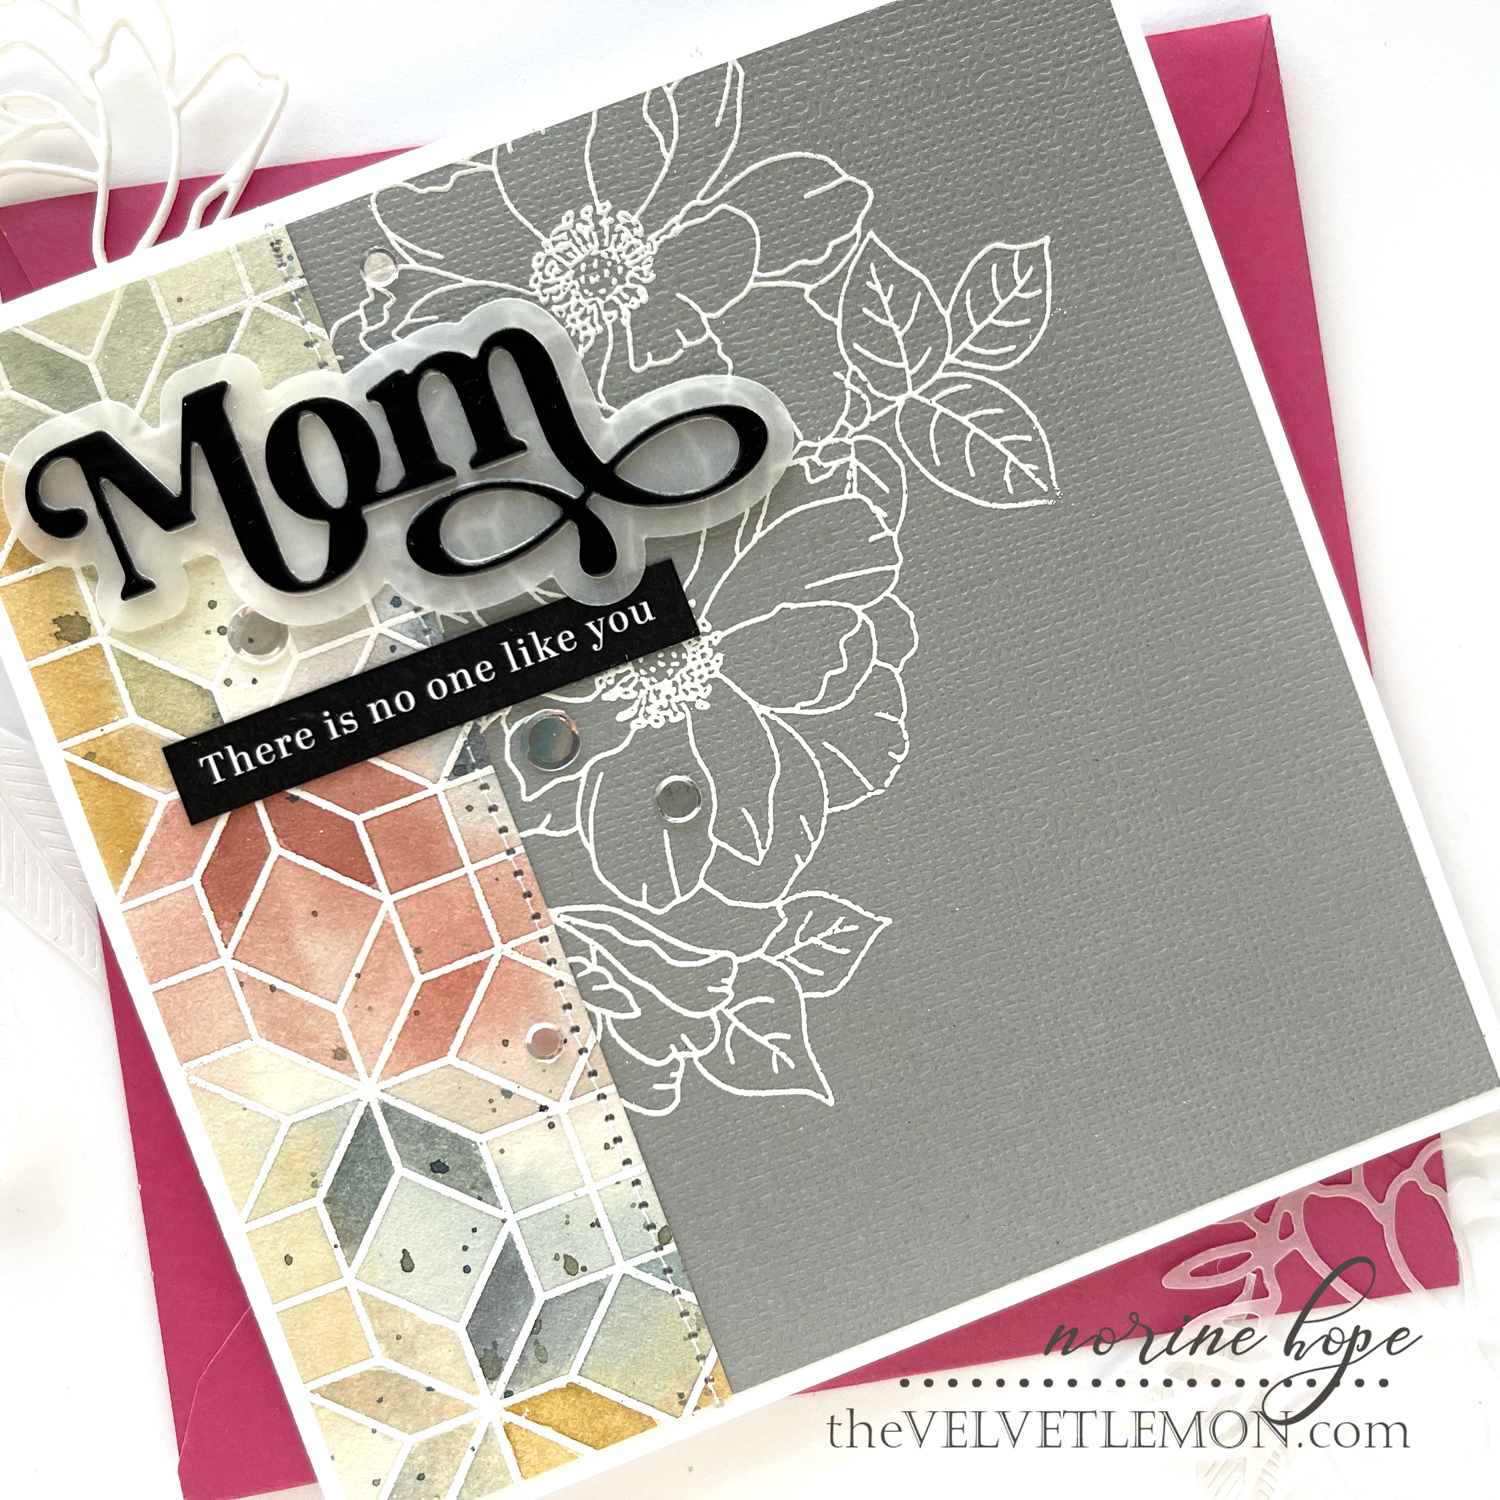
I used the floral stamp from the Mom’s Spring Flowers stamp set to create the complimentary accent to the geometric grid design. Like combining leather and lace, there’s something lovely about pairing soft/pretty, with clean and graphic. I stamped onto the grey cardstock with clear embossing ink and heat set with white powder again.
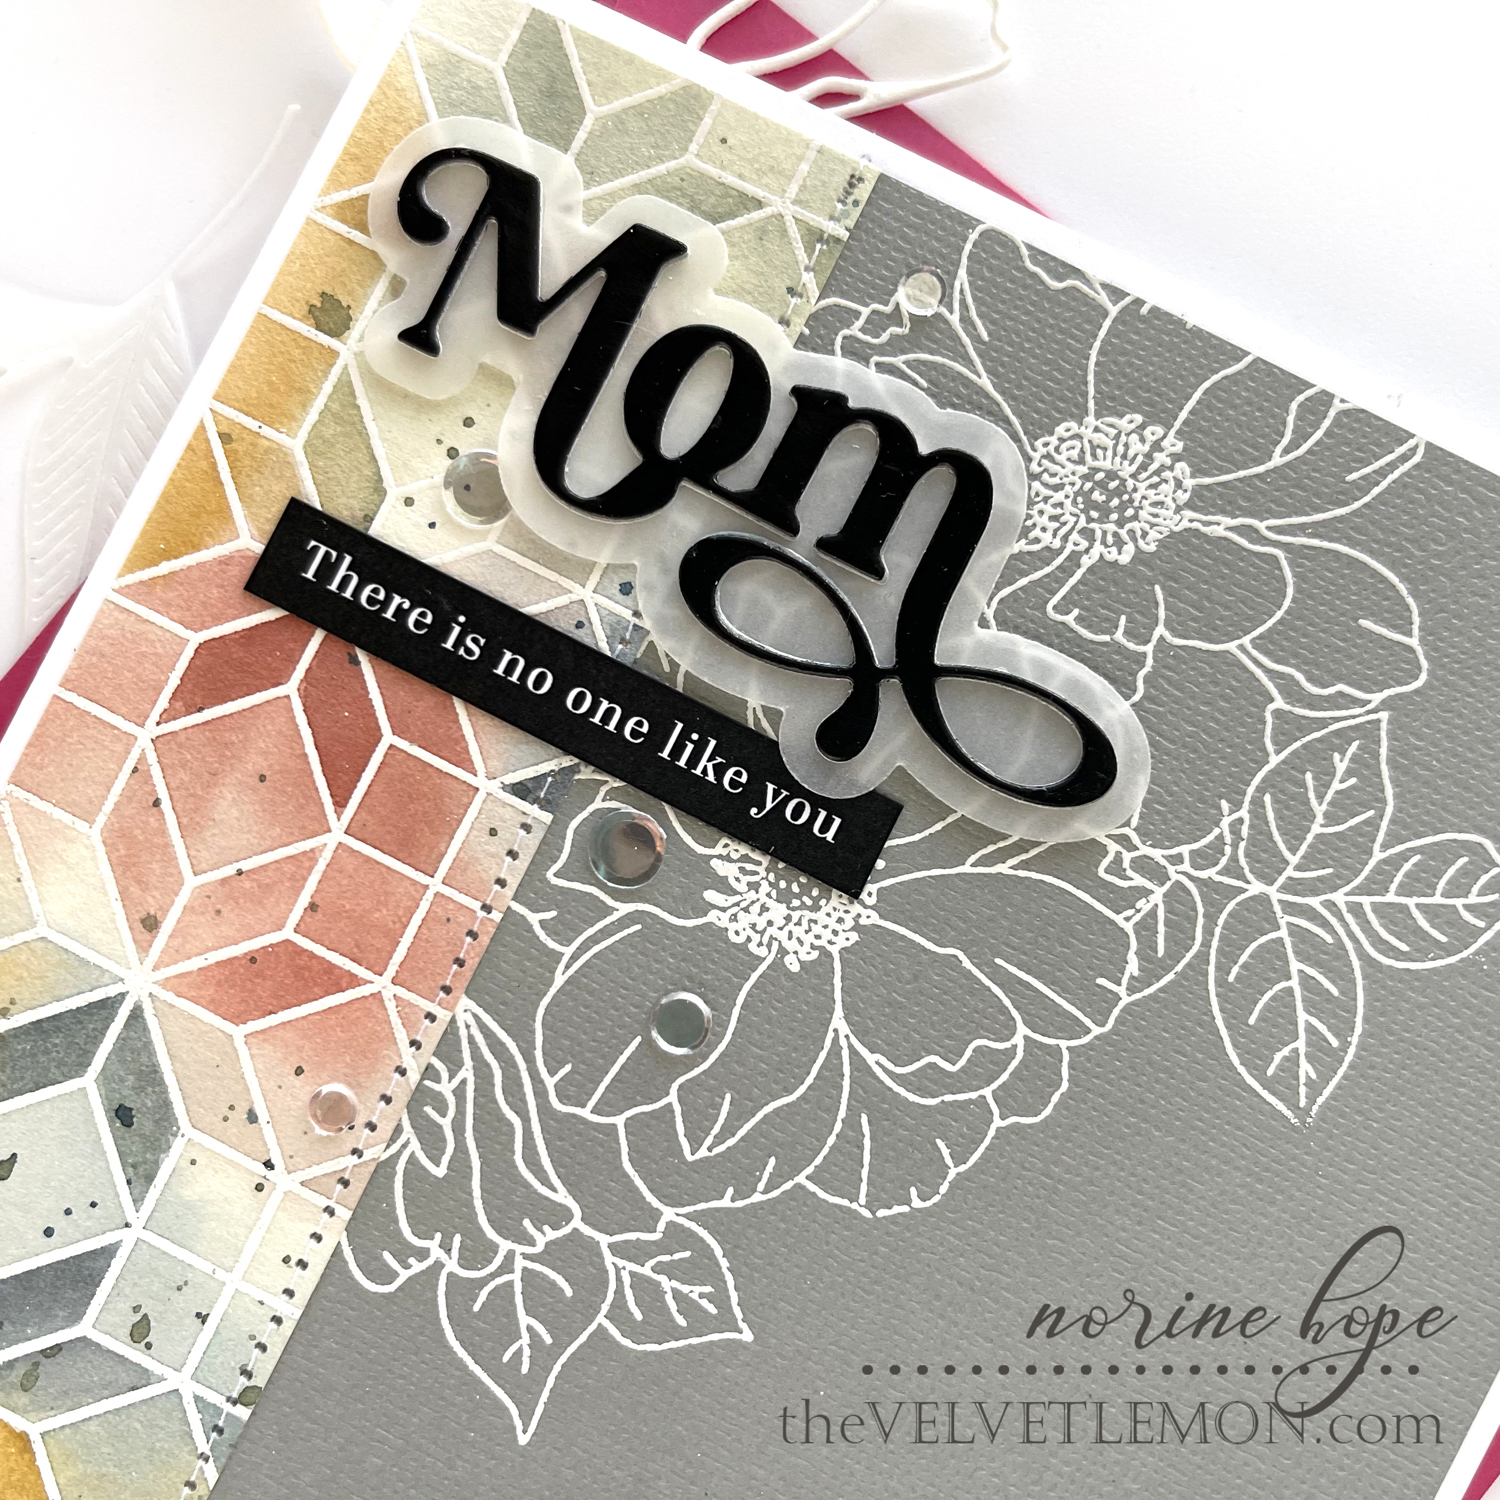
I stitched the layers of watercolor paper over the grey cardstock, trimmed the panel to 5.24″ x 5.25″ and adhered it to a folded card base. I die cut the Fancy Mom die with SSS exclusive black glossy cardstock, and twice more from white cardstock scraps. I die cut the shadow portion of the word from vellum paper and sandwiched it between the black glossy cardstock on top and the two layers of cardstock below. That allows the vellum to better pop visually.
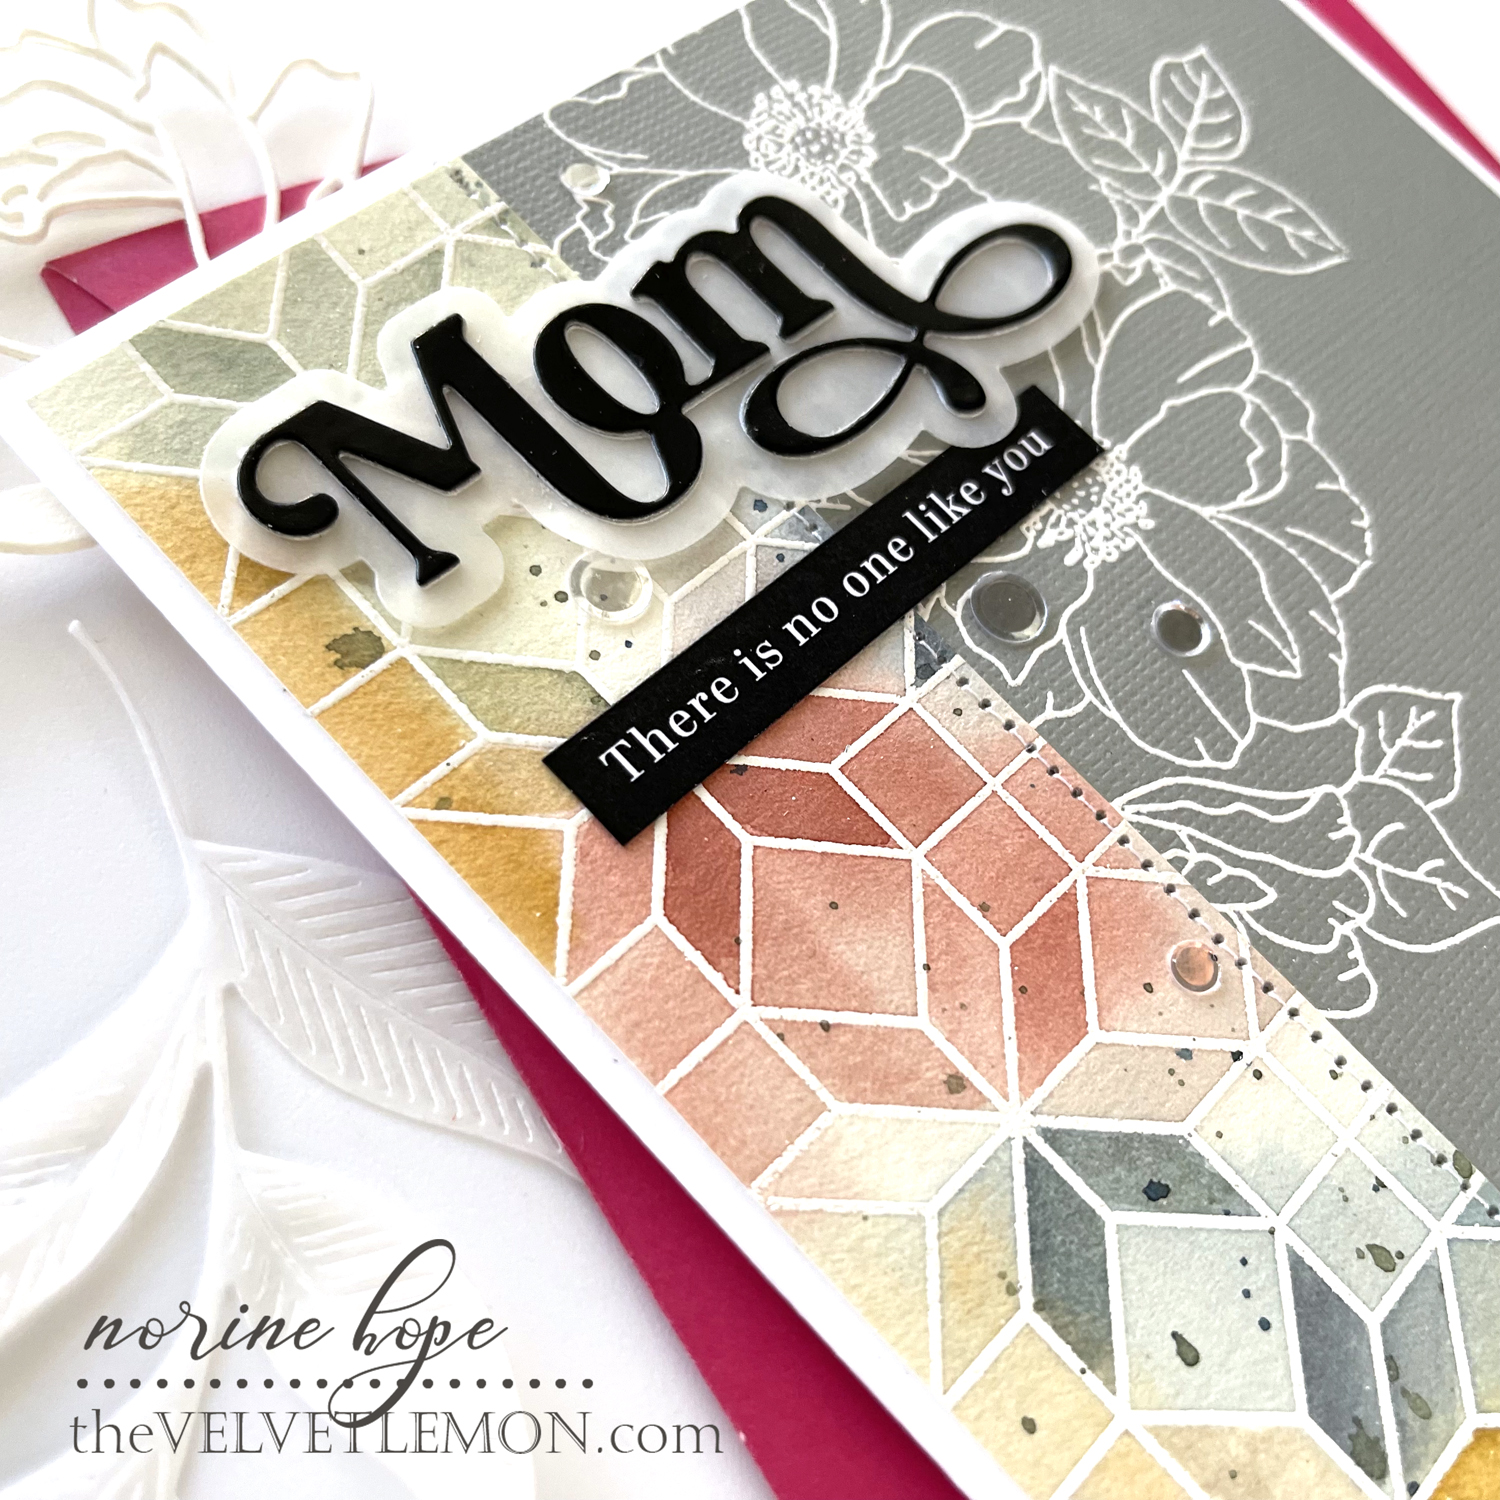
I finished the card by cutting a sentiment strip from the SSS exclusive Reverse Sentiments Mother’s Day printed cards. I ran a black marker along the edges to take away the cut, white edge. Finally, some clear sparkling sequins to complete the card.
Thanks so much for stopping by today! You will find all of the products linked below for your shopping convenience. Have a wonderful day!
SUPPLIES USED: