Hey there Schweetie, (read that in a cigar hanging off the lip, Brooklyn Mobster voice) today I’ve got something schweet as sugah! Just like you! I’m sharing a couple of cards made from this month’s Sweet as Candy Stamp and Die release at Technique Tuesday!

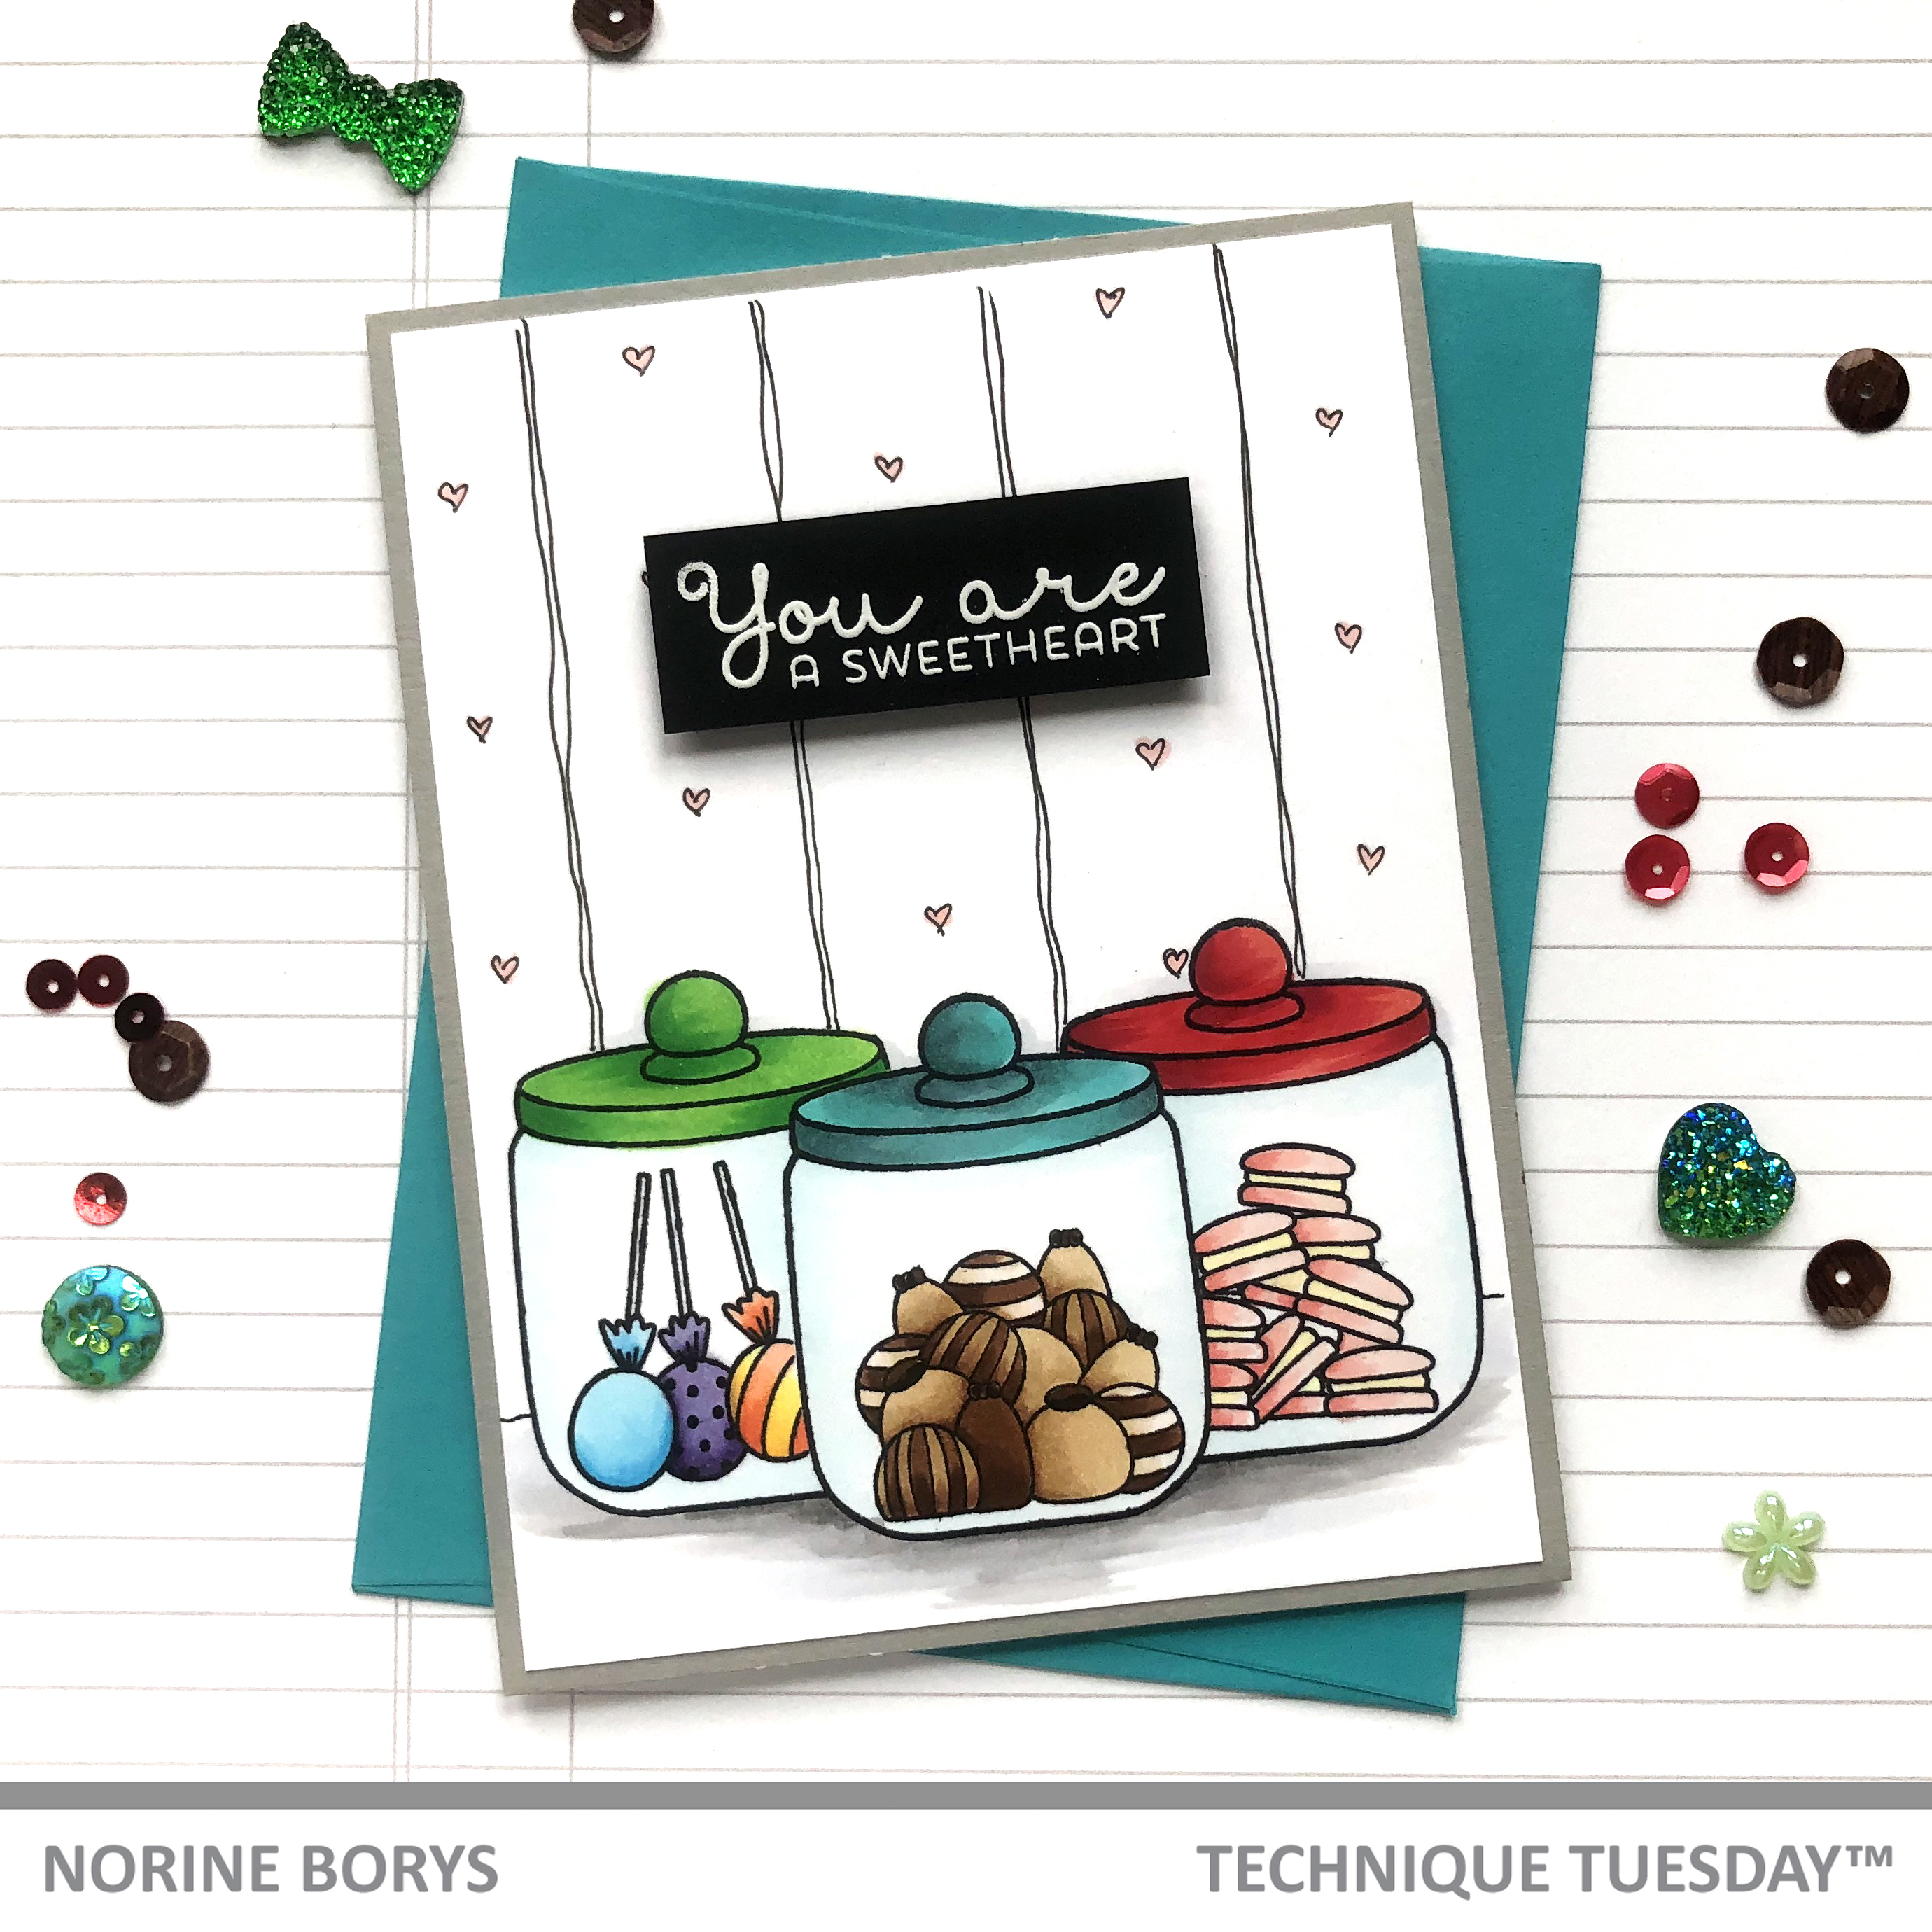
For my first card, I stamped the jar image onto masking paper and cut it out. I began by stamping the first jar in the middle of a Neenah Solar White card panel and, with the paper mask covering it, another two jars on either side. Leaving the mask in place, I then stamped some sweets in both of the side jars, and removing the mask, more sweets in the middle jar.

I colored the jars, lids and candies with Copic markers, including the B000 for the sides of the jars to give them some extra dimension and depth. I added some pale gray shadows along the bottom of the jars and a little more around the sides and tops of the jars.

Once I was finished coloring, I drew some faint pencil lines (with a ruler first, for spacing), up the background of the card panel. Then, using a thin, fine-tipped Copic Multiliner pen, I drew wiggly lines on either side of the pencil line, and then added some little drawn hearts down the middle of the lines, which I then filled in with a pale pink marker. The idea was to suggest a simple wallpaper pattern, the kind that’s vintage enough to be cute again.

I stamped a sentiment from the Sweet as Candy stamp set, onto black cardstock with embossing ink and white powder for heat embossing. I popped the sentiment up with a layer of foam tape underneath and trimmed the card panel to allow a thin, gray mat to show around the perimeter.

The next card uses the same jar image stamp set, stamped once onto Neenah Solar White cardstock with Copic friendly Versafine Onyx Black ink. I added another candy pile in this jar, plus a few loose ones arranged outside the jar.

After coloring the jar, lid and candies with Copic markers, I cut a horizontal line with an Xacto knife and straight edge, and finished by fussy cutting around the jar.

The sentiment for this card is another one included in the Sweet as Candy stamp set and I think it’s the perfect sentiment for a Valentines card. I stamped it directly onto some coordinating patterned paper, added the image to the card panel as well, with a strip of matching cardstock at the bottom and adhered everything to an A2 sized card base. Finally, I added a puffy heart sticker from my stash to complete the card.
There are so occasions this stamp and die set would be useful for and I can see myself reaching for it often! Thanks for stopping by again and have a wonderful day!