Hello, hi! I’m up on the Altenew Card Blog today with a couple of cards and a how-to video! I’m still crafting at our cottage in the Canadian Shield woods, where internet is sketchy at best and I’ve had to cobble together the gear for filming a video but it’s a fun technique and I hope you’ll take a look!

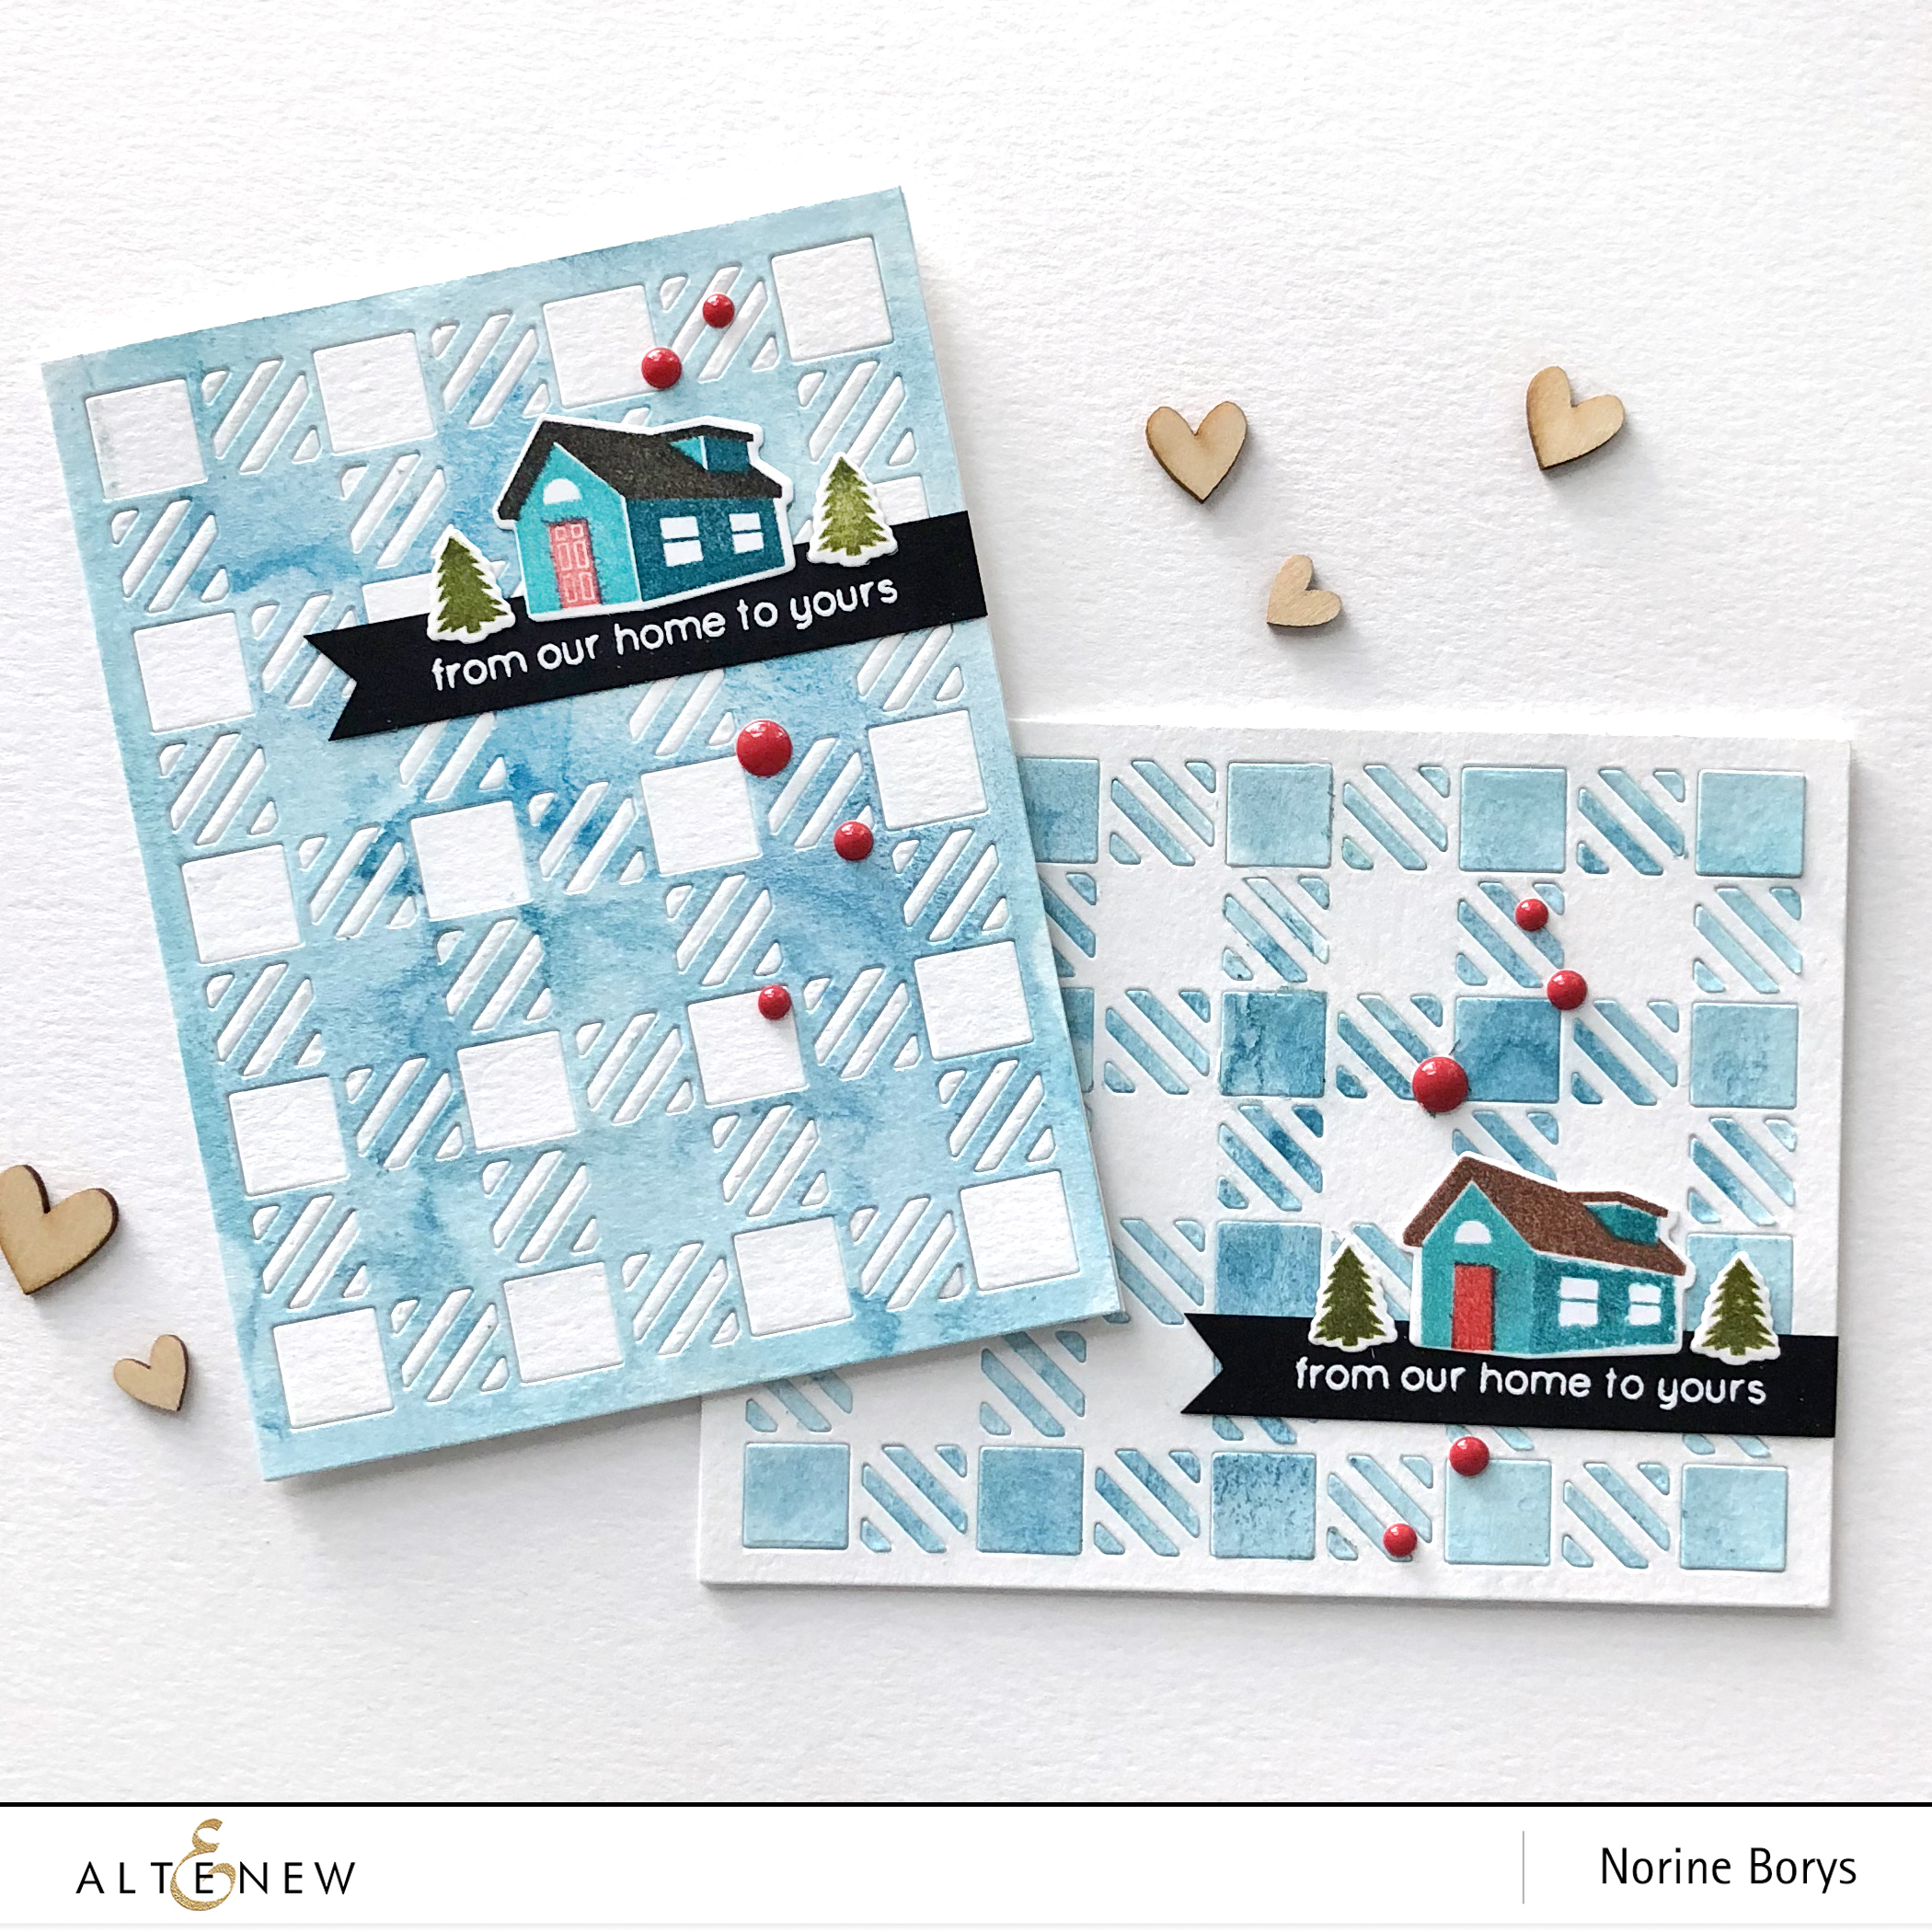
I began by watercolor painting an A2 sized panel of water color paper with a single color of paint – in this case Lagoon – then drying it with a heat tool to make all the water and pigment pile up in an unpredictable way. Once the paint was dry, I die cut it with the Cozy Flannel Cover Die. I also die cut a duplicate Cozy Flannel card panel of plain unpainted water color paper.

The next step is the tricky part. I took the die cut panels out of the die, as intact as possible and laid them down face up on my craft mat. I cut a piece of Glad Press and Seal just larger than the card panel, and pressed it down firmly on the top/good side of the water color panels – both the painted and the unpainted ones.

I also cut a sheet of printer paper in quarters, giving me 4 sheets of A2 sized papers. With the Press and Seal holding all the bitty pieces in place, I started by laying dots of liquid glue (Tombo Mono Multi) all over the “positive” portion of the die cut. That’s the outline plus the large strips of the plaid design. Once that entire piece was covered with adhesive I covered the panel with one of the sheets of printer paper. Printer paper, being much thinner than card stock, means that your final card isn’t bulked up with an unnecessary extra layer.

When I pulled off the positive portion of the die cut, the portion adhered to the printer paper, it left behind all the bitty pieces of the design. I did this step twice – once with the painted panel and again with the unpainted panel. Next, I began dotting the backside of all the squares and bitty strips of the design with more liquid adhesive, and then I could flip the Press and Seal back over and press all the blue painted die cut pieces into the corresponding openings of the white POSITIVE die cut panel, and the reverse with the white pieces and the blue painted panel. Now I had 2 card fronts to create with.

Using the stamps from the From Our Home stamp set, I stamped onto white card stock with various combinations of Volcano Lake, Lagoon and Emerald colored inks. Dark Chocolate or Black for the roof and Heartbeat for the doors. Finally I stamped several little trees with Moss ink. Then I die cut the stamped images using the corresponding dies and arranged them on a black strip of card stock that had been stamped and white heat embossed with the sentiment from the same stamp set. What a cute, neat and tidy little set this From Our Home set is!

I added a few enamel dots to finish it off and I’m up two holiday cards for my stash! I love this inlaid die cut technique. Depending on the intricacy of the die, it can be fiddly work to do but that’s right up my alley!
I hope this written description along with the video make it clear what I’ve done and enable you to try it yourself. Thanks for stopping by today and have a wonderful day!