Hello, hi! I’m up on the Altenew Card Blog today with a post showcasing the recently released Wildflower Doodles Stamp and Die Sets, and I have four different cards and techniques to show you! If you’re here looking for The Greetery’s release blog parade post, you can find it here!

Let’s jump in! I have only a skeleton crew of instructions and descriptions on duty for this post today, but you can click over to the Altenew Card Blog for many more photos and words!

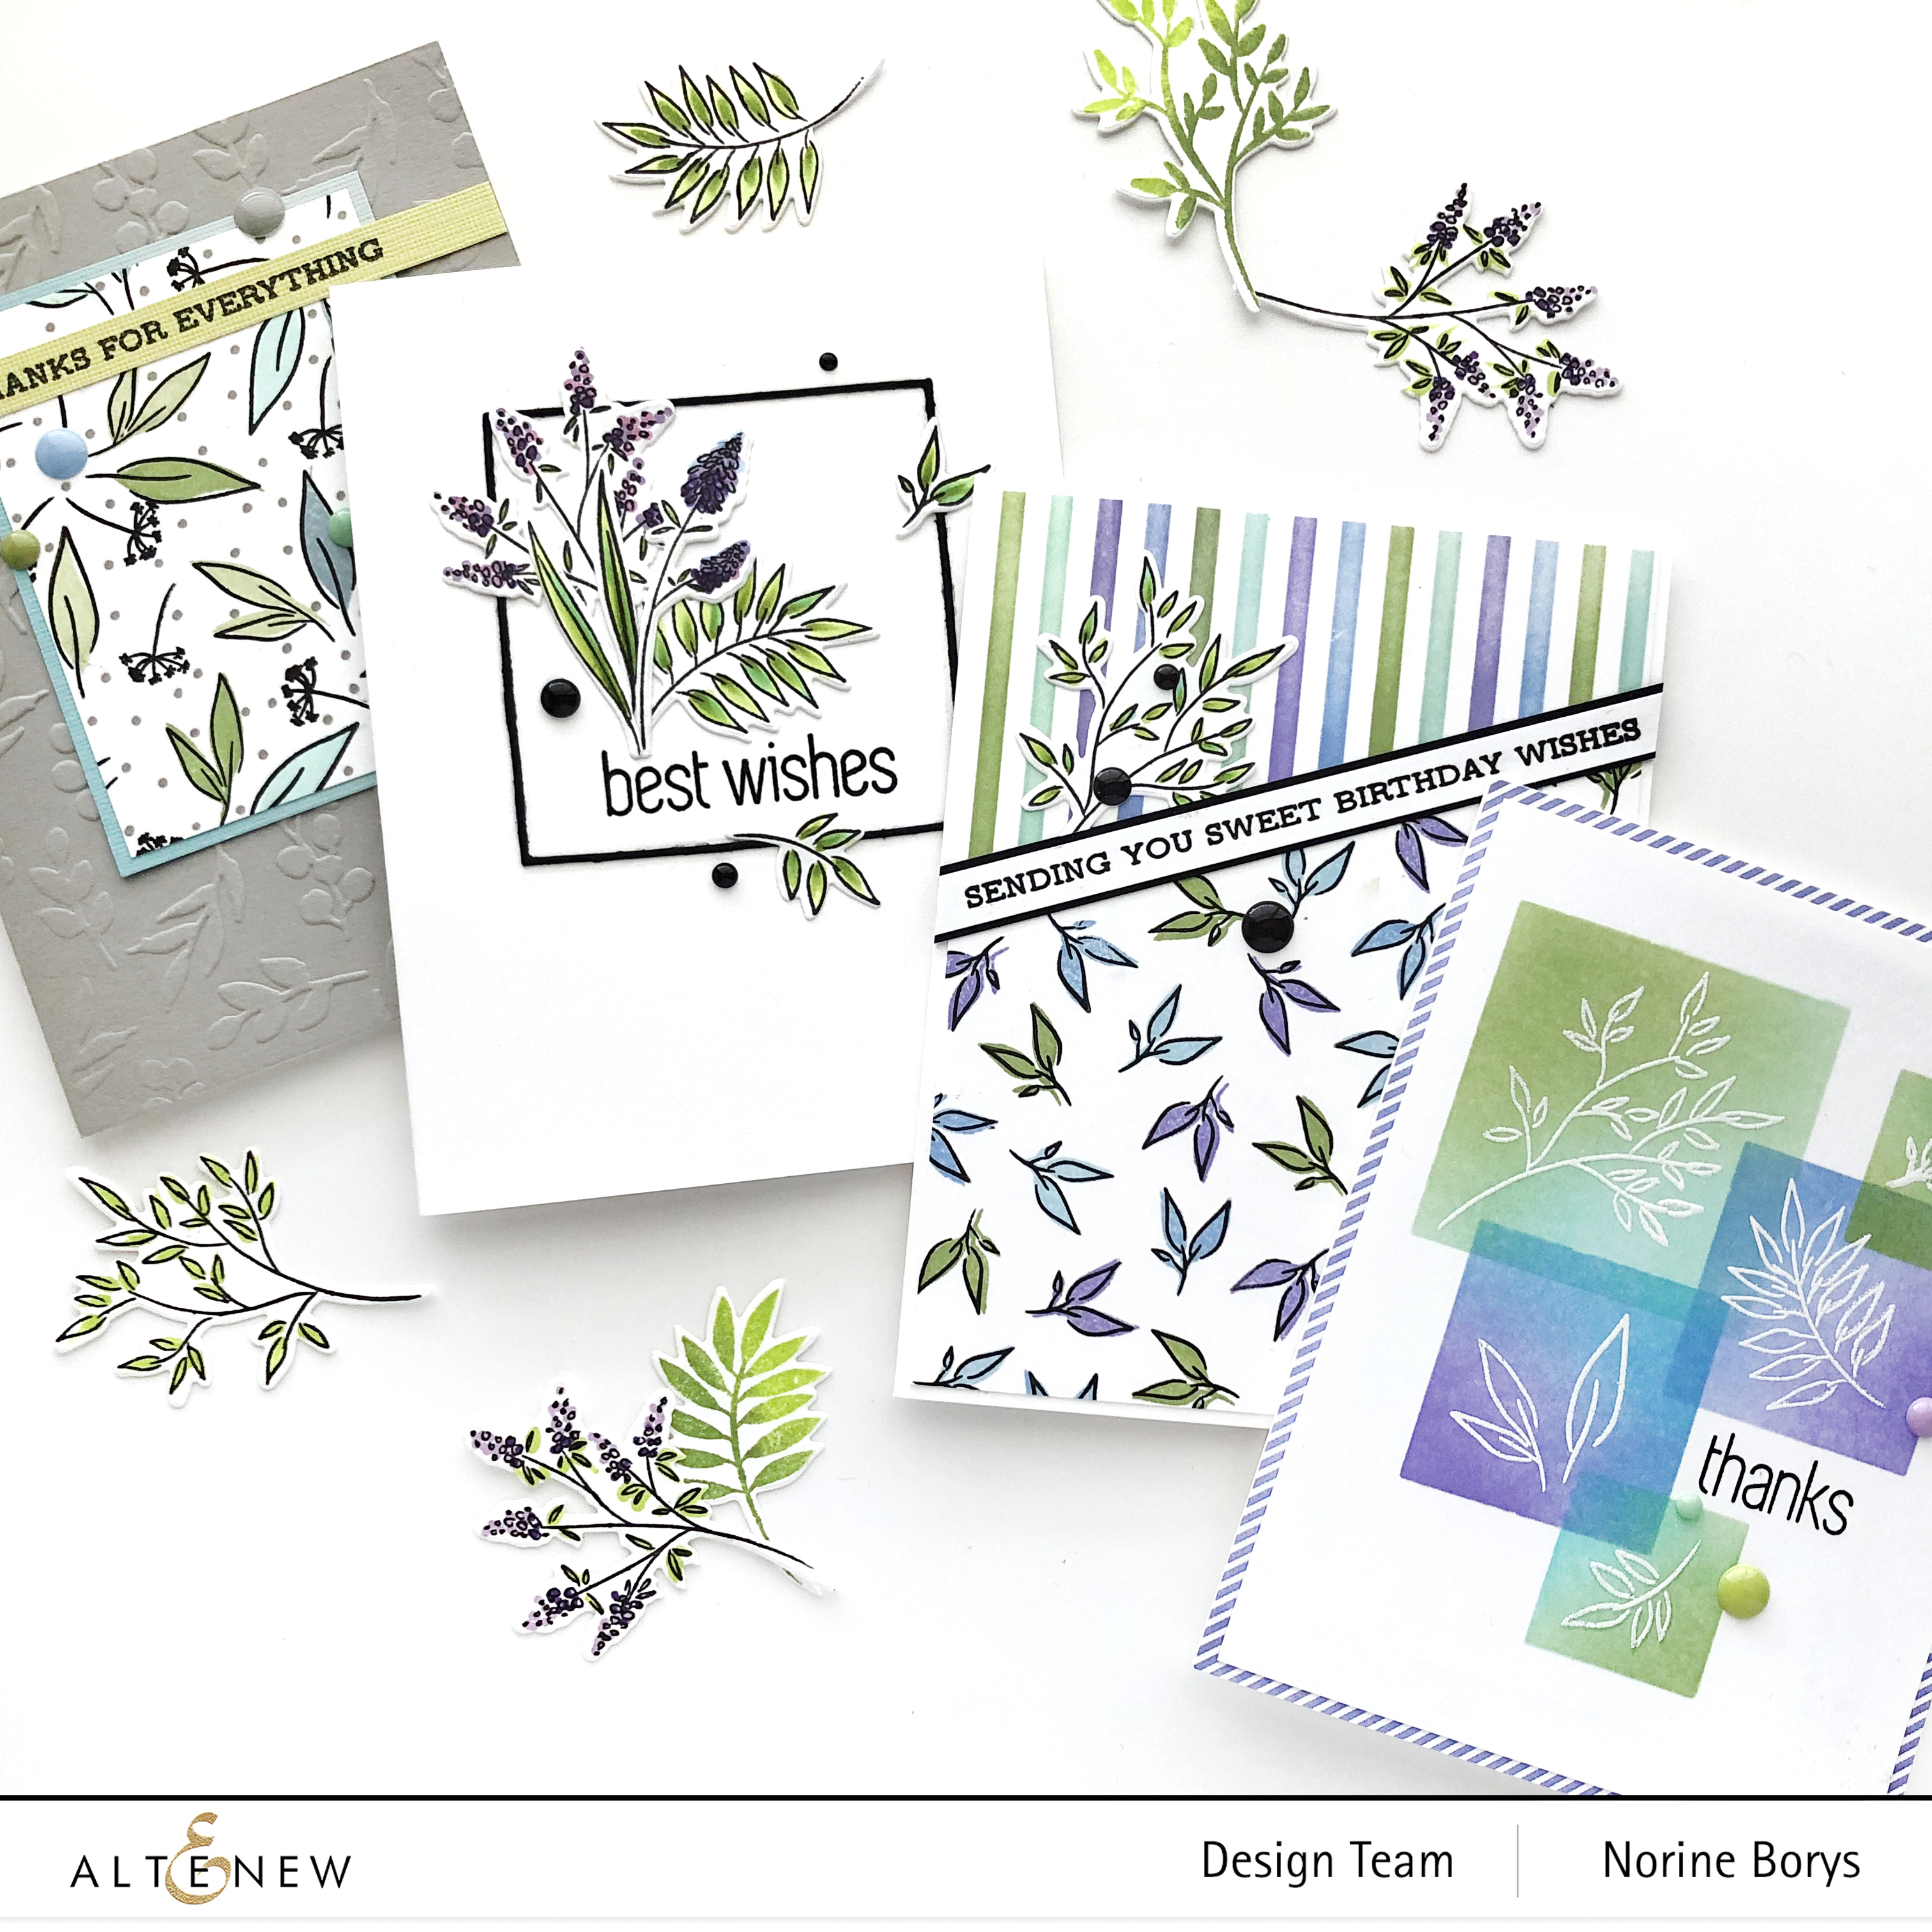
I created my own patterned paper design with several of the outline images from the Wildflower Doodles stamp set, colored them in with the filler stamps in the set, and added some randomly placed polka dots with Artist Markers, cropped the panel down and matted it with coordinating cardstock before layering it all with a dry embossed grey cardstock card base! The sentiment is from the set Sentiment Strips and is stamped with Obsidian Black ink onto some coordinating green cardstock.

My next card began with die cutting 3 of the square dies from scraps of cardstock, with the Halftone Square Dies set and using them as stencils to ink blend a variety of ink colors on a card base. Then I arranged 6 individual outline stamp images on the squares, stamped with embossing ink and heat set with white embossing powder. The “thanks” sentiment is from the Dainty Swiss Dots stamp set and the card panel is trimmed 1/8th” on all sides to allow a patterned paper mat to frame the card.

This card goes back to the “make your own patterned paper” technique again, but this time with a twist! I drew a pencil line diagonally across the card panel and laid a piece of masking tape along one edge while I stamped a single outline image stamp repeatedly, then filled it in with the filler stamps and a variety of ink colors. Then I moved the masking tape to the opposite side of the pencil line and, using the Classy Stripes Stencil, ink blended from dark to light, each of the stripes in the same colors used to fill the outline images below. (Be sure to refer to my comments on the Altenew Card Blog post to learn how not to make a mess of the lines of ink blending with stencil areas that are so small and close to each other).

Finally, I created an almost single layer card with a “bouquet” of stamped, colored and die cut images, using the outline images stamps, Artist Markers, the coordinating dies, as well as the Fine Frames Square Dies to make the black frame/outline. After arranging the pieces in place where I liked them, I adhered them to a white cardstock card base, and completed this card (as well as each of the others) with some coordinating enamel dots!
Thanks so much for stopping by today! I’d love if you left a comment telling me which technique/card you liked best and would be inclined to try yourself! Have a wonderful day! Stay well. And busy.