Hi, hello! I’m up on the Altenew card blog today with a couple of cards that I was really excited to make! And who doesn’t need some masculine cards from time to time and feel stumped for creative ideas??

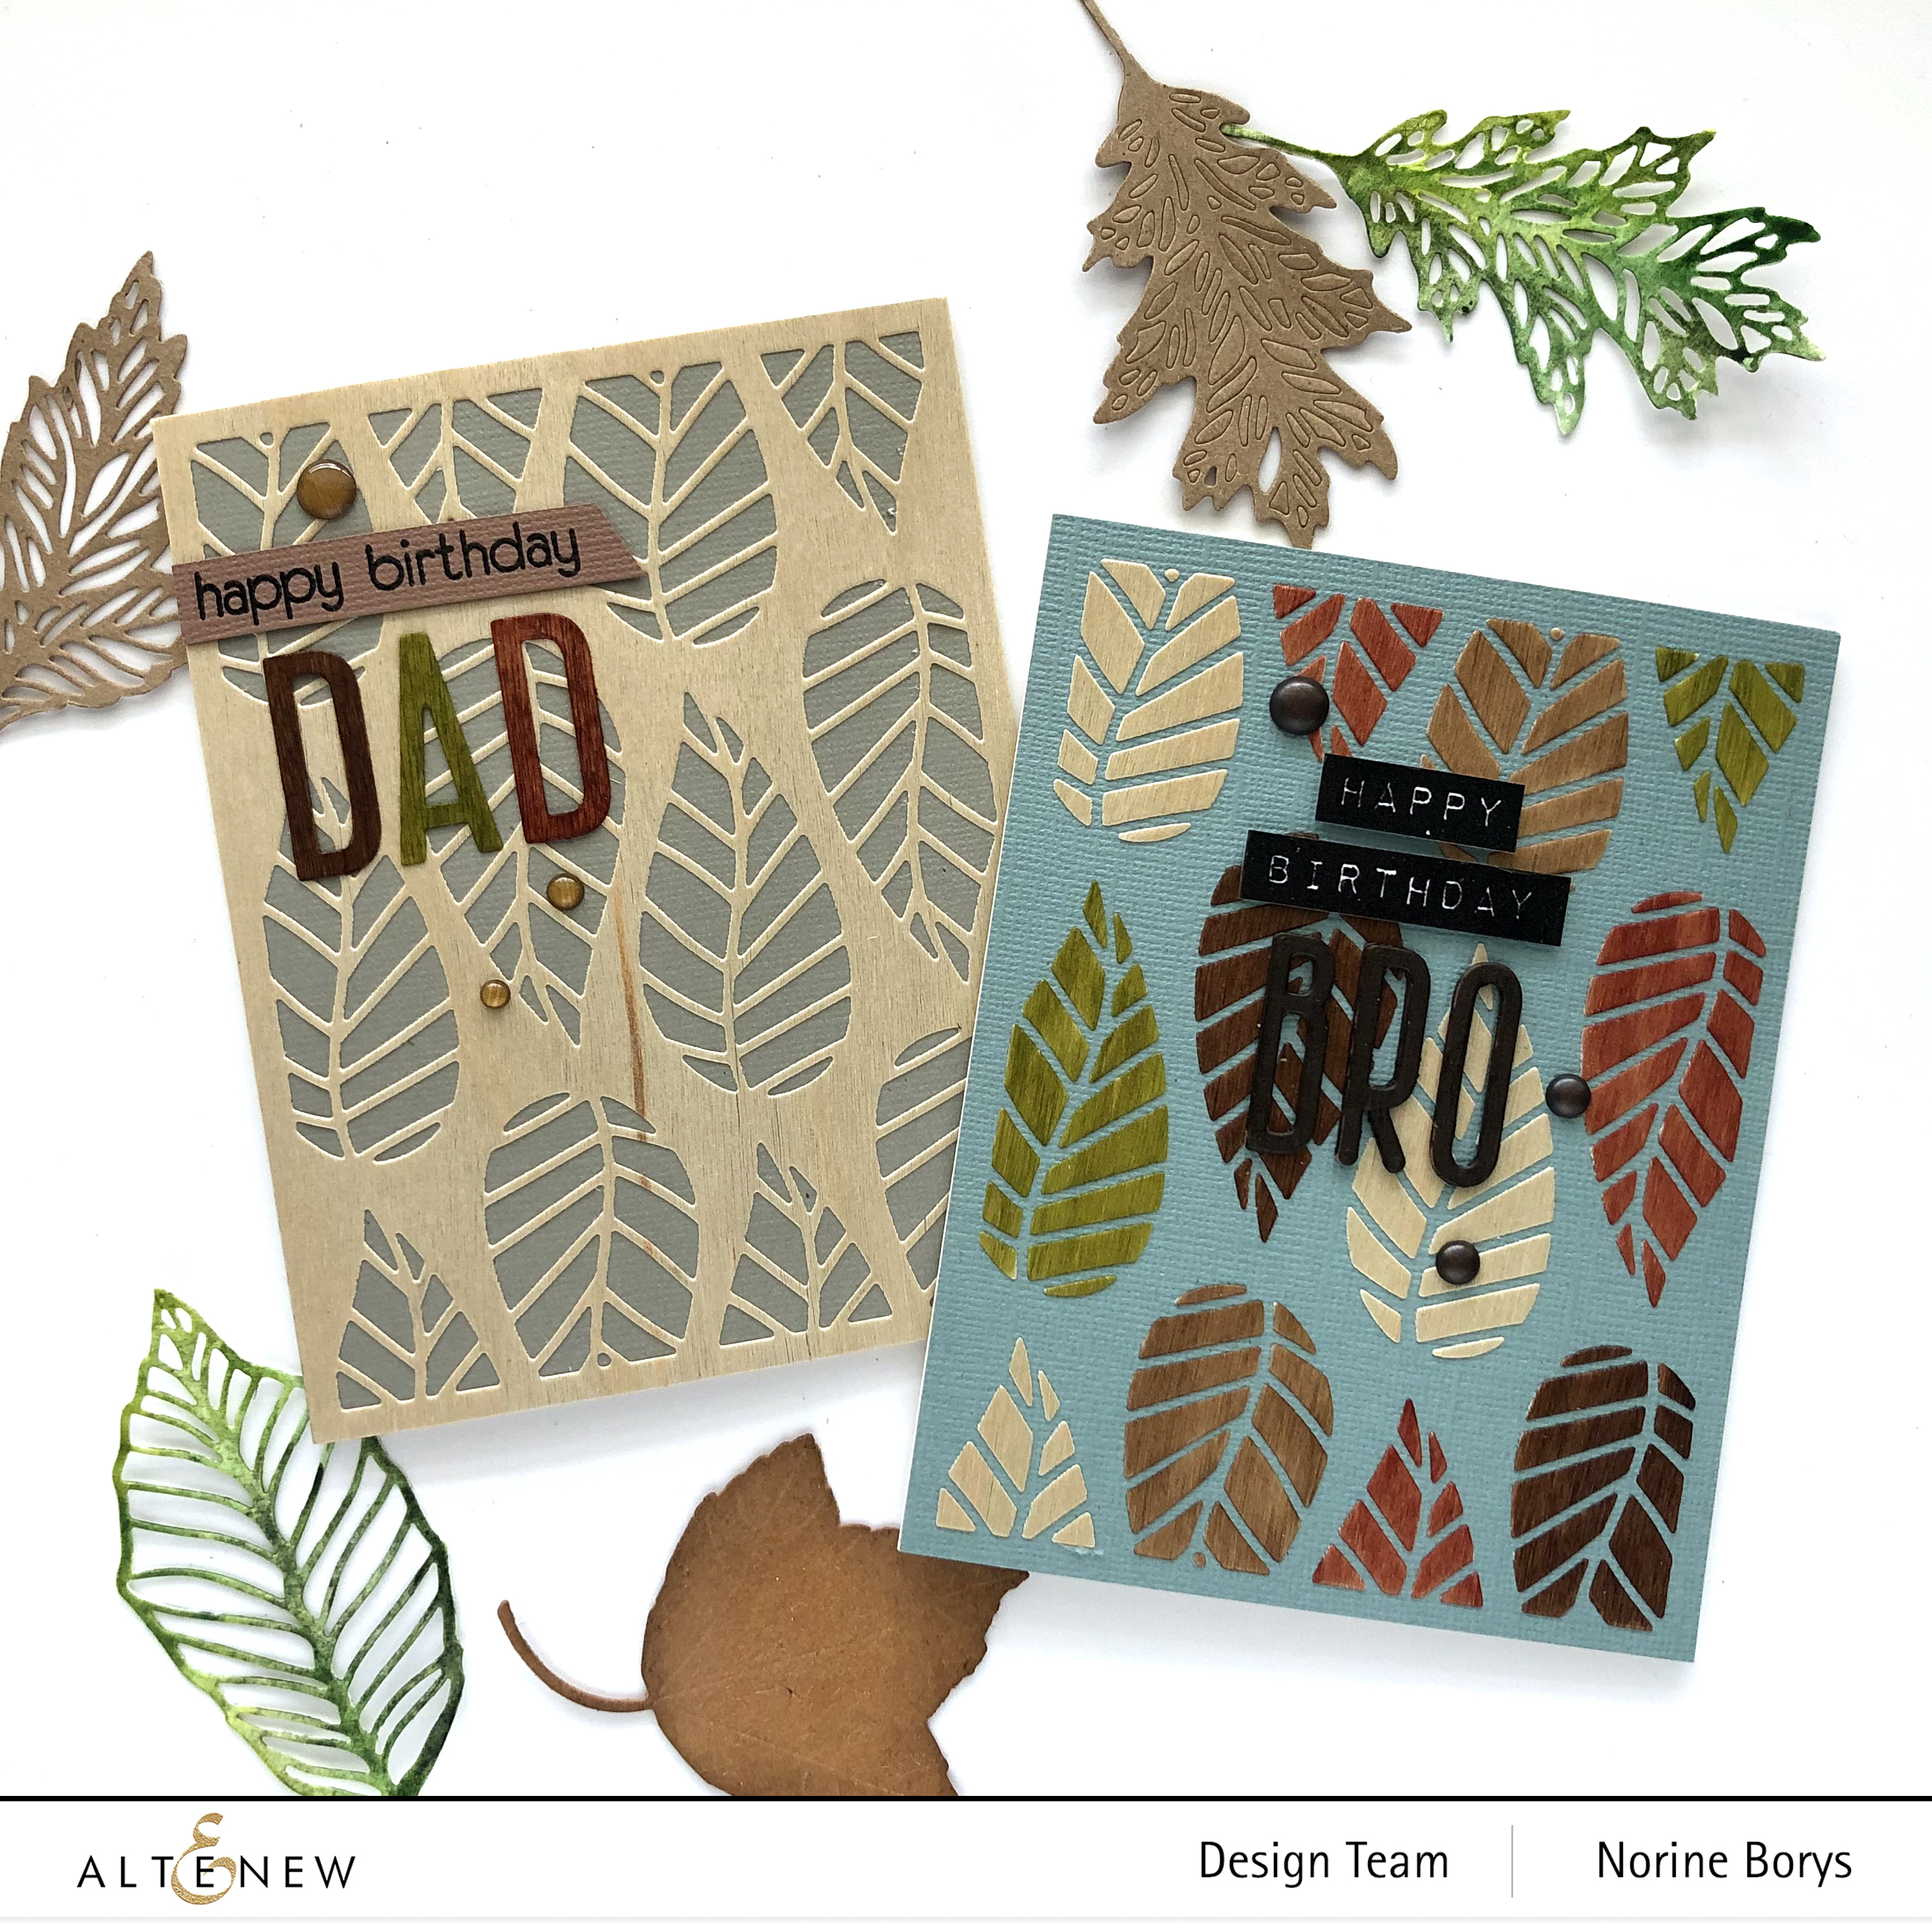
When making masculine cards I like to use a leaf motif instead of the feminine florals I reach for more regularly, so the Striped Leaf Cover Die was perfect for today’s cards! As well, I chose this Birch Wood Paper to add to the masculine flavor of these cards.

I began by running some Birch Wood Paper through my die cutting machine with the Striped Leaf Cover die, coloring the leaves in individual fall leaf colors with the Artist markers, and carefully transferring and adhering them to a cardstock card panel. My instructions and how-to’s are a little skimpy here today, because I’ve written about them more comprehensively on the Altenew Card Blog.

I stamped a sentiment with the Label Love Stamp Set and heat embossed with clear embossing powder, die cut 4 layers of the the Tall Alpha Dies letters that spell “bro” and adhered them together. Then a few metal dot embellishments to finish the card!

My second card today uses the negative portion of the die cut, or rather, it would have if I’d been more careful with my alcohol marker coloring! For this card I actually die cut a second background and I’m saving the leaf portions for another project, another day! I glued the wood paper to a piece of colored cardstock and fitted it to the front of a card base.

For this card, I stamped the sentiment from the Birthday Builders Stamp set with black ink on coordinating brown cardstock and die cut more wood-paper letters with the Fine Alphabet Dies, to spell “DAD”, before coloring them with the alcohol markers and adhering them to the card front. Once again, I used some enamel dots from my stash to complete this card.
I think this would make a striking sympathy card besides suiting any masculine card needs. Remember to click on over to the Altenew Card Blog for a more detailed blog post with more photos and all the “how-to’s”. Thanks so much for stopping by and have a wonderful day.