Hey guys, hi! I’m back on the Altenew blog again today with another cool technique and some fun cards to share!

Today’s cards are another example of how I get a little carried away when I find a fun technique and want to experiment and practice before sharing it. But the upside is, I have a nice stack of new cards to add to the stash!


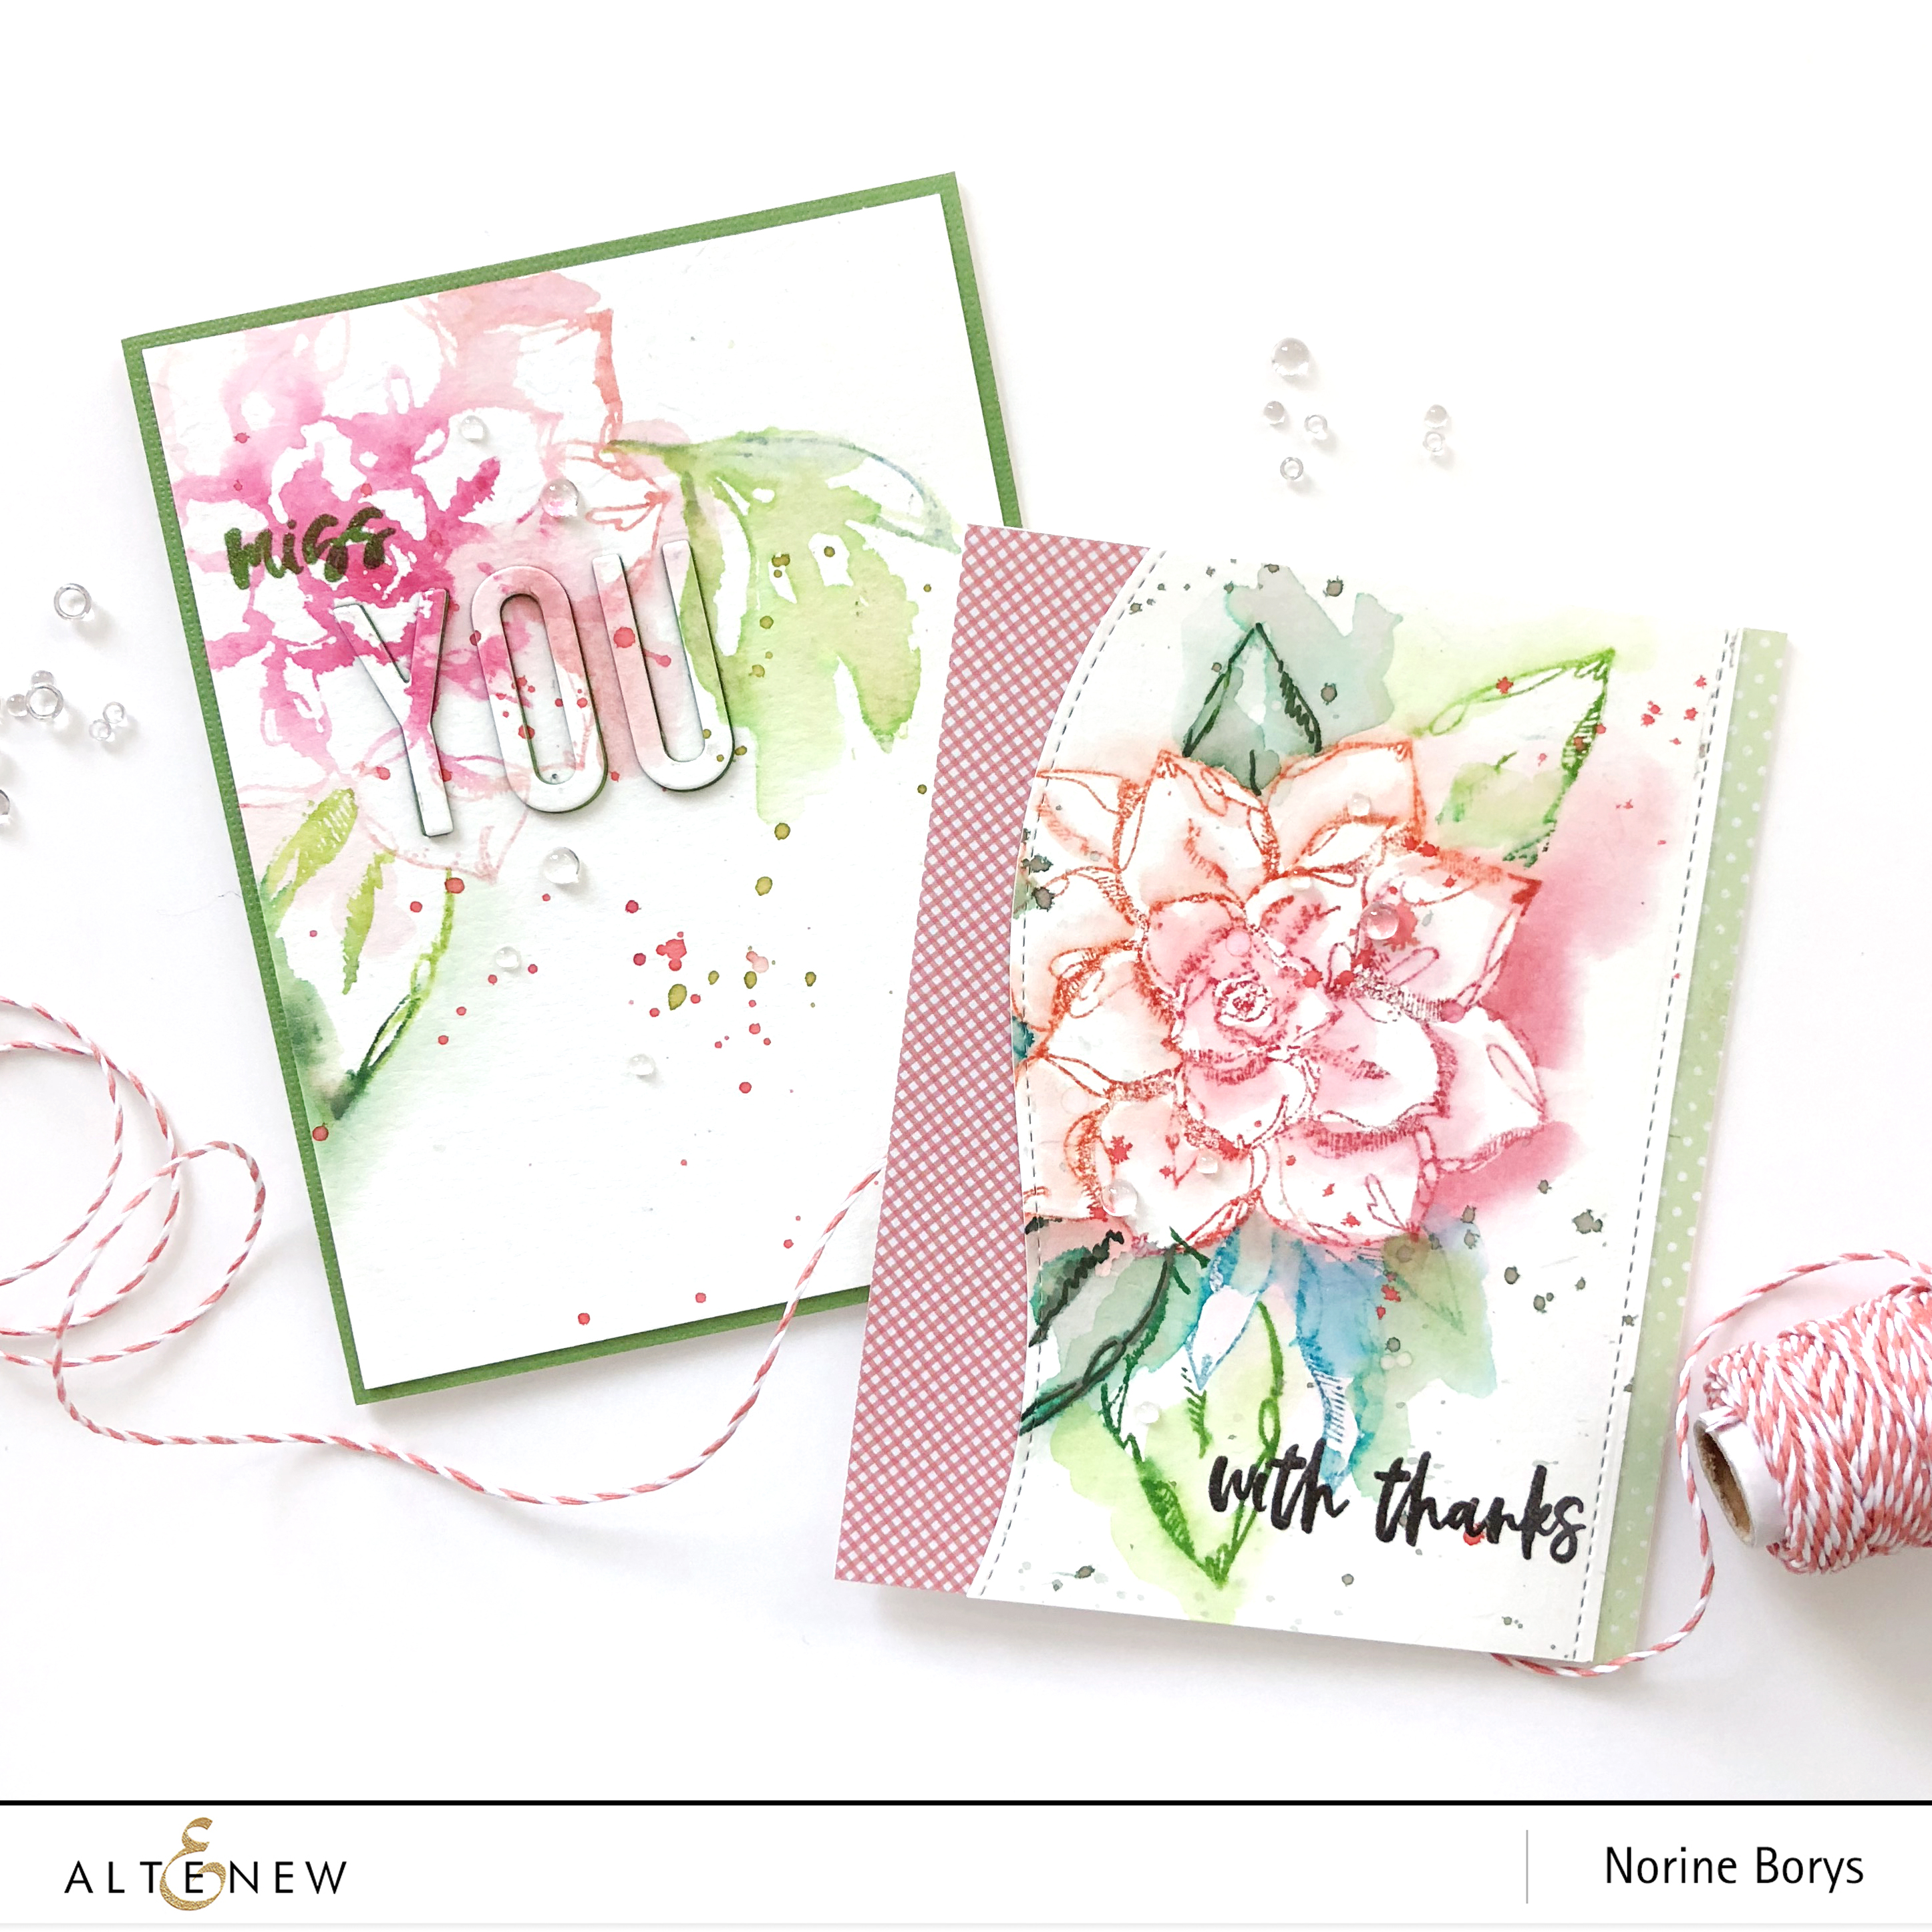
It’s a two step process to create these cards. I began by inking up one of the bloom stamps from the Inked Flora stamp set, with 2 or three varying shades of pink, red, coral colored inks and stamping onto watercolor paper.

For these cards I used combinations of Rouge, Crimson, Puffy Heart and the Tea Party set for the blooms and for the leaves I used Bamboo, Olive, Frayed Leaf and Forest Glades with a little Lagoon thrown in for good measure! Immediately, I ran a water brush along the edges of the image, activating the pigment before it dries, and drawing it outward in a color wash.

Then, with a spritzer bottle, I sprayed the stamp to reactivate the residue of ink left behind after the first stamping and stamp that onto another sheet of watercolor paper. If the impression seems a little dry, I lightly spritz the paper directly and allow the pigment to wick out organically. The second stamping is much less defined than the first, and the more water you spray on, the more indistinct will be the final result, but I love the loose, “impressionist” quality the water produces.
Once I finish stamping the bloom, I repeat the steps above with leaf stamps from the Inked Flora stamp set, using a variety of green and blue colors of ink. Sometimes I stamp the images tucked in close to the bloom and other times use a mask and stamp the leaves tucked underneath the blooms. Some colors of ink reactivate with water more readily than others and it’s a simple matter to experiment before hand to choose the best colors for this technique. Each of the cards today is also stamped with a sentiment from the same Inked Flora Stamp set.

For the card above, I let the ink and water dry, added some splatters of the colors used in the stamping and then die cut the word YOU using the Fine Alphabet Dies. I also die cut the letters from FunFoam and colored the edges with markers to match and coordinate with stamping inks before adhering the layered letters to the card front.


This card was the result of experimenting with more ink colors, but I also tried another interesting thing and quite liked the effect. As well as splattering colors of watered ink to finish the card, I also splattered clean water droplets, and before they dried, I covered them with glitter embossing powder and heat set them. I really love the uneven coverage and irregular sizes and placement of the drops and the crystalized effect of the glitter after it’s been heat set.


The card above is another of the 2nd stage stamping, where the stamp has already been stamped once, then spritzed with water. The end result is more distinct because I only spritzed the stamp before stamping and I didn’t go further and spritz the paper after stamping as well. That helps retain the defined edges of the stamp images. I like each example, but it’s helpful to have an idea of what will happen with more water and to know what to expect when creating with this technique yourself.
I was realizing after I’d made these cards that perhaps this technique needs a video to show exactly how it’s done. Maybe I’ll do that for a future blog post and a different stamp set. Let me know in the comments below, if you’d be interested in seeing a video like that!
Thanks for stopping by and have a wonderful day!