Hello, hey! I’m back with a couple more cards to share! In these last months of CoronaVirus shut down, many manufacturers have been affected, not to mention long shipping delays, so these cards use the May product for the Spellbinders Small Die of the Month subscription even though it is now June! I hope you don’t mind…

The subscription kit for May included a number of delicate lacey border dies along with a negative-die-cut “thank you” die. I used two of those border dies today, along with the “thank you” die cut.

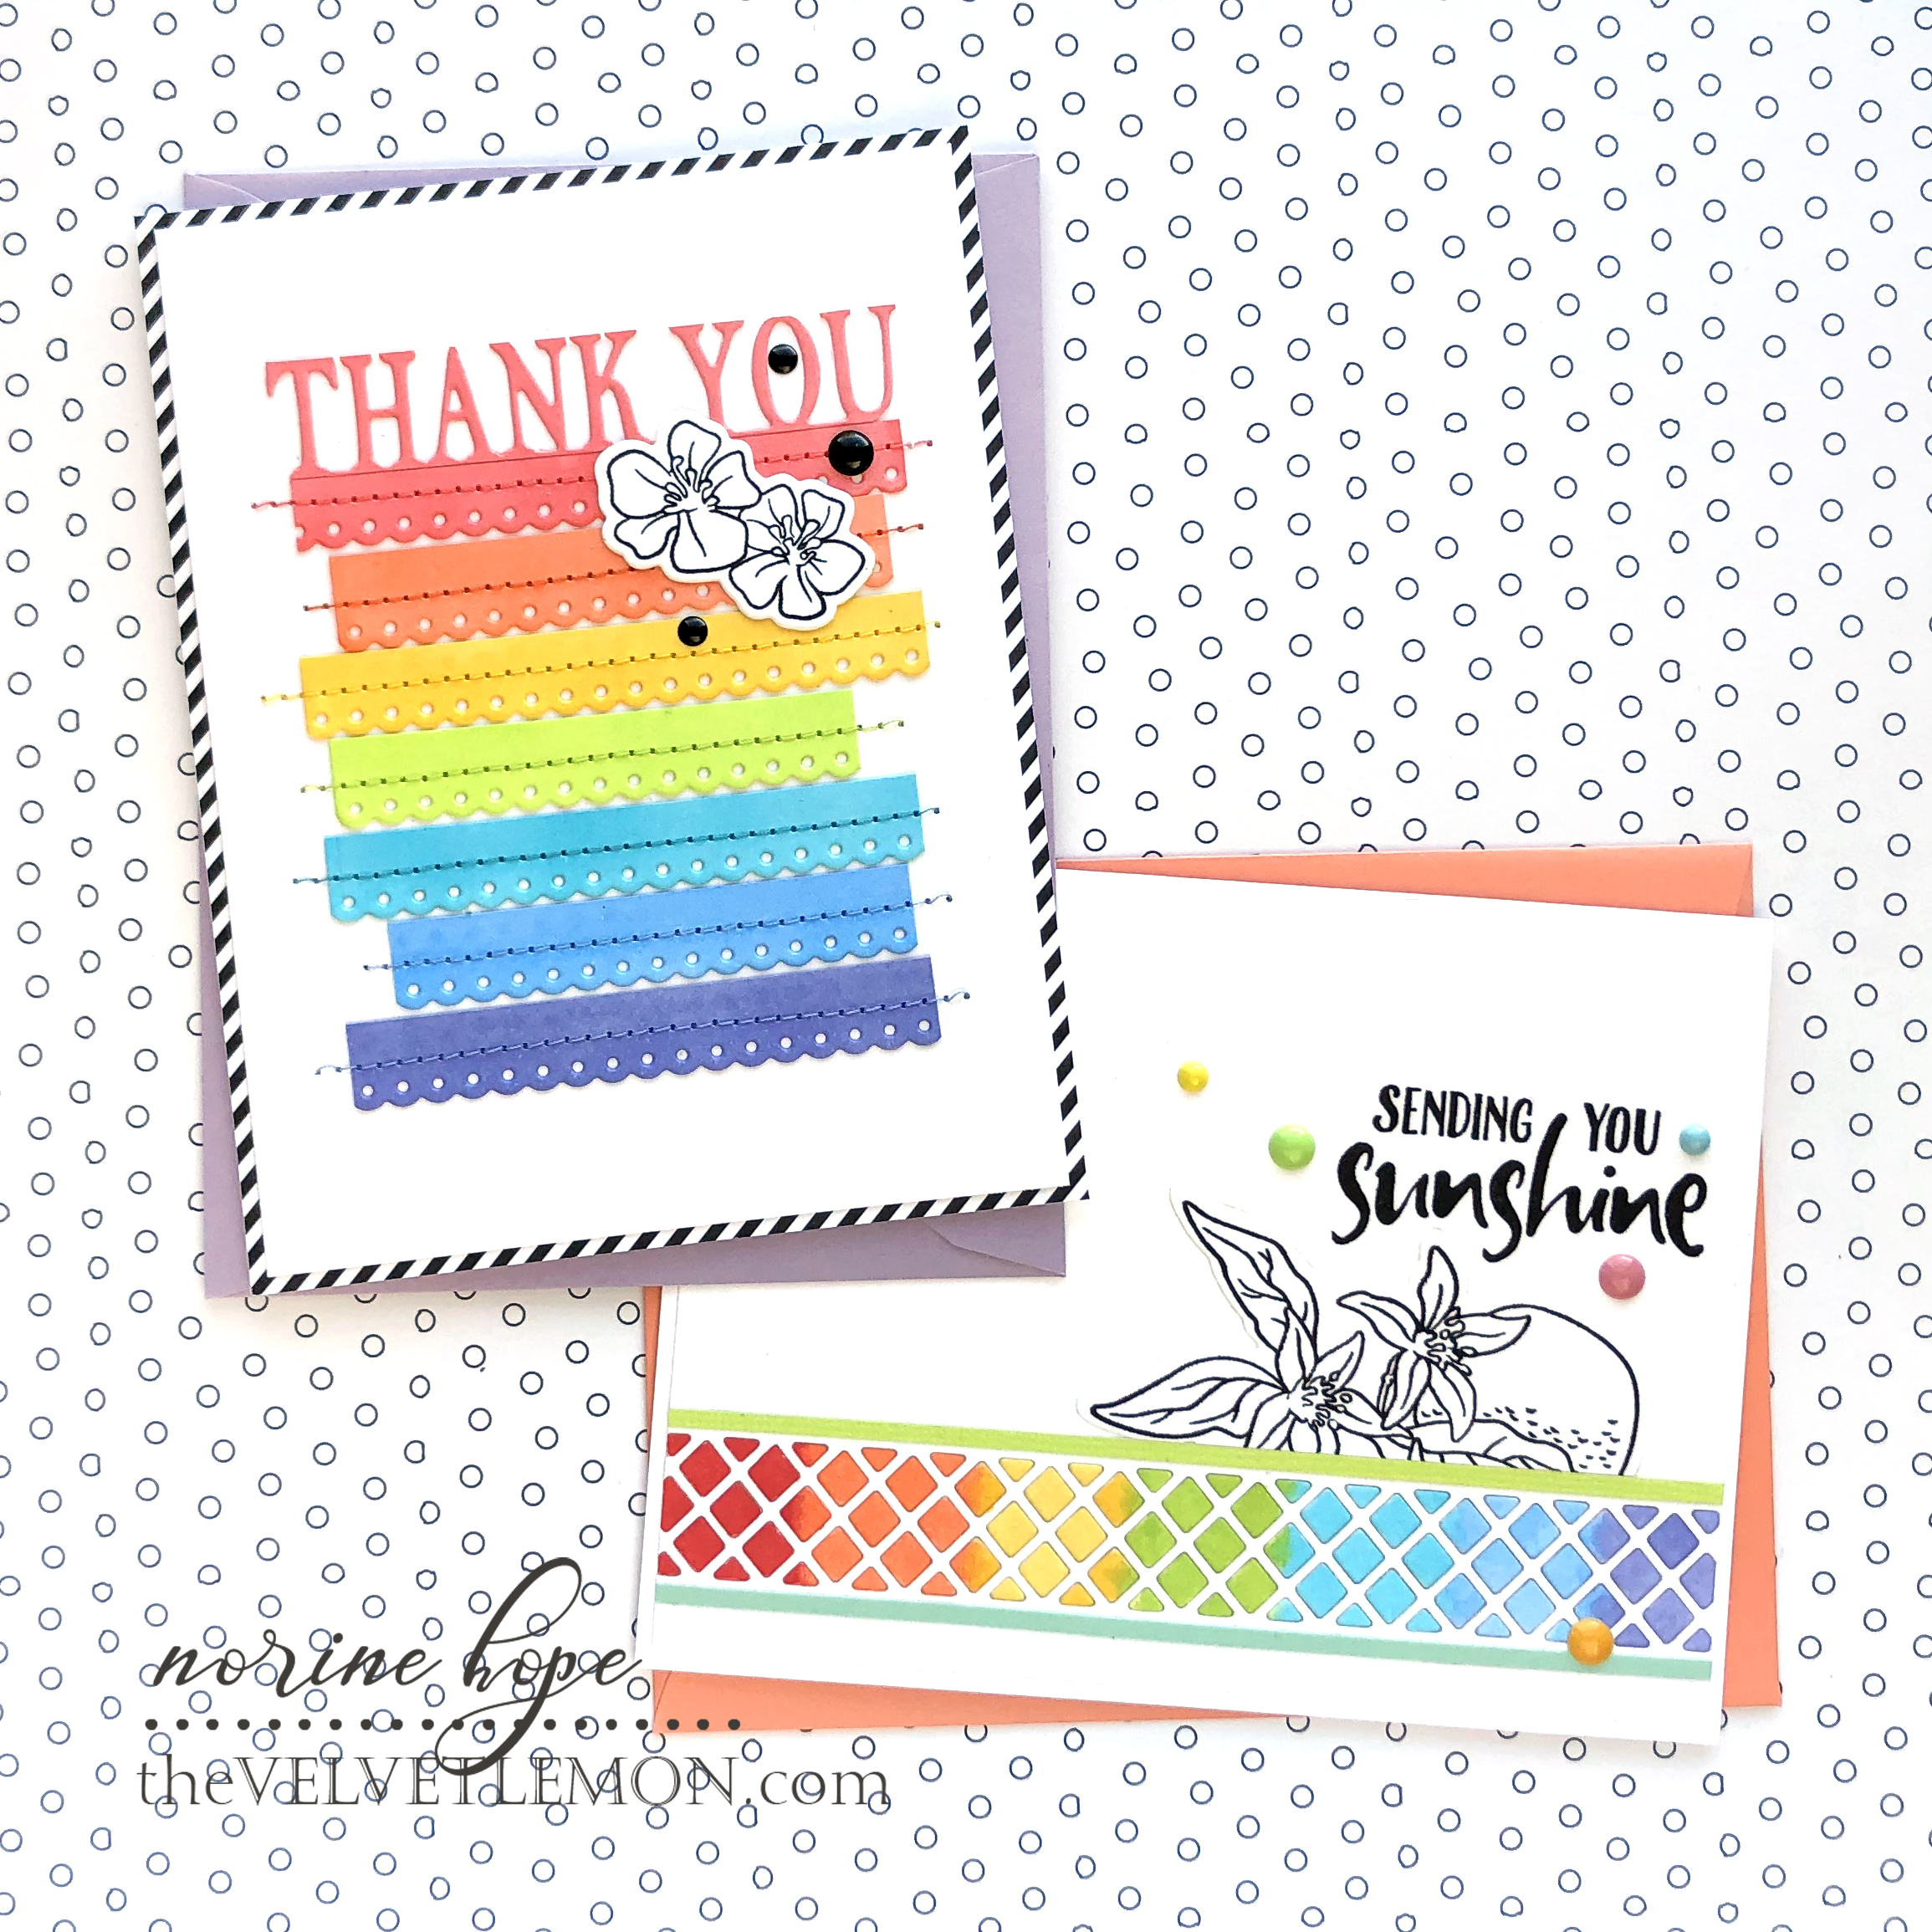
For my first card, I did some rainbow Copic coloring and then an inlaid die cut technique. I started by coloring a strip of Neenah Solar White cardstock with Copic colors: R22, YR02, Y15, YG01, B01, B32, and BV02.

Then I ran that colored strip of paper through the die cutting machine with the “trellis” design die, and preserved all the negative pieces in place using some Glad Press and Seal. I then ran another Neenah Solar white card panel through the die cutting machine with the same die, positioning the trellis cuts near the bottom.

I placed some double sided adhesive tape behind the die cut openings of the card panel, then pressed the colored pieces into the openings through the Press & Seal. Where they didn’t align perfectly, I used my piercing tool and an embossing stylus to press them into position perfectly.

I trimmed two narrow strips of cardstock in coordinating colors to match the Copic coloring and adhered them above and below the die cut design. I flirted with this die cut design plus only the greeting stamped on the card front. Many would call that Clean And Simple, but you know me, I can’t leave well enough alone. Plus I recently got the very fun Fun Stampers Journey Orange Blossoms stamp and die set (on sale right now!) and I was desperate to bust it out and use it! I stamped the fruit image, die cut it out and cut it in half, then butted the cut side up against the cardstock strip above the rainbow cut outs. Then I positioned the greeting (from the same Orange Blossoms stamp set) above the fruit die cut and stamped with Versafine Onyx Black ink. I added a few matching enamel dots to finish.

For the next card, I made a rainbow of die cut border strips, topped with the Thank You die trimmed up.

Here’s the money saving tip for you, if like me, you don’t have an exhaustive supply of all the perfect shades of colored cardstock! I simply colored small strips of Neenah Solar White cardstock with the same Copic markers I used for the card above, and die cut them with the scalloped border die. I wouldn’t suggest doing this for an entire card front panel, but it works great for small pieces like this!

After die cutting the word Thank You, I simply trimmed off the top edge of the die cut, and trimmed the bottom edge almost to the bottom of the letters, then bumped the die cut up against the top scallop strip and adhered it in place.

After lightly tacking the strips to the card front, I machine sewed the strips in place, changing the thread for each color! (The things I do for my cards!) Finally, I stamped a smaller image from the FSJ Orange Blossoms stamp set with black ink onto Neenah cardstock and die cut it out before adhering it to the border strips below the greeting. And, to support the little bit of B&W on the card front, I cropped the card panel and matted it with some B&W striped patterned paper.
Even though May is finished and we’re on to new June dies, I hope you’ll check out the Spellbinders Subscriptions here; there are so many to choose from and the more you subscribe to, the more you save! I love receiving the Small Die of the Month kit – it’s always different and interesting and prompts some creative thinking! Thanks so much for stopping by and have a great day!